Easy Honey Garlic Chicken Ready in 30 Minutes
Honey garlic chicken usually fails in one of two ways: the sauce stays watery, or the honey scorches before the chicken cooks through. This version fixes both with boneless thighs, a light cornstarch coat, and a sauce that only hits the pan after the heat drops.
I tested this honey garlic chicken seven times over three weeks. Batch one was basically honey soup. Batch four was so salty my brother set his fork down and asked what I had done. The recipe below is the one that held up: a sticky glaze, juicy thighs, and garlic that tastes sweet instead of sharp.
Everything happens in one 12-inch skillet and takes 30 minutes, including the time it takes to start the rice. The sauce uses five pantry staples, so nothing needs marinating. Read the preparation section before you turn on the stove, since the order of the steps matters more than any single measurement.
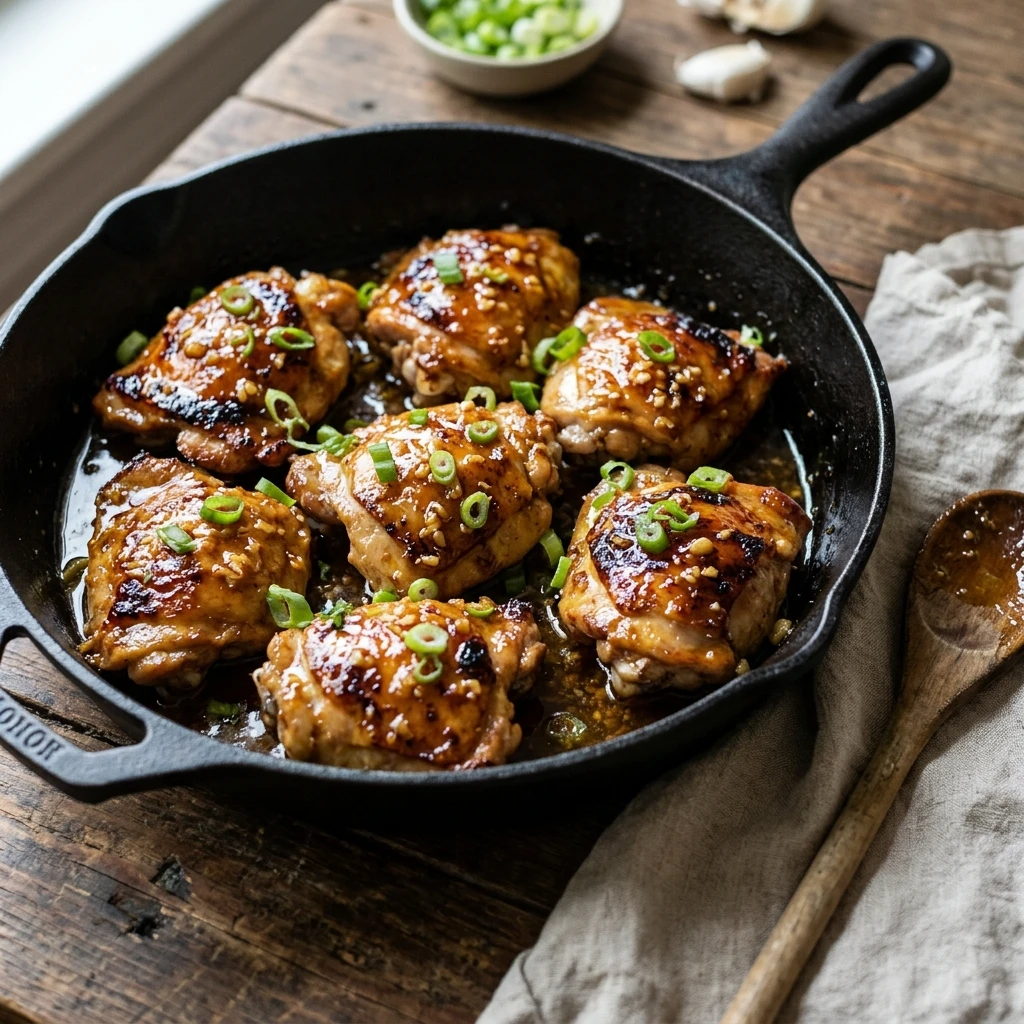
Table of Contents
Why You Will Love This Honey Garlic Chicken
- Dinner is on the table in 30 minutes, with one skillet to wash afterward.
- Boneless thighs forgive an extra minute on the heat, so the chicken stays juicy even on a distracted night.
- The sauce is five pantry ingredients. No marinating, no special shopping trip.
- Leftovers reheat in about 6 minutes, and the glaze tastes even better the next day over rice.
- Kids tend to like it because simmering mellows the garlic and the sweetness leads.
Recipe Snapshot
- Prep Time: 8 minutes
- Cook Time: 22 minutes
- Total Time: 30 minutes
- Servings: 4
- Difficulty: Easy
- Calories per serving: About 483
- Key Ingredient or Tool: Boneless, skinless chicken thighs and a 12-inch skillet
- Best For: Weeknight dinners and next day lunch bowls
Nutrition Information
- Calories per Serving: About 483
- Protein: 46 g
- Carbs: 31 g
- Fat: 19 g
- Fiber: 0 g
- Sugar: 24 g
- Sodium: 706 mg
- Serving Size: About 2 thighs with sauce
- Servings per Recipe: 4
Each serving carries 46 grams of protein, almost all of it from the thighs. The carbs come from the honey and the thin cornstarch coat. Sodium stays near 700 milligrams only because of the less sodium soy sauce, since regular soy sauce would push a serving past 1,000.
Nutrition values are approximate and calculated per serving using standard ingredient amounts. Values may vary based on brands used and portion sizes.
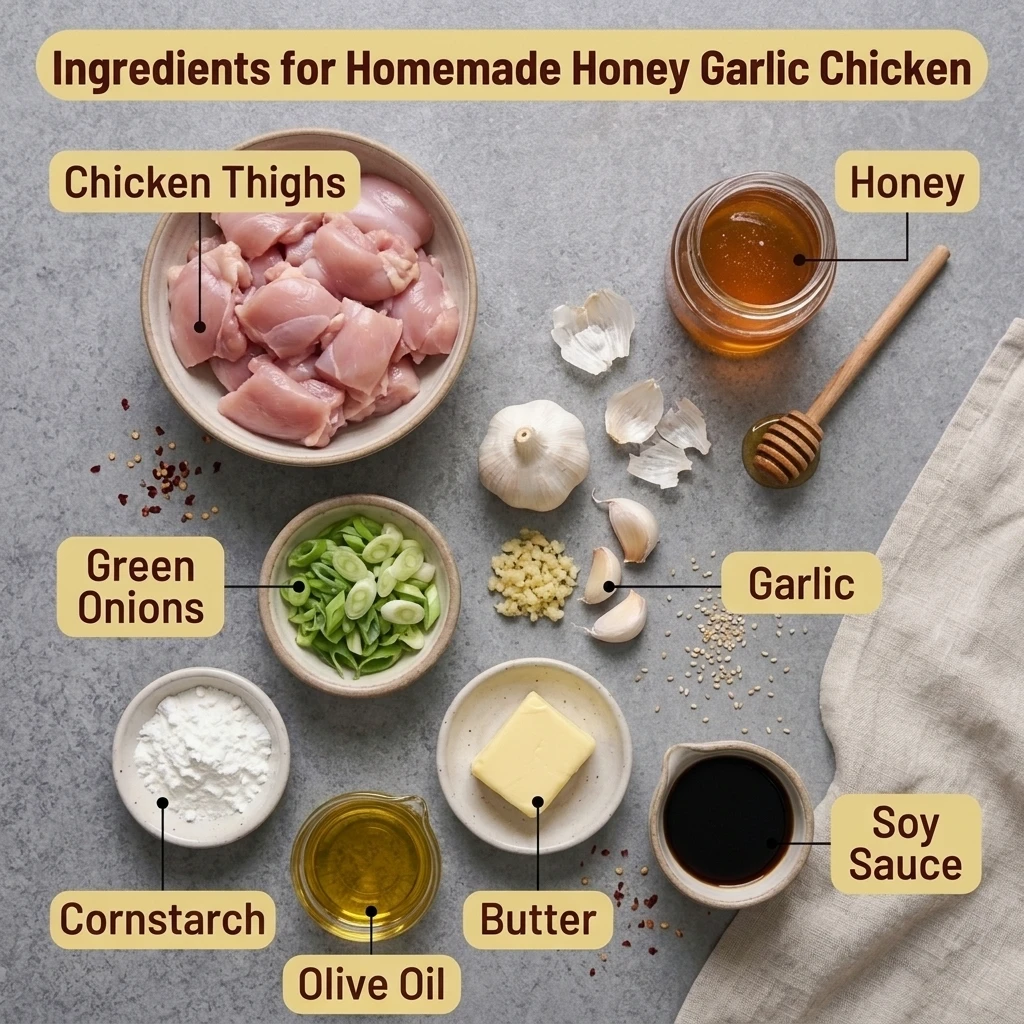
Ingredients for Honey Garlic Chicken
For the chicken:
- 2 pounds boneless, skinless chicken thighs (about 8 thighs), trimmed
- 1/4 teaspoon Diamond Crystal kosher salt
- 1/4 teaspoon black pepper
- 1/2 teaspoon smoked paprika
- 2 tablespoons cornstarch
- 2 tablespoons olive oil
For the sauce:
- 1/3 cup honey (about 113 grams)
- 1/4 cup low-sodium soy sauce (I use Kikkoman less sodium)
- 2 tablespoons rice vinegar
- 1/4 cup water
- 5 large garlic cloves, minced (about 2 tablespoons)
To finish:
- 1 tablespoon unsalted butter
- 2 tablespoons sliced green onions
Honey sets the sweetness and the glaze, and it scorches fast, so the heat drops before the sauce goes in. The soy sauce reduces by a third and its salt concentrates, so I use the less sodium kind. Fresh garlic matters too, since powder tastes flat here.
Swaps that work:
- Maple syrup for honey, same amount. Simmer 1 extra minute.
- Coconut aminos for soy sauce, same amount. Cut the honey to 1/4 cup.
- Apple cider vinegar for rice vinegar, same amount.
- Potato starch or arrowroot for cornstarch, same amount.
Pro Tip: Rub a thin film of olive oil inside your 1/3 cup measure before adding the honey. It slides out clean, so none of the sweetness stays behind.
Equipment Needed
- 12-inch skillet: Stainless steel or cast iron brown best. Nonstick gives a paler glaze.
- Instant-read thermometer: Check the thickest part of a thigh, away from the pan edge.
- Kitchen tongs: They flip thighs without piercing them, which keeps the juices inside.
- Small bowl and whisk: Whisk about 30 seconds, until the honey dissolves into the soy sauce.
- Kitchen shears: Trimming fat takes half the time it does with a knife.
Preparation
- Let the thighs sit on the counter for 10 minutes, since cold chicken steams instead of searing.
- Trim large pieces of fat with kitchen shears, then pat every thigh very dry. Wet chicken will not brown.
- Mince the garlic and set it in a small bowl.
- Whisk the honey, soy sauce, rice vinegar, and water until smooth, then park the bowl by the stove.
- Measure the cornstarch into a shallow bowl, and set the butter and green onions within reach.
- Set a 12-inch skillet on the stove with a clean plate beside it. No oven is needed.
How to Make Honey Garlic Chicken Step by Step
- Sprinkle the thighs with the salt, pepper, and paprika, then toss them in the cornstarch. Chef’s Note: Shake off the extra, because a thick coat turns pasty in the pan. Each thigh should look dusty and dry.
- Heat the olive oil in the skillet over medium-high heat for 2 minutes. The oil should shimmer, and a pinch of cornstarch dropped in should sizzle right away.
- Lay the thighs in the pan, smoother side down, and leave them alone for 5 to 6 minutes. Chef’s Note: If the thighs touch, cook in two batches, since crowding traps steam. The underside should be deep golden and lift away from the pan without tugging.
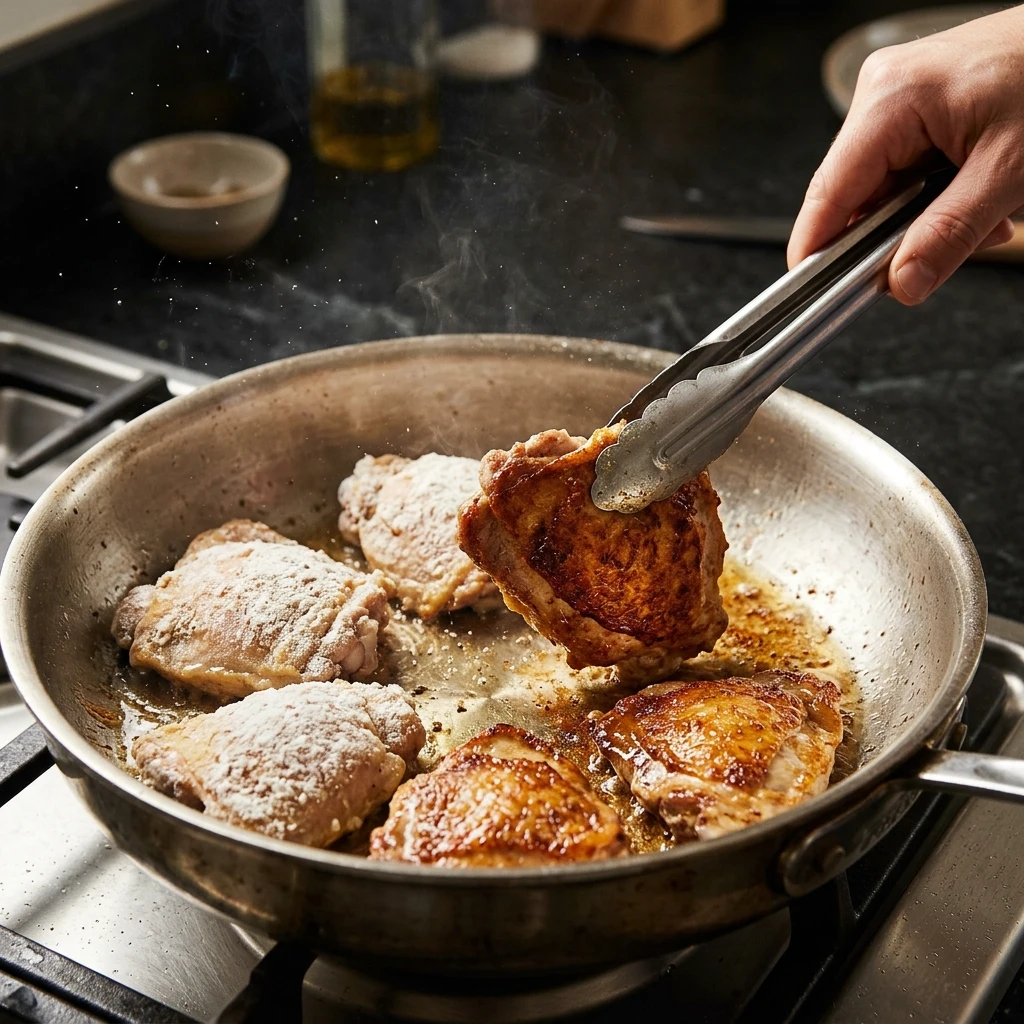
- Flip the thighs and cook 4 more minutes, then move them to the plate. They should be golden on both sides and read about 150°F in the thickest part.
- Turn the heat to medium-low, wait 1 minute, then stir in the garlic for 30 seconds. Chef’s Note: Garlic goes from golden to bitter in about 15 seconds, so slide the pan off the burner if it browns fast. It should smell sweet and look pale gold, not tan.
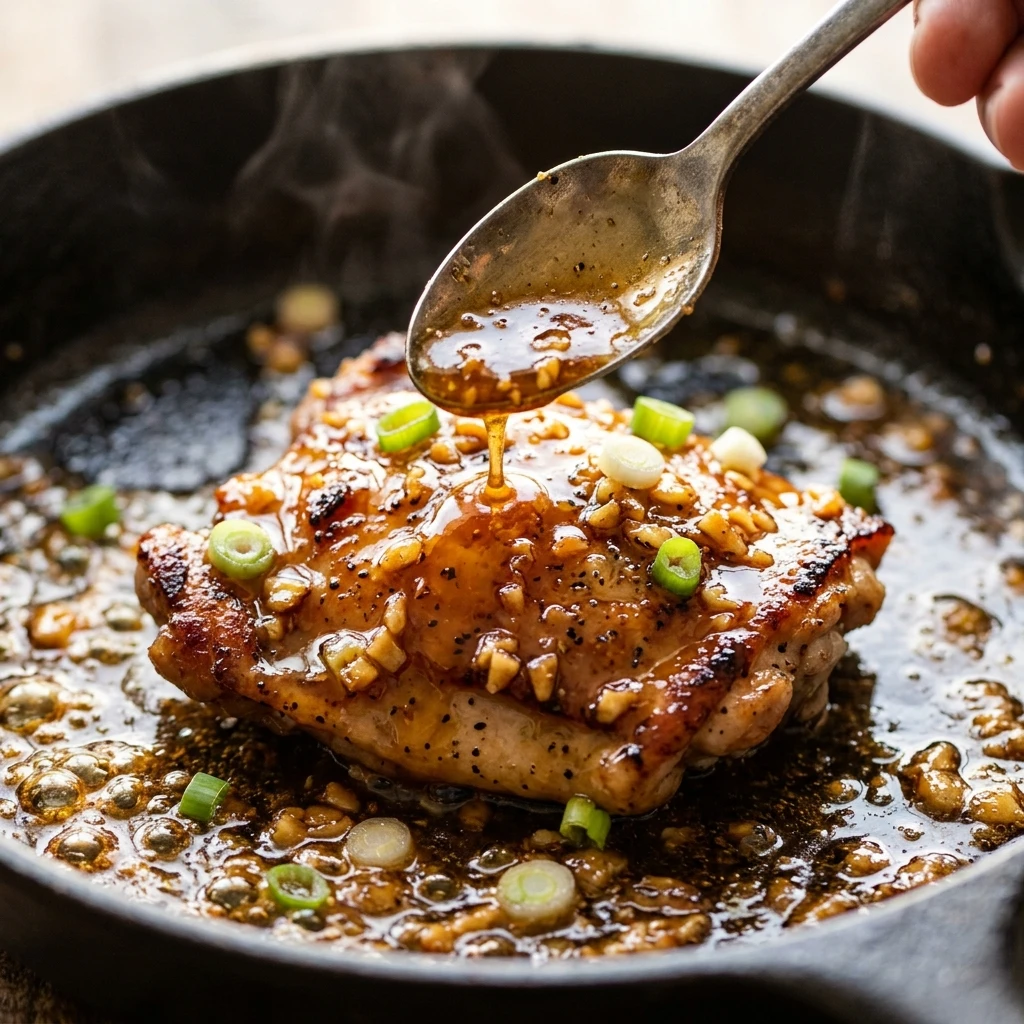
- Pour in the sauce and scrape up the browned bits with a wooden spoon. Simmer 2 minutes, until the bubbles turn large and slow.
- Return the thighs and any plate juices to the pan, then simmer 4 to 5 minutes, turning twice. Chef’s Note: Thighs are safe at 165°F but turn silky closer to 175°F, so those extra minutes pay off. A finger drawn across the back of a sauce-coated spoon should leave a clean line.
- Take the pan off the heat, stir in the butter until it melts, and scatter the green onions on top. Let it rest 1 minute, until the sauce looks glossy and clings to the chicken instead of pooling.
Expert Tips and Tricks
- My mistake: I once poured the sauce into a smoking skillet, and the honey scorched in under 20 seconds. I now drop the heat first, every time.
- Make ahead: Whisk the honey, soy sauce, vinegar, and water up to 3 days ahead and keep it in a jar in the refrigerator.
- Leftovers: Spoon extra sauce over the thighs before chilling. Dry chicken turns rubbery in about 2 days, while sauced thighs stay tender for 4.
- Technique: Fold the thin tail of each thigh under so every piece is about 1 inch thick and finishes together.
- Texture: Dust the chicken, do not bread it. A thin cornstarch film adds crispness and helps the glaze cling.
- Time saver: Trim with kitchen shears. Eight thighs take about 2 minutes.
- Extra sauce: The first time I served this honey garlic chicken, my neighbor’s 9 year old, who picks garlic out of everything, asked for a second spoonful of sauce on his rice.
Common Mistakes and Troubleshooting
The sauce is thin. The simmer was too short. Keep a steady bubble for the full 4 to 5 minutes, or lift out the thighs and boil the sauce alone for 2 minutes.
The sauce tastes bitter. The garlic browned in a pan that was too hot. Cool the pan for 1 minute first. Once it happens, 1 tablespoon each of honey and water only softens it.
The chicken is pale. The thighs were damp or crowded. Dry them well and leave space, or sear each side 1 more minute in the empty hot pan before they return to the sauce.
The glaze is too salty. Regular soy sauce or over-reduction is the cause. Use the less sodium kind, and stir in 1 tablespoon honey and 2 tablespoons water if it happens.
The chicken is dry. It cooked too long, most often with breasts. Pull thighs near 175°F and breasts at 165°F, and warm dry slices in extra sauce for 2 minutes.
Storage Instructions
- Room Temperature: Up to 2 hours, or 1 hour above 90°F.
- Refrigerator: 3 to 4 days in an airtight glass container, with sauce spooned over. Cool 30 minutes before closing the lid.
- Freezer: Up to 3 months in a freezer-safe zip bag with sauce, laid flat. Thaw overnight in the refrigerator.
- Reheating: Use a covered skillet over medium-low heat with 2 tablespoons water for 5 to 7 minutes, until the thickest piece reaches 165°F.
- Make-Ahead Notes: Trim and pat dry the thighs up to 24 hours ahead and refrigerate them on a plate. Never coat them early, because cornstarch turns gummy after about 15 minutes.
I freeze two thighs per bag with the sauce poured over, and a bag thaws in cold water in about 30 minutes. I date every bag, since I never trust my memory at the 2 month mark.
Storage Trick: Lay parchment between stacked thighs in the container. The sticky glaze will not weld them together.
Variations and Substitutions
- Spicy Honey Garlic Chicken: Whisk 1 tablespoon sriracha and 1/2 teaspoon red pepper flakes into the sauce. Top with thin slices of fresh red chile.
- Kid-Friendly: Cut the thighs into 1 inch pieces and sear them 3 to 4 minutes per side. Use 3 garlic cloves instead of 5.
- Vegetarian: Swap in 14 ounces of extra firm tofu, pressed 20 minutes and cubed. Sear 3 to 4 minutes per side, then simmer in the sauce 3 minutes.
- Gluten-Free: Use gluten-free tamari in the same amount. Check that your cornstarch label also says gluten-free.
- Chicken Breast: Slice 2 pounds into 3/4 inch cutlets and sear 3 to 4 minutes per side. Simmer in the sauce only until 165°F.
What to Serve With Honey Garlic Chicken
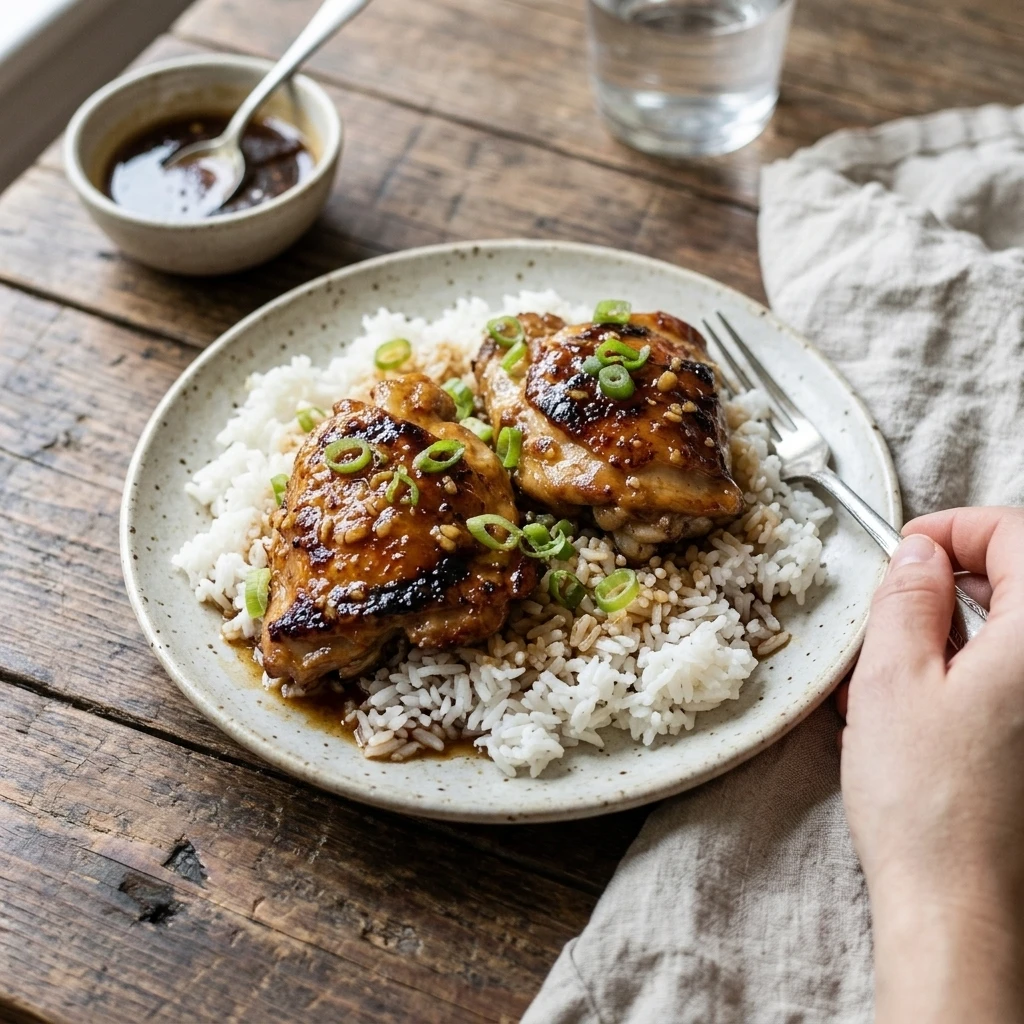
- Steamed jasmine rice with roasted broccoli: The rice catches every drop of sauce, and broccoli roasted at 425°F for 18 to 20 minutes adds charred edges.
- Fried rice: Turn day old rice into a second dinner with a simple fried rice built around the extra glaze.
- Cucumber salad: A cold, vinegary cucumber salad cuts the sweetness and brings crunch.
- Potato night: If your family wants potatoes over rice, crispy smashed potatoes soak up the glaze nicely.
- Iced jasmine tea: Lightly floral and unsweetened, it keeps the table from feeling too sugary.
Frequently Asked Questions
Can you make honey garlic chicken ahead of time?
Yes, and it reheats well. Cooked honey garlic chicken keeps 3 to 4 days in the refrigerator after a 30 minute cool down. Reheat it in a covered skillet with 2 tablespoons of water, which loosens the glaze without drying out the thighs. If you would rather prep ahead, whisk the sauce up to 3 days early and keep it in a jar.
Why is my honey garlic sauce not thickening?
Honey garlic sauce stays thin when the simmer is too gentle or too short. Bring it to a steady bubble and give it the full 4 to 5 minutes with the thighs in the pan, since the cornstarch coating helps it tighten. If it is still loose, take the chicken out and boil the sauce alone for 2 minutes. It also keeps thickening as it rests off the heat.
Can I use chicken breast instead of thighs for honey garlic chicken?
Yes. Slice 2 pounds of boneless breasts into 3/4 inch cutlets so they cook evenly, then sear 3 to 4 minutes per side. Simmer them in the sauce only until a thermometer reads 165°F, then take them out right away. Breasts go from juicy to dry quickly, which is why thighs stay my first choice for honey garlic chicken on busy nights.
How do you know when honey garlic chicken is done?
Use a thermometer, not the clock. Honey garlic chicken is safe at 165°F in the thickest part, and thighs taste best near 175°F. Visually, the sauce should coat a spoon and hold a clean line when you drag a finger through it. Expect 5 to 6 minutes on the first side, 4 on the second, and 4 to 5 more in the sauce.
Why does my honey garlic chicken taste so salty?
Soy sauce concentrates as it reduces. Regular soy sauce has nearly twice the sodium of the less sodium kind, and simmering pushes it higher. Use low-sodium soy sauce, measure exactly 1/4 cup, and stop simmering once the sauce coats a spoon. Taste the sauce before the chicken goes back in, since you can still add water then. If a batch is already salty, stir in 1 tablespoon honey and 2 tablespoons water.
Final Thoughts on Honey Garlic Chicken
One habit improves this dish every time: set a timer for the sauce, not just the chicken. The 4 to 5 minute simmer is where the glaze forms, and the clock keeps you from pulling the pan too early or pushing the honey too far.
I cook this on the Sunday before a busy week, then pack it over rice for lunches, and the glaze holds up through Wednesday. Serve it with something cold and crunchy, and the sweetness never feels heavy.
If you loved this recipe, save it to your chicken dinner Pinterest board so you can find it easily later!
Easy Honey Garlic Chicken Ready in 30 Minutes
Ingredients
Equipment
Method
- Let the thighs sit on the counter for 10 minutes. Trim large fat pieces with kitchen shears, then pat each thigh very dry with paper towels.
- Mince the garlic. Whisk the honey, soy sauce, rice vinegar, and water until smooth, and set the bowl by the stove.
- Sprinkle the thighs with the salt, pepper, and paprika, then toss them in the cornstarch. Each thigh should look dusty and dry.
- Heat the olive oil in the skillet over medium-high heat for 2 minutes, until the oil shimmers and a pinch of cornstarch sizzles.
- Lay the thighs in the pan, smoother side down, and cook 5 to 6 minutes without moving them, until the underside is deep golden and lifts away easily. Cook in two batches if they touch.
- Flip the thighs and cook 4 more minutes, until golden on both sides and about 150°F in the thickest part. Move them to a plate.
- Turn the heat to medium-low, wait 1 minute, then stir in the garlic for 30 seconds, until it smells sweet and looks pale gold.
- Pour in the sauce and scrape up the browned bits. Simmer 2 minutes, until the bubbles turn large and slow.
- Return the thighs and plate juices to the pan. Simmer 4 to 5 minutes, turning twice, until the sauce coats a spoon with a clean line and the thickest thigh reads 165°F to 175°F.
- Take the pan off the heat, stir in the butter until melted, and top with the green onions. Rest 1 minute, until the sauce is glossy and clings to the chicken.
Notes
Use low-sodium soy sauce. Regular soy sauce makes the finished glaze too salty.
Storage: refrigerate 3 to 4 days in an airtight container, or freeze up to 3 months.