Beginner Sourdough Bread Recipe With a Crackly Crust and Chewy Crumb
A good sourdough bread recipe should work on a regular Tuesday, in a regular kitchen, without a bakery’s worth of gear. This one does. It needs four ingredients and a Dutch oven, and a cold overnight rest does most of the work while you sleep.
I tested this sourdough bread recipe nine times over five weeks before the crust crackled the way I wanted and the crumb stayed soft and chewy instead of gummy. The early loaves spread flat or baked up dense, and each one taught me something about timing or shaping. Those lessons are built into every step below.
What sets this sourdough bread recipe apart is the schedule. You mix in the early afternoon, shape in the evening, and bake the next morning, so a full workday never gets in the way. Plan for a little hands-on time and a lot of waiting, and you will pull a deep golden loaf from the oven.
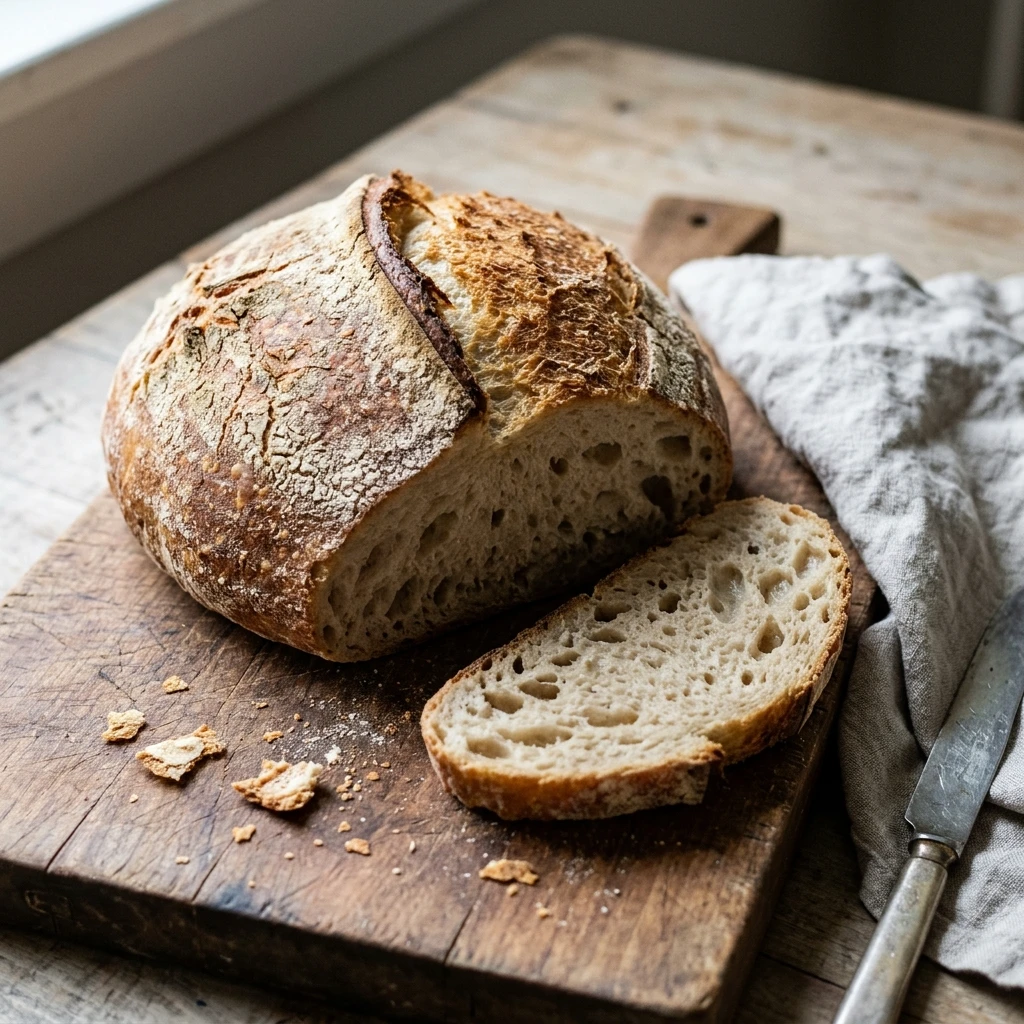
Table of Contents
Why You Will Love This Sourdough Bread Recipe
- Four dough ingredients: bread flour, water, starter, and salt.
- This sourdough bread recipe gives a crackly crust, a soft chewy crumb, and a mild tang.
- Hands-on time adds up to about 45 minutes.
- One loaf cuts into 12 slices that freeze well for toast.
- Kid-approved: my daughter asked for buttered toast three mornings in a row.
Recipe Snapshot
- Prep Time: 45 minutes
- Cook Time: 45 minutes
- Total Time: 19 hours 30 minutes
- Servings: 12 slices
- Difficulty: Medium
- Calories per Serving: About 170
- Key Ingredient or Tool: Active starter and a Dutch oven
- Best For: Sandwiches, toast, and soup nights
Nutrition Information
- Calories per Serving: About 170
- Protein: 6 g
- Carbs: 34 g
- Fat: 1 g
- Fiber: 1 g
- Sugar: 0 g
- Sodium: 340 mg
- Serving Size: About 1 slice (1/12 loaf)
- Servings per Recipe: 12
Each slice has about 6 g of protein, mostly from the bread flour. This sourdough bread recipe has no added oil or sugar, so fat and sugar stay near zero. Sodium runs 340 mg per slice, and salted butter adds more.
Nutrition values are approximate and calculated per serving using standard ingredient amounts. Values may vary based on brands used and portion sizes.
Ingredients
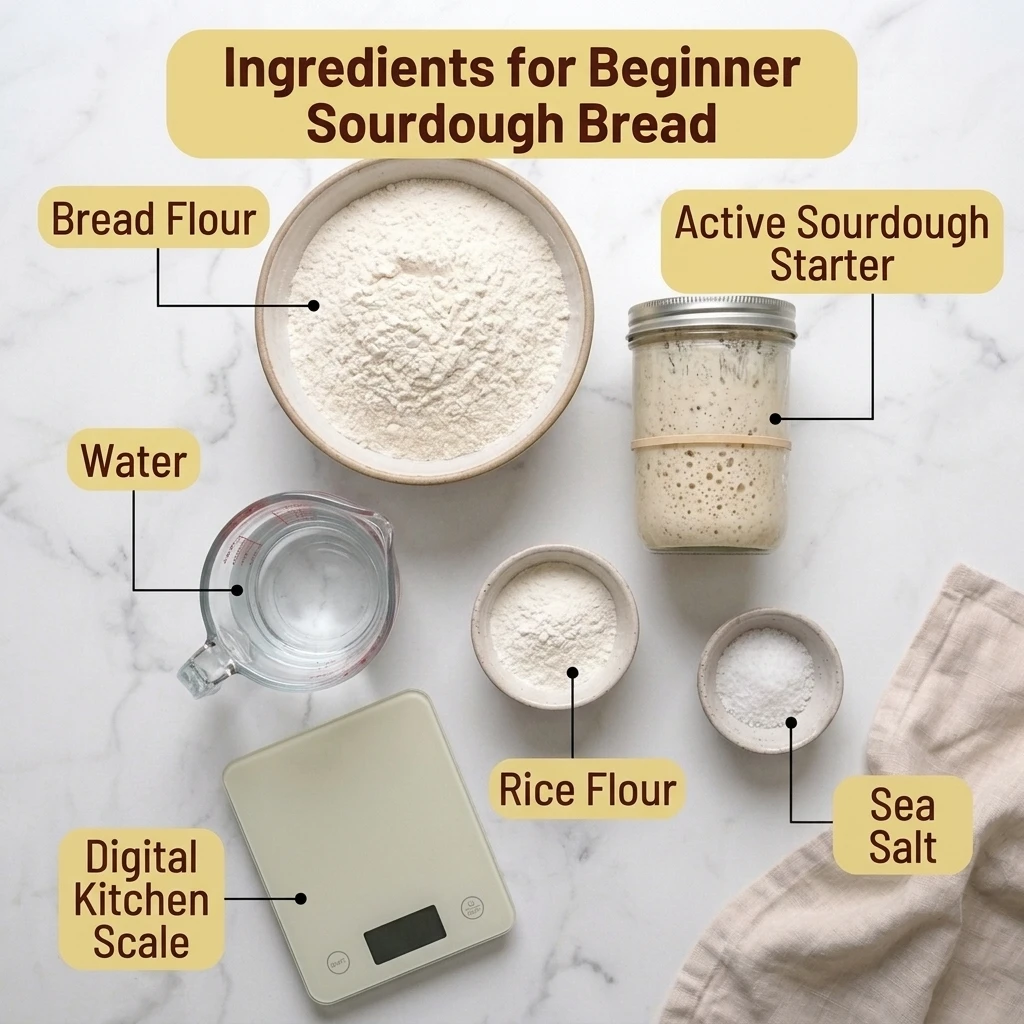
- 18 ounces bread flour (about 4 1/4 cups or 510 g), such as King Arthur
- 1 1/2 cups water at about 80°F (12 fluid ounces)
- 1/2 cup active sourdough starter (about 4 ounces or 113 g), fed 4 to 8 hours earlier
- 1 3/4 teaspoons fine sea salt (about 10 g)
- 2 tablespoons white rice flour, for dusting the banneton
Bread flour matters most. King Arthur lists its bread flour at 12.7 percent protein, which builds the strong gluten this sourdough bread recipe needs to hold a tall shape. With all-purpose flour, hold back 2 tablespoons of water.
The starter comes next. It should have doubled, with a domed top and bubbles throughout, before you use it. A sleepy starter is a common reason for dense bread, and nothing substitutes for an active one.
Salt controls both flavor and fermentation speed. Kosher salt works, but weigh it at 10 g because crystal size changes by brand. Bread flour can stand in for the rice flour if needed.
Equipment Needed
- Digital kitchen scale: It repeats the same loaf every time.
- 5 to 6 quart Dutch oven with lid: The lid traps steam, so the crust stays flexible while the loaf rises.
- 9-inch round banneton: A bowl lined with a floured kitchen towel works too.
- Razor blade or bread lame: A sharp blade cuts cleanly, while a dull knife drags.
- Instant-read thermometer: It confirms doneness at 205 to 210°F.
Preparation
Set these up before step 1 so this sourdough bread recipe runs without pauses.
- Starter: Feed it equal weights of flour and water 4 to 8 hours before mixing.
- Water: Measure it and bring it to 80°F.
- Banneton: Rub 2 tablespoons of rice flour into every corner and ridge.
- Parchment: Tear off a 12 by 16 inch sheet to use as a lifting sling.
- Oven: On baking day, heat the oven with the Dutch oven and lid inside to 475°F for 45 minutes.
Pro Tip: Use a clear, straight-sided container and mark the dough’s starting level with a rubber band. Bulk fermentation is done when the dough has grown 50 to 75 percent above that band.
Step-by-Step Instructions
- Stir the bread flour and 80°F water in a large bowl until no dry flour remains, then cover and rest for 45 minutes. Chef’s Note: This rest, called an autolyse, lets the flour absorb water before kneading. The dough looks rough and shaggy.
- Spread the starter and salt over the dough, then squeeze and fold it with wet hands for 3 minutes. Move it to a clear, straight-sided container. The dough looks smooth and slightly sticky, with no streaks of starter.
- Every 30 minutes for 2 hours, wet your hand, lift one edge of the dough, and fold it over the center, working around all four sides. The dough turns springy and holds a rounded shape.
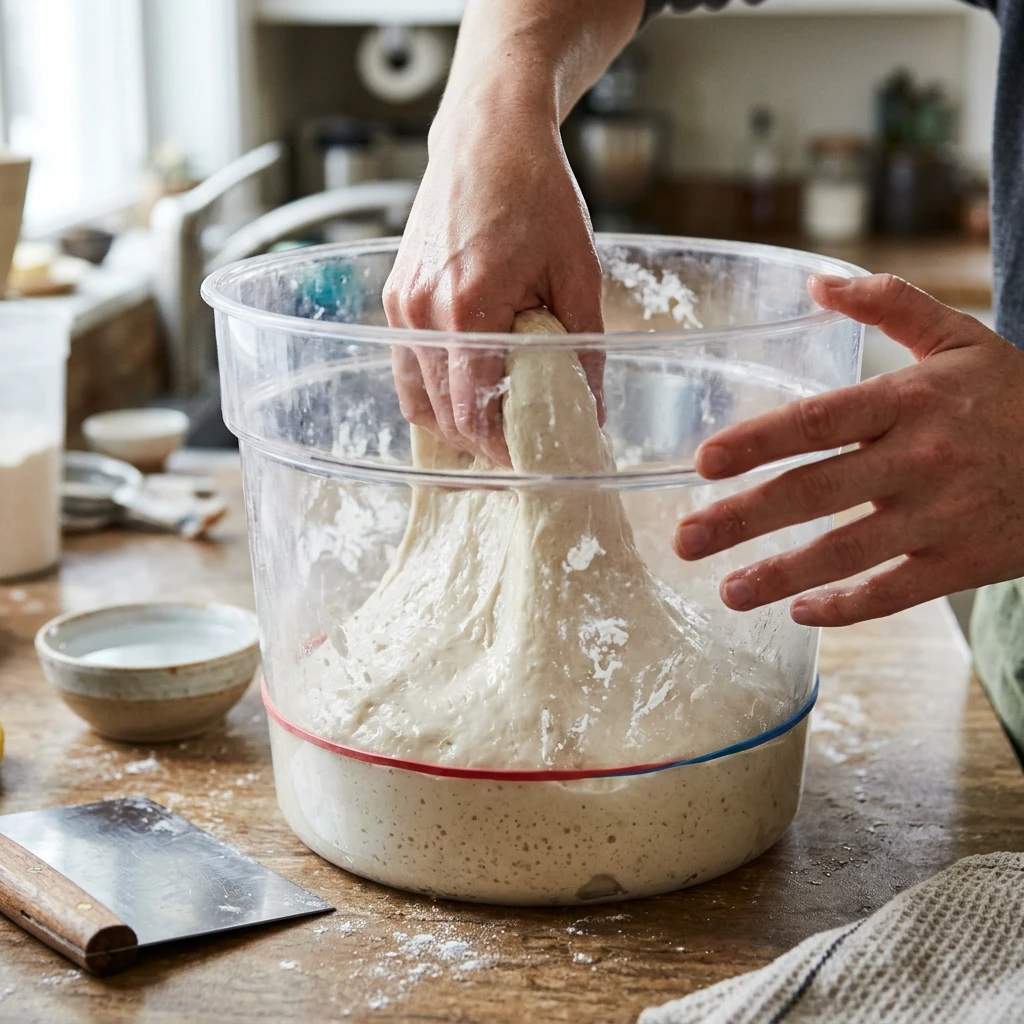
- Keep the dough covered at 75 to 78°F until it has grown 50 to 75 percent above the rubber band, usually 4 to 6 hours after you added the starter. The top looks domed and jiggly, with bubbles along the sides.
- Scrape the dough onto a lightly floured counter, fold the edges into the center, flip it seam side down, and rest it for 30 minutes. The round relaxes and spreads a little.
- Flip the round, fold the four edges into the center, then flip it again and drag it toward you to tighten the surface. Place it seam side up in the banneton. The ball holds a firm dome without spreading.
- Cover the banneton with a shower cap and refrigerate for 10 to 14 hours. The dough feels firm and slightly puffy, and a floured fingertip leaves a dent that springs back slowly.
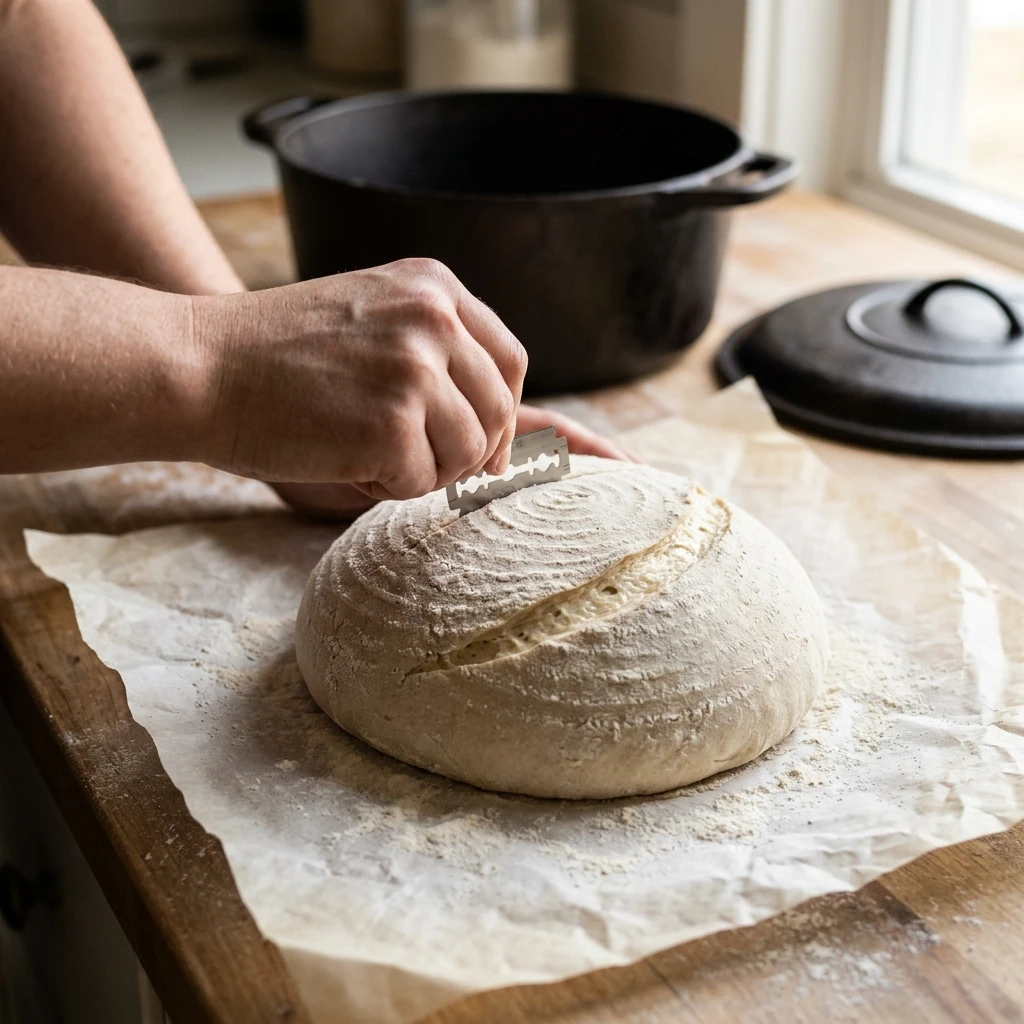
- Turn the cold dough onto the parchment, dust it with flour, and cut one 1/2 inch deep slash at a 30 degree angle with a razor blade. Chef’s Note: Score straight from the fridge, because cold dough holds its shape under the blade. The cut opens cleanly without tearing.
- Wearing oven mitts, lift the dough by the parchment into the preheated Dutch oven, cover it, and lower the oven to 450°F. Bake for 20 minutes. The loaf looks tall and pale gold, with the slash starting to open.
- Remove the lid and bake 20 to 25 minutes more, until an instant-read thermometer in the center reads 205 to 210°F. Chef’s Note: A loaf can look done while the center is still wet, so trust the thermometer. The crust turns deep brown and the loaf feels light.
- Lift the loaf onto a wire rack and cool it for at least 1 hour before slicing. The crust crackles as it cools, and the crumb sets from sticky to soft.
Pro Tip: If the bottom of your loaf browns faster than the top, slide a baking sheet onto the rack beneath the Dutch oven to shield the base from direct heat.
Expert Tips and Tricks
- Weigh everything when you bake this sourdough bread recipe. A scooped cup of flour can weigh noticeably more than a spooned one.
- I once skipped dusting the banneton, and the dough stuck and tore. Rice flour fixed it every time after.
- Make-ahead option: this sourdough bread recipe can wait in the fridge up to 16 hours after shaping, so bake when the morning suits you.
- Once the loaf is cut, keep it cut side down and eat it within 4 days, or freeze slices for up to 3 months.
- Use little flour on the counter, because too much makes the dough slide.
- Set a phone timer for the folds. Each takes under a minute, so chores fit in between.
Common Mistakes and Troubleshooting
Dense crumb with large tunnels. The dough was underproofed, so the gluten and gas were not ready for the oven. Wait for the full 50 to 75 percent rise in this sourdough bread recipe, and toast the slices from this loaf.
A flat loaf that spreads in the pot. The dough overproofed in a warm kitchen. Shorten the cold proof to 10 hours, or reshape gently, rest it 20 minutes, and bake it anyway.
A gummy center. You sliced too soon, while steam was still setting the crumb. Wait the full hour, and toast any slices that turn out damp.
A pale, soft crust. The Dutch oven was not hot enough, or the loaf left the oven too early. Preheat the pot for 45 minutes, and return a pale loaf to a 450°F oven for 5 to 10 minutes.
Storage Instructions
- Room Temperature: 3 to 4 days, cut side down on a board or in a paper bag.
- Refrigerator: Not recommended, since the cold speeds up staling. In a hot, humid kitchen, sliced bread keeps up to 7 days in a zip bag.
- Freezer: Slice first, then freeze in a freezer-safe zip bag with parchment between the slices for up to 3 months.
- Reheating: Toast frozen slices straight from the freezer. Refresh a whole loaf with a splash of water and 8 to 10 minutes in a 350°F oven.
- Make-Ahead Notes: Shape the dough and refrigerate it for up to 16 hours before baking.
I freeze the end slices in their own bag, since they toast fastest. Slices from this sourdough bread recipe that dry out become French toast, and the tang holds up well against custard.
Variations and Substitutions
- Spicy Sourdough: Fold 1/4 cup chopped pickled jalapeños, drained and patted dry, and 1 teaspoon red pepper flakes into the dough during the second round of folds.
- Mild and Kid-Friendly: Replace 1/4 cup of the water with whole milk and cut the cold proof to 8 hours for a softer crumb and gentler tang.
- Vegetarian: This loaf is already vegetarian and vegan. For a savory twist, add 2 tablespoons chopped fresh rosemary with the salt.
- Gluten-Free: A straight swap fails in this sourdough bread recipe, because wheat gluten gives the loaf its structure. Use a recipe built for gluten-free flour and a gluten-free starter, since long fermentation does not make wheat bread safe for celiac disease.
What to Serve With This Sourdough Bread Recipe
Thick slices suit anything wet or buttery.
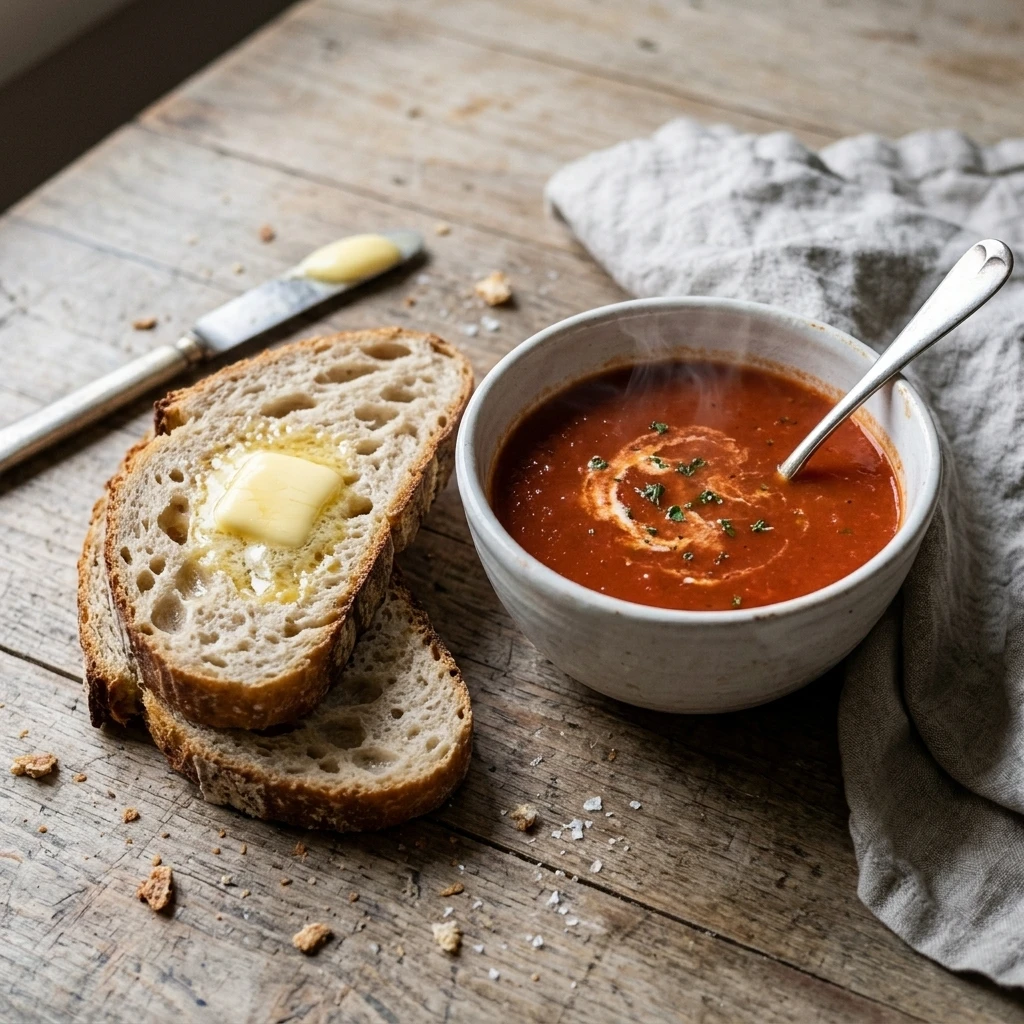
- Tomato soup: Dunk a slice into a bowl of tomato soup, because the sturdy crust holds up to liquid.
- Chicken salad: Toast two slices and pile on chicken salad with grapes and pecans, where the tang cuts the creaminess.
- Whipped honey butter: Beat softened butter with a spoonful of honey for warm slices.
- Olive oil dip: Add cracked pepper and dried oregano to a dish of olive oil.
- Sparkling lemon water: A cold, tart drink keeps a rich meal feeling light.
Frequently Asked Questions
Can you freeze sourdough bread?
Yes, and it freezes better than most bread. Cool the loaf completely, slice it, and stack the slices in a freezer-safe zip bag with parchment between them. They keep their quality for up to 3 months. Toast slices straight from the freezer, and they taste close to fresh with a crisp edge. I freeze half of every loaf from this sourdough bread recipe on baking day.
Why is my sourdough bread gummy?
A gummy crumb usually points to one of three things: underproofed dough, an underbaked center, or a loaf sliced too soon. Check that the dough grew 50 to 75 percent before shaping, that the center reached 205 to 210°F, and that the loaf cooled for a full hour. If this sourdough bread recipe leaves you with a damp crumb, bake the next loaf 5 minutes longer.
Can I use all purpose flour instead of bread flour for sourdough?
Yes. Use the same weight, but hold back 2 tablespoons of water, since all-purpose flour has less protein and absorbs less liquid. The loaf rises a little lower and feels softer instead of chewy. I baked two loaves this way during testing, and both held their shape in the Dutch oven. Bread flour still gives the taller, chewier loaf I prefer.
How do you know when sourdough bread is done baking?
Use two checks together for the most reliable answer. The crust should be deep brown, and an instant-read thermometer pushed into the center should read 205 to 210°F. A hollow sound when you tap the bottom is a good backup sign. For this loaf, that usually lands 40 to 45 minutes after it enters the oven, covered and uncovered time combined.
How do I know when my sourdough starter is ready to use?
Before you start this sourdough bread recipe, look for a starter that has doubled, with a domed top and bubbles throughout, 4 to 8 hours after feeding. It should smell yeasty and mildly tangy, not sharp like nail polish remover. The float test is not a dependable check, so rely on the rise instead. If the top has already flattened, feed the starter again and wait for the next peak.
Final Thoughts on This Sourdough Bread Recipe
Sourdough rewards patience more than skill. Your first loaf may bake up a little flat, as three of my first four did. Keep notes on your kitchen’s temperature and how the dough looked at each stage, and your second loaf will beat your first.
My favorite moment is the cooling hour. I stand in the kitchen listening to the crust crackle, and it still feels like a small win. Slice it thick, add salted butter, and share it warm.
If you loved this recipe, save it to your sourdough bread Pinterest board so you can find it easily later!
Beginner Sourdough Bread Recipe With a Crackly Crust and Chewy Crumb
Ingredients
Equipment
Method
- Feed the starter equal weights of flour and water 4 to 8 hours before mixing. It is ready when it has doubled and the top is domed and bubbly.
- Stir the bread flour and 80°F water in a large bowl until no dry flour remains, then cover and rest for 45 minutes. The dough looks rough and shaggy.
- Spread the starter and salt over the dough, then squeeze and fold it with wet hands for 3 minutes. Move it to a clear, straight-sided container and mark the starting level with a rubber band. The dough looks smooth and slightly sticky, with no streaks of starter.
- Every 30 minutes for 2 hours, wet your hand, lift one edge of the dough, and fold it over the center, working around all four sides. The dough turns springy and holds a rounded shape.
- Keep the dough covered at 75 to 78°F until it has grown 50 to 75 percent above the rubber band, usually 4 to 6 hours after you added the starter. The top looks domed and jiggly, with bubbles along the sides.
- Scrape the dough onto a lightly floured counter, fold the edges into the center, flip it seam side down, and rest it for 30 minutes. The round relaxes and spreads a little.
- Rub 2 tablespoons of rice flour into a 9-inch banneton. Flip the round, fold the four edges into the center, flip it again, drag it toward you to tighten the surface, and place it seam side up in the banneton. The ball holds a firm dome without spreading.
- Cover the banneton with a shower cap and refrigerate for 10 to 14 hours. The dough feels firm and slightly puffy, and a floured fingertip leaves a dent that springs back slowly.
- On baking day, put the Dutch oven with its lid in the oven and heat it to 475°F for 45 minutes. The oven and pot are fully hot before the dough comes out of the fridge.
- Turn the cold dough onto a 12 by 16 inch sheet of parchment, dust it with flour, and cut one 1/2 inch deep slash at a 30 degree angle with a razor blade. The cut opens cleanly without tearing.
- Wearing oven mitts, lift the dough by the parchment into the hot Dutch oven, cover it, lower the oven to 450°F, and bake for 20 minutes. The loaf looks tall and pale gold, with the slash starting to open.
- Remove the lid and bake 20 to 25 minutes more, until an instant-read thermometer in the center reads 205 to 210°F. The crust turns deep brown and the loaf feels light.
- Lift the loaf onto a wire rack and cool it for at least 1 hour before slicing. The crust crackles as it cools, and the crumb sets from sticky to soft.
Notes
With all-purpose flour instead of bread flour, hold back 2 tablespoons of the water.
Storage: room temperature 3 to 4 days, refrigerator up to 7 days only in a hot, humid kitchen, freezer up to 3 months (sliced).