How to Make Cake Pops Perfectly Every Time
Homemade cake pops look like bakery treats, but the real secret is not decorating skill. It is temperature. Firm, cool cake balls and a warm, thin coating are the whole game, and once you understand that, cake pops stop cracking, sliding off sticks, or turning greasy.
I tested these cake pops nine times over five weeks, changing one thing per batch: the frosting amount, the chill time, the coating thickness. Batch four slid off the sticks in a sad row. Batch six cracked like dry mud. Batch nine finally gave me a smooth shell and a soft, fudgy center.
This version starts with a simple vanilla butter cake baked from scratch, a small batch of cream cheese frosting as the binder, and a thinned white coating. Plan on under four hours, though most of that is hands-off cooling. The recipe makes 40 pops, enough for a birthday table or a school bake sale.
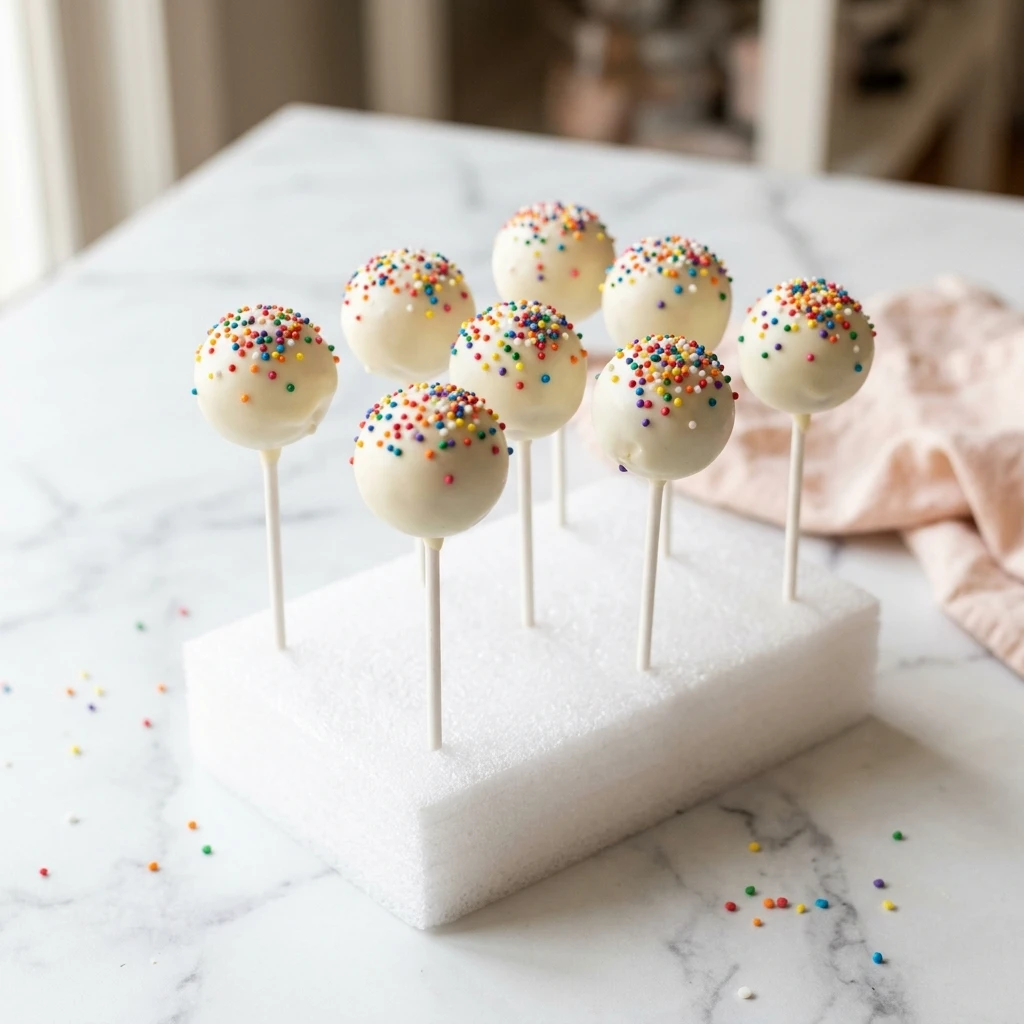
Table of Contents
Why You Will Love These Cake Pops
- You can bake the cake one evening and dip the pops the next day, so nothing feels rushed.
- The centers stay soft and fudgy because the frosting is measured, not guessed.
- One 9×13 cake and two bags of candy melts make 40 pops, enough for a classroom.
- Kids can roll the balls and shake on sprinkles, which turns the kitchen into a happy mess.
- Finished cake pops freeze well, so leftovers become a future dessert instead of waste.
Recipe Snapshot
- Prep Time: 1 hour 20 minutes
- Cook Time: 35 minutes
- Total Time: 3 hours 40 minutes
- Servings: 40 cake pops
- Difficulty: Medium
- Calories per Serving: About 220
- Key Tool: 1 1/2 tablespoon cookie scoop
- Best For: Birthdays, baby showers, and bake sales
Nutrition Information
- Calories per Serving: About 220
- Protein: 3 g
- Carbs: 27 g
- Fat: 12 g
- Fiber: 0 g
- Sugar: 21 g
- Sodium: 93 mg
- Serving Size: About 1 pop
- Servings per Recipe: 40
At about 220 calories, one pop is a small, sweet treat. The coating makes up roughly 17 g of each pop, so a thin dip trims sugar and fat fastest. Protein sits at only 3 g, so pair a pop with milk or berries.
Nutrition values are approximate and calculated per serving using standard ingredient amounts. Values may vary based on brands used and portion sizes.
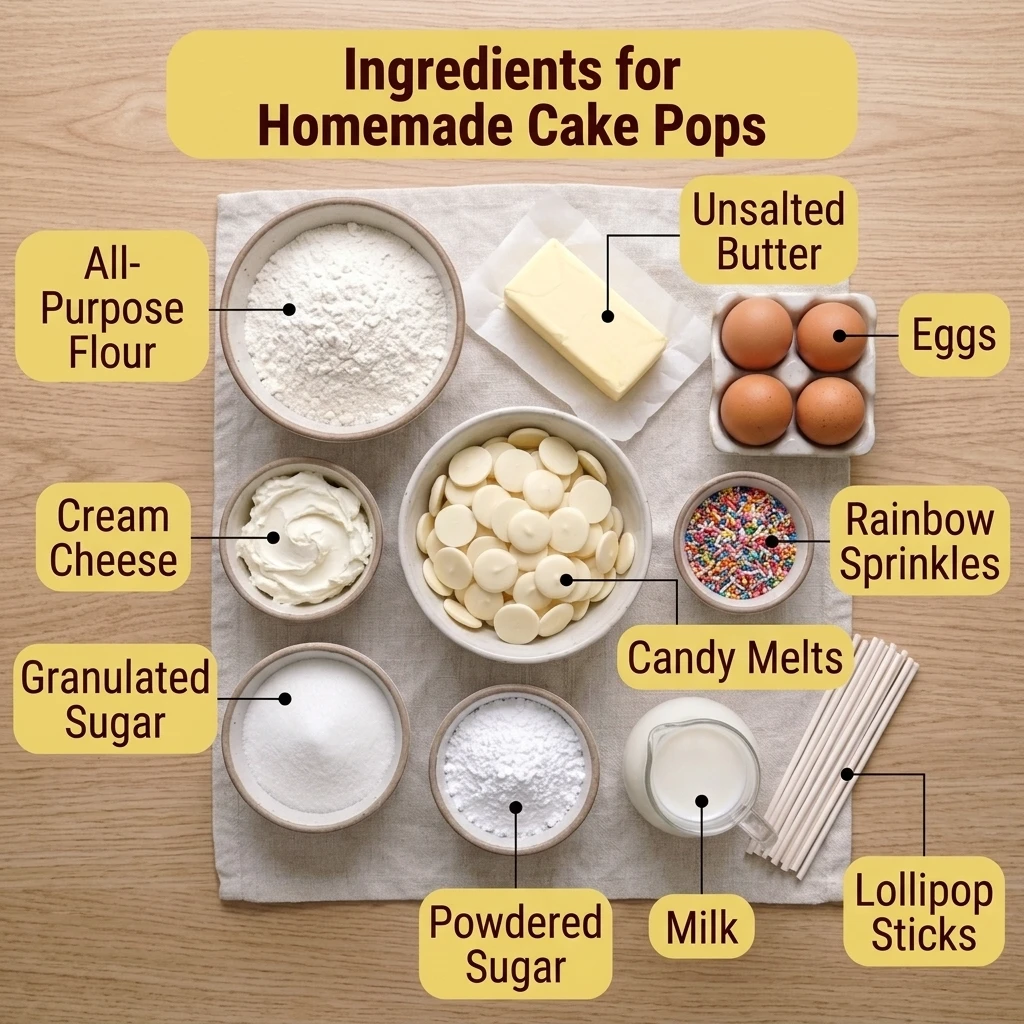
Ingredients for Homemade Cake Pops
For the Vanilla Cake
- 2 1/2 cups (313 g) all-purpose flour (I use King Arthur; spoon and level it)
- 1 1/4 cups (250 g) granulated sugar
- 2 1/2 teaspoons baking powder
- 1/2 teaspoon fine salt
- 3/4 cup (170 g) unsalted butter, softened
- 3 large eggs, at room temperature
- 1 cup (245 g) whole milk, at room temperature
- 2 teaspoons alcohol-free vanilla extract
For the Cream Cheese Binder
- 4 ounces (113 g) block cream cheese, softened (substitute: mascarpone)
- 2 tablespoons (28 g) unsalted butter, softened
- 1 cup (120 g) powdered sugar
- 1/2 teaspoon alcohol-free vanilla extract
For the Coating and Decorating
- 24 ounces (680 g) white candy melts, certified (substitute: white chocolate chips plus extra oil)
- 2 tablespoons refined coconut oil or vegetable shortening
- 1/4 cup (about 50 g) sprinkles, certified
- 40 paper lollipop sticks, 6 inches long
Three ingredients decide how cake pops turn out. Block cream cheese matters because tub spreads hold extra water and make a soggy center. Candy melts set hard without tempering, while chocolate chips thicken. Coconut oil thins the coating, but butter or water makes it seize.
Regular vanilla extract contains alcohol, so I use an alcohol-free version. Check candy melt and sprinkle labels for gelatin or confectioner’s glaze. Short on time? Use my cream cheese frosting, adding a few tablespoons at a time until the crumbs hold together.
Equipment Needed
- 9×13-inch metal baking pan: Metal bakes evenly, so the crumbs stay soft.
- Hand or stand mixer: Fluffy butter takes 3 minutes.
- 1 1/2 tablespoon cookie scoop: Equal balls set at the same pace.
- Tall, narrow microwave-safe cup: Depth lets you dip straight down.
- 6-inch paper lollipop sticks: Paper grips the candy glue better than smooth plastic.
- Foam block or pop stand: Poke holes first so shells do not crack.
Preparation
- Set the butter, eggs, milk, and cream cheese on the counter for 1 hour to reach room temperature.
- Preheat the oven to 350°F with a rack in the center.
- Grease the 9×13-inch pan, then line it with parchment that hangs over two sides for easy lifting.
- Line a rimmed baking sheet with parchment and clear a flat spot in your freezer for it.
- Poke 40 holes in the foam block with a skewer, spaced 2 inches apart.
- Measure every ingredient first so the cake goes together without pauses.
Step-by-Step Instructions
- Whisk the flour, baking powder, and salt for 30 seconds, until no lumps remain.
- Beat the 3/4 cup butter and granulated sugar on medium speed for 3 minutes, until pale and fluffy. Chef’s Note: Scrape the bowl twice to catch buttery streaks.
- Beat in the eggs one at a time, 30 seconds each, then the vanilla, until the batter looks glossy.
- Add the flour mixture in three parts, alternating with the milk, mixing on low until no dry streaks remain and the batter looks thick and creamy.
- Spread the batter into the pan and bake at 350°F for 30 to 35 minutes, rotating once at 20 minutes, until the top springs back and a toothpick shows a few moist crumbs.
- Cool the cake in the pan for 15 minutes, lift it out, and cool 45 minutes more, until the bottom feels room temperature.
- Beat the cream cheese and 2 tablespoons butter for 1 minute, then beat in the powdered sugar and vanilla for 2 minutes, until fluffy and spoonable.
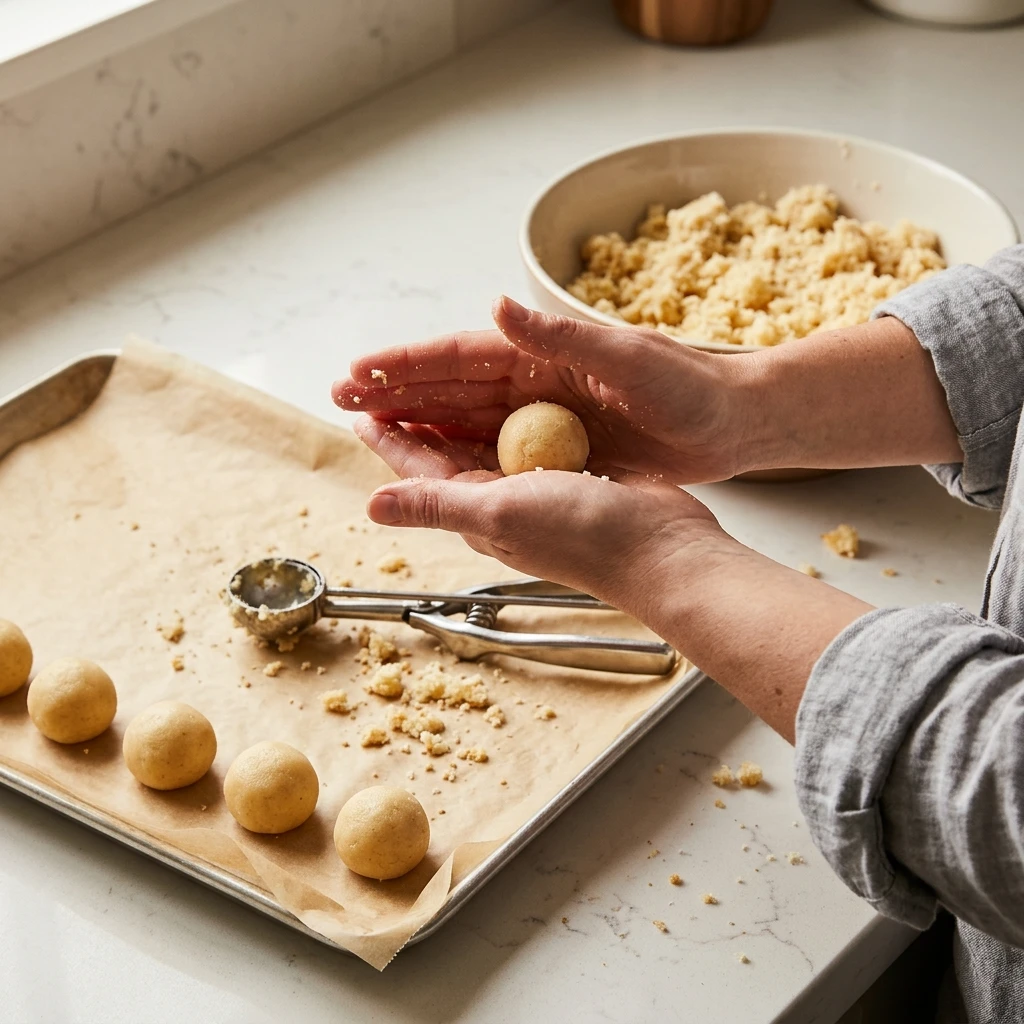
- Crumble the cooled cake into fine crumbs, add all the frosting, and knead 2 minutes, until a squeezed handful holds its shape without feeling oily.
- Scoop and roll the dough into smooth 1 ounce balls. Freeze them on the lined sheet for 15 minutes, until firm but not rock hard.
- Melt 12 ounces of candy melts with 1 tablespoon coconut oil in the tall cup at 50 percent power, in 30 second bursts, stirring each time, until silky. Chef’s Note: Stop heating while a few wafers remain.
- Dip 1/2 inch of each stick into the coating, push it halfway into a ball, and chill 15 minutes in the refrigerator, until the glue feels hard.
- Dip each ball straight down, lift, and tap the stick against your wrist while turning, until the surface looks glassy. Chef’s Note: Tapping the cup rim shakes too hard and loosens the ball.
- Add sprinkles right away and stand each pop in the foam block for 15 minutes, until the shell feels hard. Melt the remaining 12 ounces of melts and 1 tablespoon oil when the cup runs low.
Pro Tip: Drag a spoon through the coating before dipping. If the trail closes slowly, stir in 1 teaspoon of oil for a thinner, crack-resistant shell.
Expert Tips and Tricks
- Weigh the first 3 balls on a kitchen scale at 1 ounce each, then match the rest by eye so all your cake pops set at the same speed.
- My mistake: I once dipped balls after 40 minutes in the freezer, and the shells cracked in spiderweb lines within 10 minutes. Fifteen minutes is the limit.
- Make ahead: freeze the cooled cake in two layers of plastic wrap for up to 1 month, then start at the crumbling step.
- Discard hard edge bits while crumbling, since they show up as bumps under the shell.
- Keep finished pops covered at the back of the fridge, not the door, for up to 4 days.
- Make the frosting while the cake cools, which saves about 15 minutes.
Common Mistakes and Troubleshooting
Cracked shells: Ice cold balls expand inside a warm shell, so it splits. Chill them only 15 minutes. If cracks appear, dab melted coating over them and add sprinkles.
Balls sliding off sticks: The ball is too heavy, or the stick was never glued in. Dip each stick tip in coating first. If a ball falls, re-glue it and chill 10 minutes.
Thick, clumpy coating: Overheating or one drop of water makes candy melts seize. Melt at 50 percent power and thin with 1 teaspoon of oil at a time. Water damage is permanent, so start fresh.
Greasy centers: Too much frosting leaves oil beading on the surface. Stop mixing when a squeezed handful holds together. If the dough looks shiny, chill it 20 minutes.
Sweaty pops: Moisture beads form when cold cake pops meet warm air. Let them warm up inside a closed container, so condensation lands on the container, not the shells.
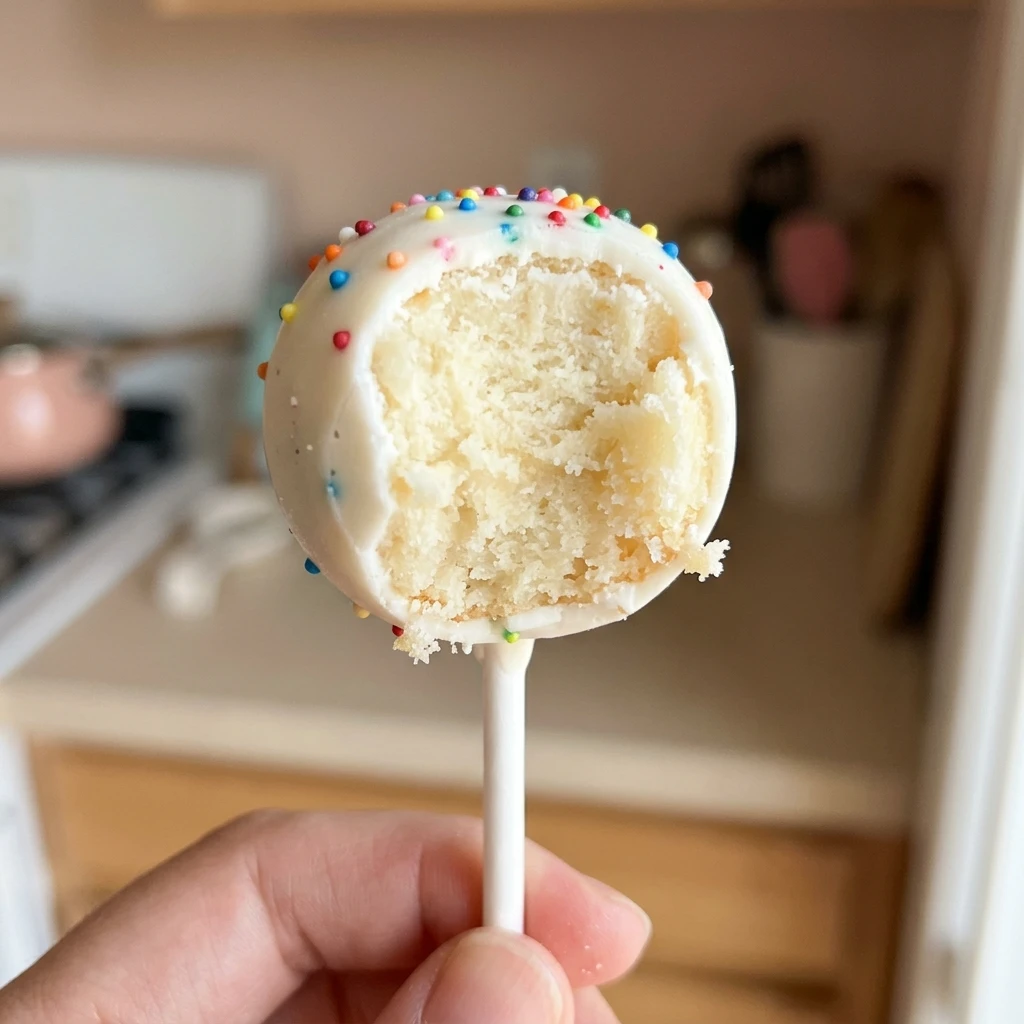
Storage Instructions
Room Temperature: Up to 2 hours (1 hour above 90°F), since the cream cheese inside is perishable.
Refrigerator: Up to 4 days in an airtight container, with parchment between layers.
Freezer: Up to 2 months in a freezer-safe container, with parchment between layers.
Reheating and Thawing: Skip the oven. Thaw frozen pops overnight in the refrigerator inside the closed container, then rest them 20 minutes on the counter.
Make-Ahead Notes: Bake the cake up to 2 days ahead and refrigerate it wrapped tightly. Roll the balls up to 2 days ahead and keep them covered in the fridge.
I freeze extras on a parchment lined tray for 1 hour first, then bag them. The shells never stick, and I can grab 6 pops for lunchboxes without thawing the batch.
Storage Trick: Fold a paper towel into the bottom of the container. It soaks up the condensation that forms as cold pops warm up, which keeps the shells smooth.
Variations and Substitutions
Spicy Mexican Chocolate: Whisk 1/2 teaspoon cinnamon and 1/4 teaspoon cayenne into the flour, then dip in dark chocolate melts. The heat builds slowly.
Mild and Kid-Friendly: Keep the recipe as written, choose pastel melts, and let kids decorate their own cake pops.
Vegetarian and Dairy-Free: This recipe is already vegetarian. For dairy-free pops, use plant-based butter, oat milk, and dairy-free cream cheese.
Gluten-Free: Swap in a 1 to 1 gluten-free flour blend such as King Arthur Measure for Measure, and check your candy melt and sprinkle labels too.
Red Velvet: Bake your favorite red velvet cake instead and keep the cream cheese binder for a classic pairing.
What to Serve With This
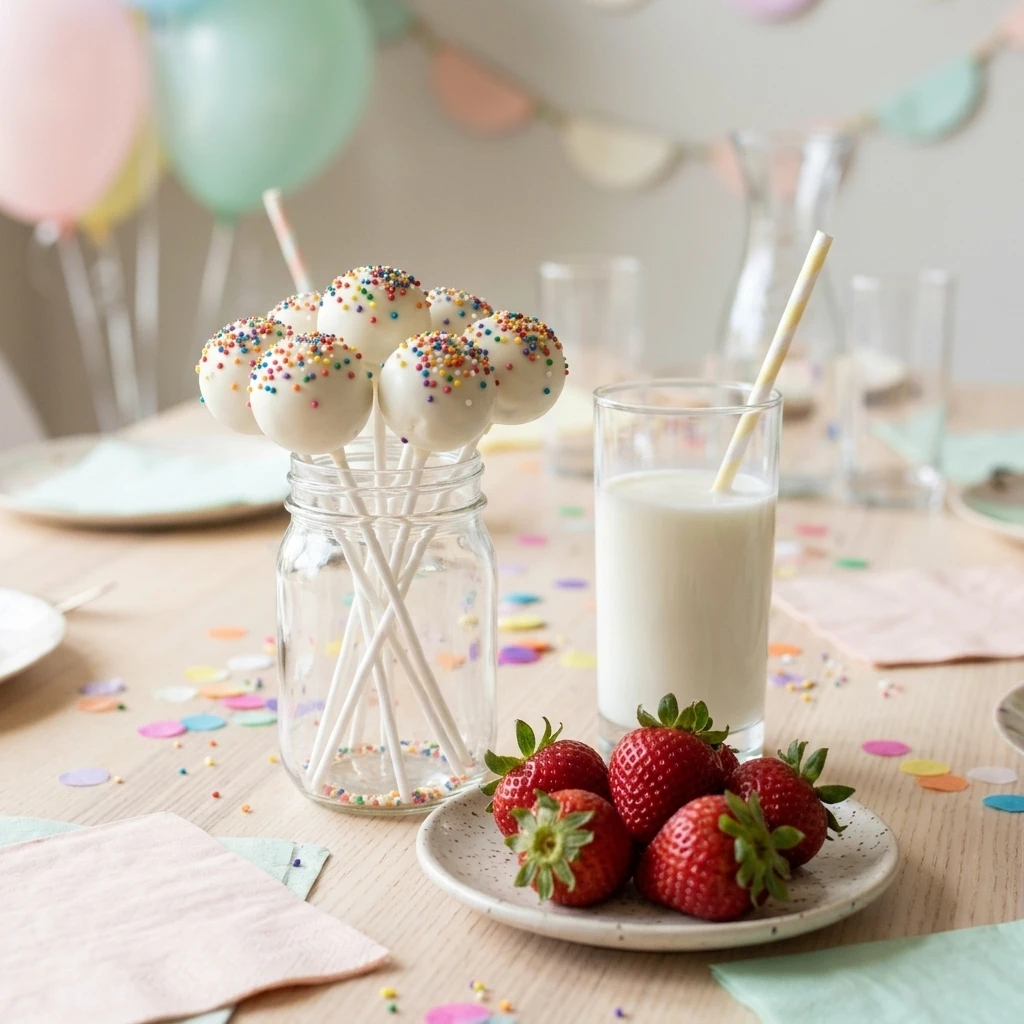
Cold Milk: The creamy chill balances the sweet coating.
Fresh Strawberries: Their tartness cuts through the sugar.
Oreo Balls: Set my Oreo balls beside the pops for a table with two textures.
Sparkling Lemonade: Serve it over ice for a bright, alcohol-free drink.
Full Dessert Table: Stand the pops in a foam block as the centerpiece, then ring them with berries, cookies, and small cups of milk.
Frequently Asked Questions
Can I use chocolate chips instead of candy melts for cake pops?
Yes, but expect a thicker shell. Stir 1 tablespoon of coconut oil or vegetable shortening into every cup of chips, and melt them at 50 percent power in 30 second bursts. White chips stay lightest in color, while semisweet chips taste richer. I tested both, and I slightly preferred candy melts because they gave a thinner, smoother dip. Add the oil before melting, not after.
Can I make cake pops the day before a party?
Yes, and it is the calmest way to do it. Bake and roll the balls up to 2 days ahead, keep them covered in the refrigerator, then dip and decorate the night before. Finished cake pops hold in a covered container in the fridge for 4 days. Pull them out 20 minutes before guests arrive so the centers soften. Store sticks and sprinkles separately.
Why are my cake pops falling apart when I roll them?
Crumbly dough usually means too little frosting or a dry cake. Overbaking by even 5 minutes dries the crumb, so check with a toothpick at 30 minutes. Coarse crumbs also bind poorly, so break them finer. Add frosting 1 tablespoon at a time until a squeezed handful holds. If the dough feels oily instead, chill it 20 minutes. Warm hands help the frosting blend evenly.
How long should cake pops chill before dipping?
Freeze the rolled balls for 15 minutes, or refrigerate them for 1 hour. Use touch as your doneness cue: a ball should feel firm and cool, with a tiny dent when pressed, never icy or rock hard. If frost or beads of moisture show on the surface, let the ball rest 5 minutes at room temperature before dipping. Test one ball before you dip the whole batch.
Can I use store-bought frosting for cake pops?
Yes, and it saves about 15 minutes. Start with 3/4 cup of cream cheese or vanilla frosting for this 9×13 cake, then add 1 tablespoon at a time only if the crumbs will not hold together. Store-bought frosting tastes sweeter than homemade, so the cake pops will too. Refrigerate them if you use cream cheese frosting, and mix it in with clean hands so you can feel the texture.
Final Thoughts on Making Cake Pops at Home
Once you roll your first batch, you will notice how much of this treat is simple patience. Chill, dip, tap, and wait. Next time, make the balls a day ahead so the dipping session feels like a calm Saturday project instead of a marathon.
My daughter asked for these three days in a row after batch nine, and she now rolls balls faster than I can scoop. Drizzle leftover coating over a few pops for a bakery look, and keep a couple back for yourself. If you loved this recipe, save it to your party desserts Pinterest board so you can find it easily later!
How to Make Cake Pops Perfectly Every Time
Ingredients
Equipment
Method
- Before you start: set the butter, eggs, milk, and cream cheese out for 1 hour. Preheat the oven to 350°F. Grease and line a 9×13-inch pan with parchment. Line a rimmed baking sheet with parchment. Poke 40 holes in a foam block with a skewer, 2 inches apart.
- Whisk the flour, baking powder, and salt for 30 seconds, until no lumps remain.
- Beat 3/4 cup butter and the granulated sugar on medium speed for 3 minutes, until pale and fluffy. Scrape the bowl twice.
- Beat in the eggs one at a time, 30 seconds each, then the vanilla, until the batter looks glossy.
- Add the flour mixture in three parts, alternating with the milk, mixing on low until no dry streaks remain and the batter looks thick and creamy.
- Spread the batter into the pan and bake at 350°F for 30 to 35 minutes, rotating once at 20 minutes, until the top springs back and a toothpick shows a few moist crumbs.
- Cool in the pan for 15 minutes, lift out, and cool 45 minutes more, until the bottom feels room temperature.
- Beat the cream cheese and 2 tablespoons butter for 1 minute, then beat in the powdered sugar and vanilla for 2 minutes, until fluffy and spoonable.
- Crumble the cooled cake into fine crumbs, add all the frosting, and knead 2 minutes, until a squeezed handful holds its shape without feeling oily.
- Scoop and roll into smooth 1 ounce balls. Freeze on the lined sheet for 15 minutes, until firm but not rock hard.
- Melt 12 ounces of candy melts with 1 tablespoon coconut oil in the tall cup at 50 percent power, in 30 second bursts, stirring each time, until silky. Stop heating while a few wafers remain.
- Dip 1/2 inch of each stick into the coating, push it halfway into a ball, and chill 15 minutes in the refrigerator, until the glue feels hard.
- Dip each ball straight down, lift, and tap the stick against your wrist while turning, until the surface looks glassy. Never tap the cup rim.
- Add sprinkles right away and stand each pop in the foam block for 15 minutes, until the shell feels hard. Melt the remaining 12 ounces of melts and 1 tablespoon oil when the cup runs low.
Notes
Chill the balls only 15 minutes before dipping so the shells do not crack. Thin the coating with 1 teaspoon of oil at a time if it looks thick.
Storage: refrigerate up to 4 days in an airtight container, or freeze up to 2 months.