The Best Fudgy Brownies With a Shiny Crackly Top
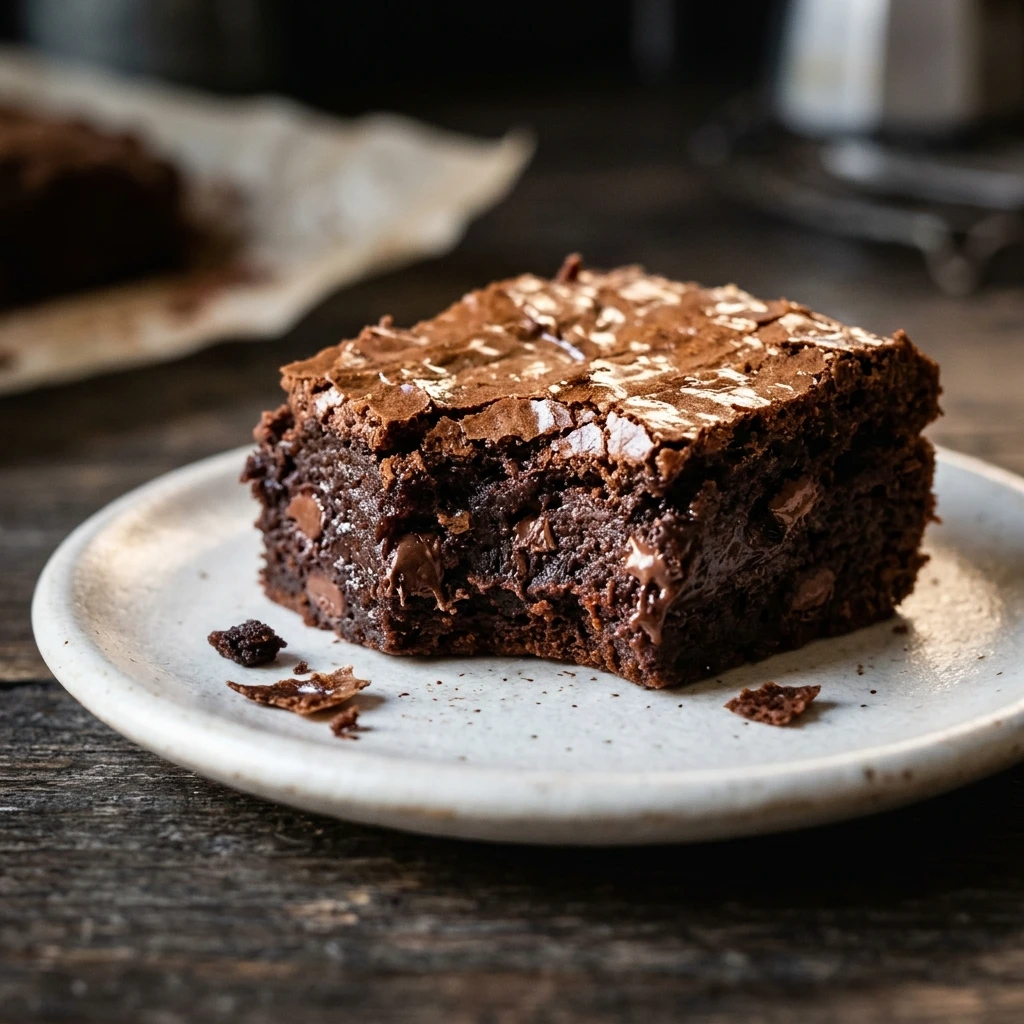
Most brownies go wrong in one of two ways. They bake up dry and cakey, or they stay so gooey in the middle that the squares fall apart on the knife. These brownies land in the sweet spot between: dense and fudgy inside, with a thin, shiny, crackly top.
I tested this brownie recipe eleven times over three weeks, changing one thing per round. The sugar went from half brown to all white, the flour dropped from a full cup to 3/4 cup, and the whisking time doubled. Round eleven is the pan my daughter asked for three days in a row.
You need one saucepan, a whisk, and about 15 minutes of hands-on time. Melted chocolate and butter build the rich base, cocoa powder deepens the flavor, and chocolate chips stay soft in little pockets after baking. Below you will find exact amounts, bake times, and fixes for common problems.
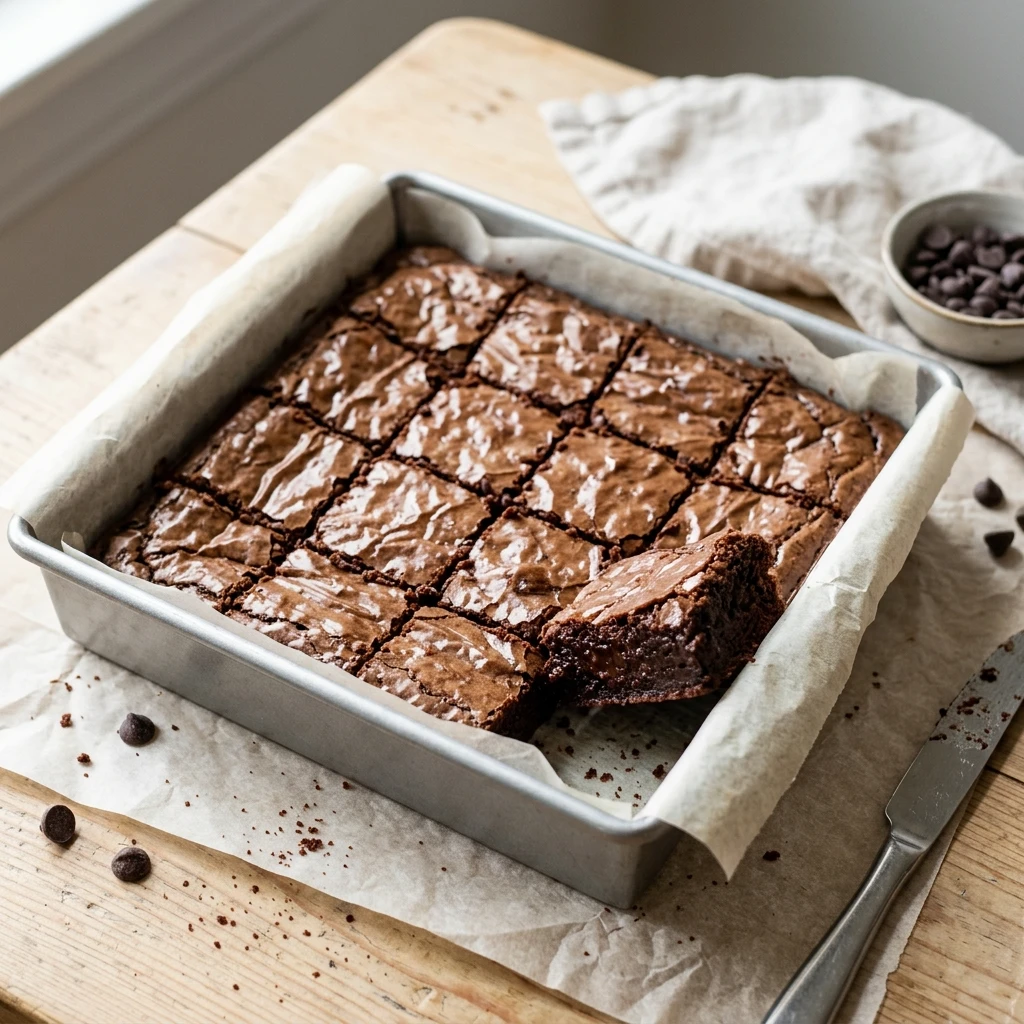
Table of Contents
Why You Will Love These Brownies
- Everything comes from the pantry, and one saucepan means cleanup takes under five minutes.
- Each square has a fudgy center, a shiny crackly top, and a deep cocoa flavor.
- Hands-on time is 15 minutes, so a weeknight craving stays easy.
- Bake the pan a day ahead and the squares slice cleaner the next morning.
- One pan cuts into 16 squares, enough for a bake sale or a family dessert with lunchbox extras.
Recipe Snapshot
- Prep Time: 15 minutes
- Cook Time: 35 minutes
- Cooling Time: 1 hour
- Total Time: 1 hour 50 minutes
- Servings: 16 brownies
- Difficulty: Easy
- Calories per Serving: About 250
- Key Ingredient or Tool: Cocoa powder plus melted semisweet chocolate
- Best For: Bake sales, potlucks, and weeknight dessert
Nutrition Information
- Calories per Serving: About 250
- Protein: 3 g
- Carbs: 33 g
- Fat: 14 g
- Fiber: 2 g
- Sugar: 26 g
- Sodium: 89 mg
- Serving Size: About 1 brownie (2-inch square)
- Servings per Recipe: 16
The 2 grams of fiber per square come mostly from the cocoa powder and chocolate. Sugar supplies most of the 33 grams of carbs, so one square suits an after-dinner treat.
Nutrition values are approximate and calculated per serving using standard ingredient amounts. Values may vary based on brands used and portion sizes.
Ingredients
For the Base
- 3/4 cup (170 g) unsalted butter, cut into pieces (plant-based butter sticks work 1 to 1)
- 4 ounces (113 g) semisweet chocolate baking bar, chopped, such as Ghirardelli (bittersweet works too)
- 1 1/2 cups (300 g) granulated sugar (brown sugar gives a chewier but duller top)
- 3 large eggs, room temperature
- 2 teaspoons alcohol-free vanilla extract
For the Dry Mix
- 3/4 cup (90 g) all-purpose flour, such as King Arthur (a 1 to 1 gluten-free baking blend works)
- 1/2 cup (43 g) unsweetened cocoa powder, sifted (natural or Dutch-process)
- 1/2 teaspoon fine sea salt (or 3/4 teaspoon Diamond Crystal kosher salt)
To Fold In
- 1/2 cup (85 g) semisweet chocolate chips (chopped walnuts also work)
Two chocolates, not one. The melted bar brings cocoa butter, which sets as the pan cools and gives the center its dense bite. Cocoa powder adds the deep flavor that melted chocolate cannot reach alone.
White sugar for the crust. Granulated sugar dissolves into the eggs and rises to the surface during baking, forming the crackly layer. Brown sugar and molasses do not, so keep them out of this pan.
Only 3/4 cup of flour. Flour adds structure, and extra structure pushes the batter toward cake. This recipe keeps it low on purpose.
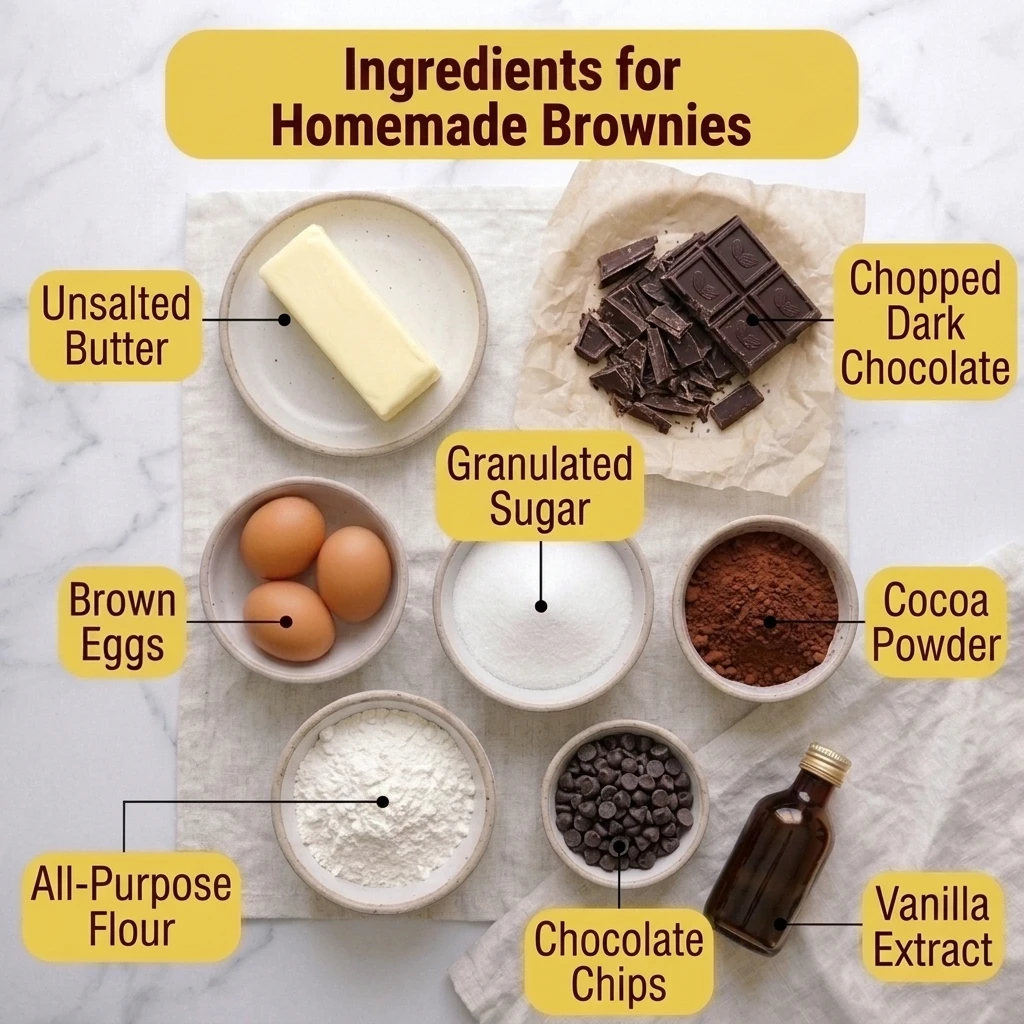
Pro Tip: A cup scooped from the bag packs in more flour than a spooned and leveled cup. Weigh 90 grams and the texture stays fudgy every time.
Equipment Needed
- 9×9-inch light-colored metal baking pan: Dark pans run hotter and darken the edges before the center sets.
- Parchment paper: A 2-inch overhang on two sides lets you lift out the whole slab.
- Medium (3-quart) saucepan: Melt, whisk, and fold in the same pot to save a bowl.
- Balloon whisk: A whisk builds glossy batter without whipping in too much air.
- Silicone spatula: It scrapes the pan corners clean.
- Digital kitchen scale: Weighing the flour and cocoa gives the same result every bake.
Preparation
- Move the oven rack to the center and heat the oven to 350°F.
- Lightly butter the 9×9-inch pan, then line it with parchment, leaving a 2-inch overhang on two sides.
- Set the eggs out 30 minutes ahead, because cold eggs stiffen the melted butter and make the batter harder to whisk smooth.
- Chop the chocolate bar into 1/2-inch pieces so it melts evenly.
- Sift the cocoa powder to remove lumps, then measure the flour, salt, and chips so everything sits ready.
Step-by-Step Instructions
- Melt the butter and chopped chocolate in the saucepan over low heat, stirring for 3 to 4 minutes. Chef’s Note: Slide the pan off the heat while one or two small chocolate pieces still show, and stir until the leftover heat melts them. The mixture is ready when it looks smooth and glossy with no streaks.
- Whisk the sugar and vanilla into the warm mixture for 30 seconds. Rest the pan for 5 minutes, until its side feels warm but not hot.
- Whisk in the eggs one at a time, beating hard for 40 seconds after each. Chef’s Note: These 2 minutes of whisking build the shiny crackly top, so do not shorten them. The batter is ready when it looks thick and glossy and a ribbon holds on the surface for a few seconds.
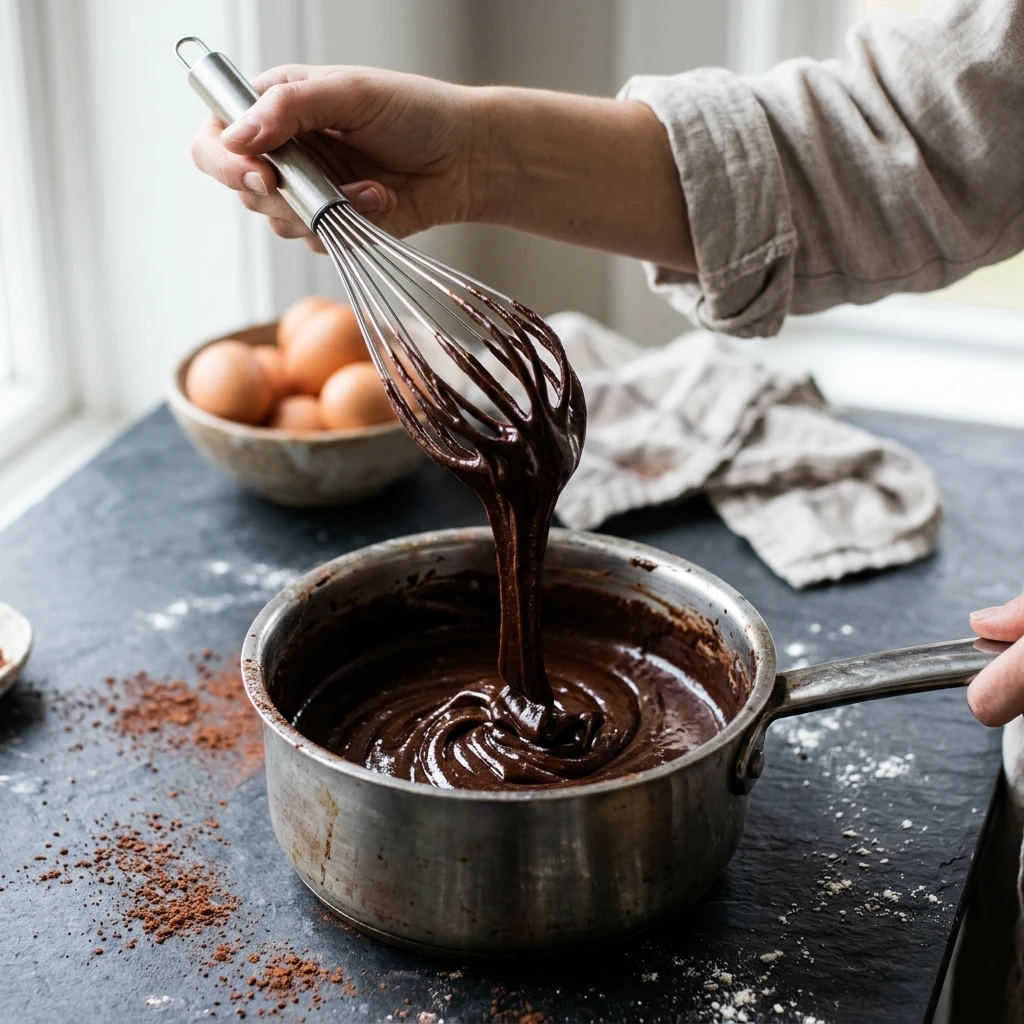
- Add the flour, cocoa powder, and salt. Fold with the spatula for about 15 strokes, until no dry streaks remain and the batter looks like thick, shiny fudge.
- Add the chocolate chips and fold 3 or 4 strokes, until they are evenly scattered through the batter.
- Scrape the batter into the prepared pan and spread it into the corners. Tap the pan on the counter twice, until the surface looks level and shiny.
- Bake on the center rack at 350°F for 30 to 35 minutes, checking at 30. Chef’s Note: Wet batter on the toothpick means 3 more minutes, while a clean toothpick means the pan went too long. They are done when the edges look set and a toothpick pushed 2 inches from the edge shows a few moist crumbs.
- Cool the pan on a wire rack for 1 hour, until the bottom of the pan feels barely warm.
- Lift the slab out by the parchment and cut it into 16 squares with a sharp knife. Wipe the blade clean between cuts so every edge comes out neat.
Expert Tips and Tricks
- My mistake: On test number four I baked a pan for 42 minutes because the middle still wobbled. It cooled into dry, crumbly squares, and a slight wobble is normal.
- Make ahead: Bake the pan the night before, cool it fully, and leave it uncut under a cover on the counter.
- Keep the tops pretty: Slip parchment between layers so the crackly tops do not stick. The squares keep 3 days at room temperature.
- Glass dish: Drop the oven to 325°F and use the same toothpick check, since glass holds heat longer than metal.
- Chop a bar for melting: Chips are made to hold their shape, so they melt less smoothly.
- Skip tasting the batter: The CDC says germs in raw flour and raw eggs are killed only when the batter is baked.
Common Mistakes and Troubleshooting
Dry, crumbly edges. The pan baked too long, because brownies keep cooking in the hot pan after you pull them out. Take the pan out while the toothpick still shows moist crumbs. If it already happened, warm a square for 10 seconds and add ice cream.
A dull, matte top. The eggs and sugar were not whisked long enough for the sugar to dissolve. Whisk the full 2 minutes next time. This pan still tastes great, and a dusting of powdered sugar covers the top.
Messy, smeared squares. Warm squares are still soft inside, so the knife drags. Wait the full hour, then chill the pan for 30 minutes if you want sharp edges.
Brownies stuck to the pan. Skipping the parchment is the usual cause. To free a stuck pan, chill it for 30 minutes and run a thin knife around the edge.
Storage Instructions
- Room Temperature: Up to 3 days in an airtight container with parchment between layers. Frosted squares belong in the refrigerator.
- Refrigerator: Up to 5 days in an airtight glass container. Let squares sit out for 20 minutes before serving.
- Freezer: Up to 3 months. Wrap each square in plastic wrap, bag the squares in a freezer-safe zip bag, and thaw on the counter for 1 hour.
- Reheating: Microwave one square for 10 seconds, or warm it in a 300°F oven for 8 minutes. Dab a dry top with 1/2 teaspoon of melted butter first.
- Make-Ahead Notes: Bake up to 2 days ahead and keep the pan uncut and covered. Whisk the flour, cocoa powder, and salt together up to 1 week early. Mix the batter right before baking.
Storage Trick: Freeze the unwrapped squares on a parchment-lined tray for 1 hour before bagging them. They stay separate, so you can pull out one square at a time.
I write the bake date on masking tape and stick it to each freezer bag. After my third batch, I stopped guessing which bag was oldest.
Variations and Substitutions
These brownies are already vegetarian, since they contain no meat.
- Spicy Mexican Chocolate: Whisk 1/2 teaspoon cinnamon and 1/4 teaspoon cayenne pepper into the dry mix. The heat shows up slowly after the first bite.
- Kid-Friendly: Swap the semisweet chips for milk chocolate chips and cut the pan into 25 small squares. Sweeter chocolate and smaller squares suit little hands.
- Dairy-Free: Use plant-based butter sticks and dairy-free chocolate. The eggs stay, so the pan is vegetarian but not vegan.
- Gluten-Free: Replace the flour with 90 grams of a 1 to 1 gluten-free baking blend. The recipe uses so little flour that the fudgy texture holds up.
- Frosted: Once the pan is fully cool, spread a thin layer of cream cheese frosting on top and keep the squares in the refrigerator.
What to Serve With Brownies
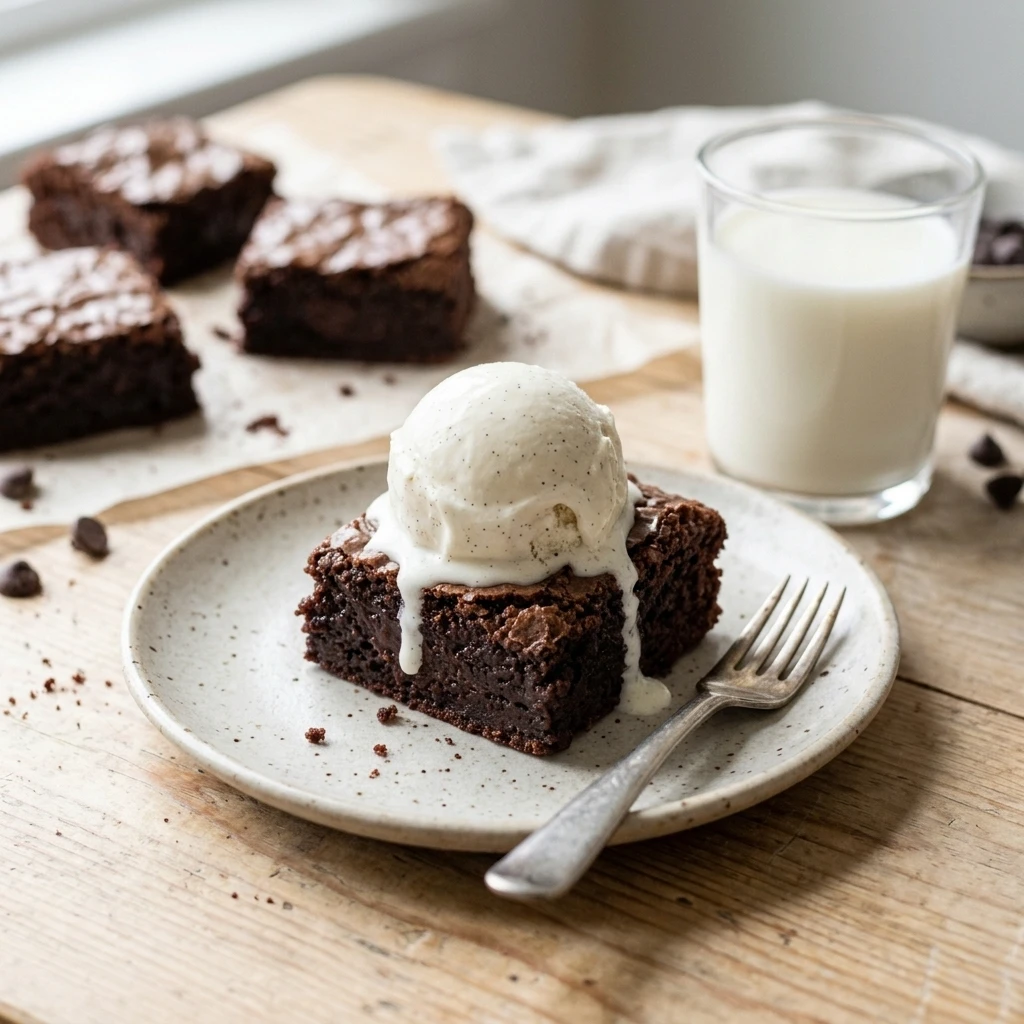
- Vanilla ice cream: A scoop melts into the soft center and cools the dense chocolate.
- Cold milk: Plain, cold milk balances the sweetness of each square.
- Hot chocolate: A mug of homemade hot chocolate with real chocolate turns a square into a cozy dessert for cold evenings.
- Fresh berries: Set chocolate covered strawberries beside a square for a simple dessert plate.
- Dessert board: Arrange squares with whipped cream, raspberries, and sliced bananas for a self-serve party board.
Frequently Asked Questions About Brownies
why are my brownies cakey instead of fudgy
Too much flour or too much air is almost always the cause. Extra flour adds structure, and heavy mixing after the flour goes in or baking powder lifts the batter into a cake crumb. Measure 90 grams of flour, fold it in with about 15 strokes, and skip any leavening. Overbaked brownies also turn dry and cake-like, so check the toothpick at 30 minutes.
how do you know when brownies are done without a toothpick
Nudge the pan gently. The outer 3 inches should stay still, while only a small patch in the very center jiggles. The edges should look set and pull slightly from the parchment, and the top should look shiny with fine cracks instead of wet. I also press an edge with a fingertip, and it should spring back. If the whole surface ripples like liquid, give the pan 3 more minutes.
can you freeze brownies
Yes, brownies freeze well for up to 3 months. Wrap each cooled square in plastic wrap, then store the squares in a freezer-safe zip bag with the air pressed out. Thaw a square on the counter for 1 hour, or overnight in the refrigerator for a lunchbox treat. A full batch spreads over weeks this way, and the center stays soft after thawing.
can i use oil instead of butter in brownies
Yes, use 1/2 cup plus 1 tablespoon of neutral oil for the 3/4 cup of butter. Oil is pure fat, while butter is about 81 percent fat according to USDA data, so you need less oil. Expect a slightly more tender, less buttery brownie. Melt the chocolate on its own over low heat, then whisk it into the oil and sugar before adding the eggs.
why are my brownies sinking
A small dip in the middle is normal for fudgy brownies, since they settle as they cool. A deep sunken center usually means the pan was underbaked and the middle never set. Ovens can run hotter or cooler than the dial says, so an oven thermometer takes out the guesswork. If the center still looks wet at 35 minutes, bake 3 more minutes.
Final Thoughts on Brownies
Every oven bakes a little differently, so trust the toothpick over the timer. A pan that comes out with a few moist crumbs sets into the fudgy center you want, and you can always add 3 minutes but you can never take them back. Write your oven’s exact time on the recipe card after the first bake, and the second pan comes out perfect.
I bake a pan on the first cold Friday of the school year, and the corner squares are gone before the milk is poured. After eleven test rounds, I still reach for a center piece, which stays the softest.
If you loved this recipe, save it to your chocolate dessert Pinterest board so you can find it easily later!
The Best Fudgy Brownies With a Shiny Crackly Top
Ingredients
Equipment
Method
- Move the oven rack to the center and heat the oven to 350°F. Lightly butter a 9×9-inch pan and line it with parchment, leaving a 2-inch overhang on two sides.
- Melt the butter and chopped chocolate in the saucepan over low heat, stirring for 3 to 4 minutes. Pull the pan off the heat while one or two small pieces still show, and stir until the mixture looks smooth and glossy with no streaks.
- Whisk the sugar and vanilla into the warm mixture for 30 seconds. Rest the pan for 5 minutes, until its side feels warm but not hot.
- Whisk in the eggs one at a time, beating hard for 40 seconds after each, about 2 minutes in total. The batter is ready when it looks thick and glossy and a ribbon holds on the surface for a few seconds.
- Add the flour, cocoa powder, and salt. Fold with the spatula for about 15 strokes, until no dry streaks remain and the batter looks like thick, shiny fudge.
- Add the chocolate chips and fold 3 or 4 strokes, until they are evenly scattered.
- Scrape the batter into the pan, spread it into the corners, and tap the pan on the counter twice, until the surface looks level and shiny.
- Bake on the center rack at 350°F for 30 to 35 minutes, checking at 30. The brownies are done when the edges look set and a toothpick pushed 2 inches from the edge shows a few moist crumbs. Wet batter means 3 more minutes, and a clean toothpick means the pan went too long.
- Cool the pan on a wire rack for 1 hour, until the bottom of the pan feels barely warm. Lift the slab out by the parchment and cut 16 squares with a sharp knife, wiping the blade between cuts.
Notes
Use white granulated sugar only. Brown sugar gives a chewier but duller top.
Storage: room temperature up to 3 days, refrigerator up to 5 days, freezer up to 3 months.