Easy No Bake Cheesecake With a Creamy Filling and Graham Crust
Cold, creamy cheesecake with a crumbly graham cracker base does not need an oven. This no bake cheesecake uses a filling that gets its body from full-fat cream cheese and whipped heavy cream, so there are no eggs or setting powders to measure. The result is meant to be soft and airy, with enough structure to cut into chilled wedges.
A smooth filling still needs a long chill before it can support its own sides.Plan for at least six hours of chilling because the filling needs time to firm up before slicing. Assemble it ahead of a birthday and decorate it at serving time.
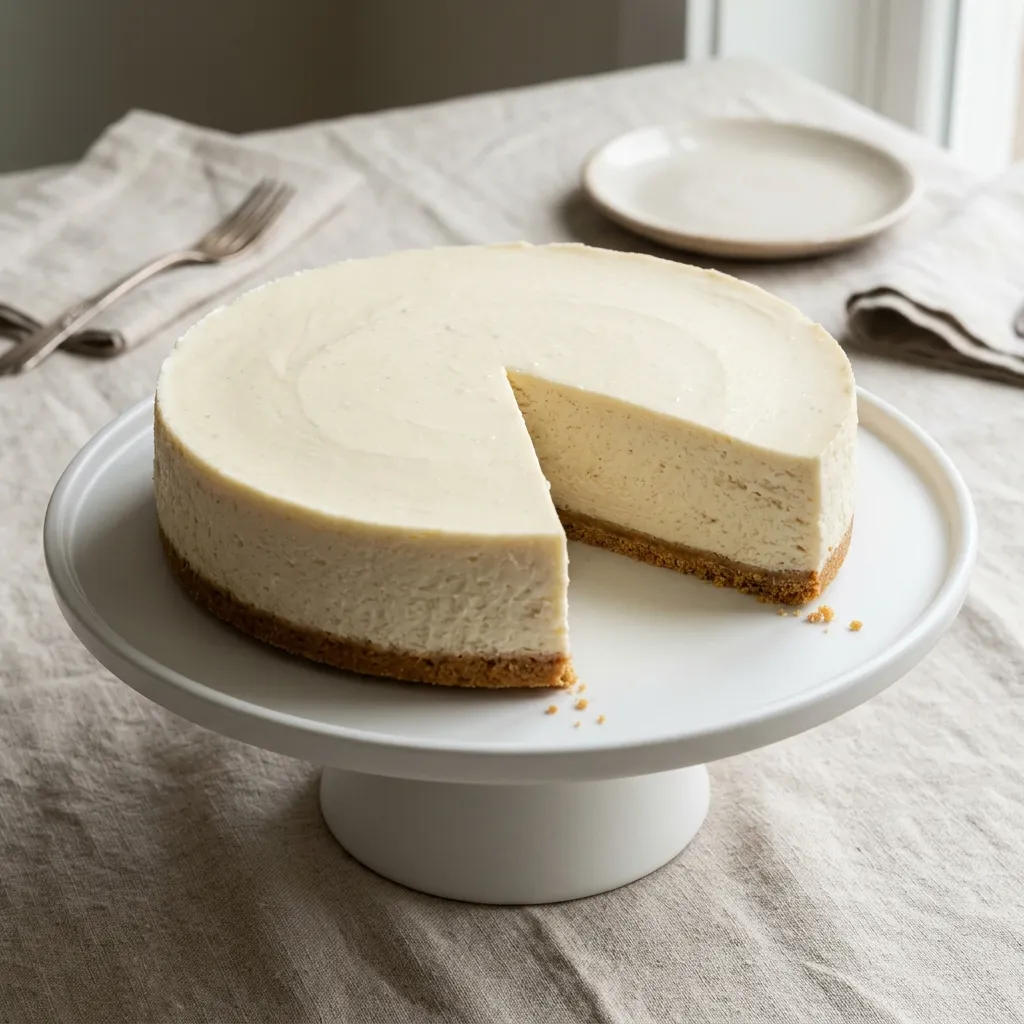
Table of Contents
Why You Will Love This No Bake Cheesecake
- No oven: The crust sets cold, with no water bath or oven. The oven stays free.
- Airy center: Whipped heavy cream lightens the rich cream cheese without making the filling taste watery.
- One pan: A 9-inch springform pan gives you a neat round cake with little shaping or trimming.
- Make it early: Make dessert six hours before guests arrive.
- Simple finish: Try sliced fruit or leave it plain. Guests can choose toppings.
Recipe Snapshot for Busy Cooks
- Prep Time: 30 minutes
- Cook Time: 0 minutes
- Chill Time: 6 hours
- Total Time: 6 hours 30 minutes
- Servings: 12 slices
- Difficulty: Easy
- Calories per Serving: About 399
- Key Tool: 9-inch springform pan
- Best For: Make-ahead birthdays and weekend desserts
Nutrition Information Per Slice
- Calories per Serving: About 399
- Protein: 5 g
- Carbs: 23 g
- Fat: 33 g
- Fiber: 0.4 g
- Sugar: 16 g
- Sodium: 278 mg
- Serving Size: About 1 slice (107 g)
- Servings per Recipe: 12
No bake cheesecake is a rich dairy dessert, with most of its fat coming from cream cheese, butter, and heavy cream. These figures assume 12 equal slices and no toppings.
Nutrition values are approximate and calculated per serving using standard ingredient amounts. Values may vary based on brands used and portion sizes.
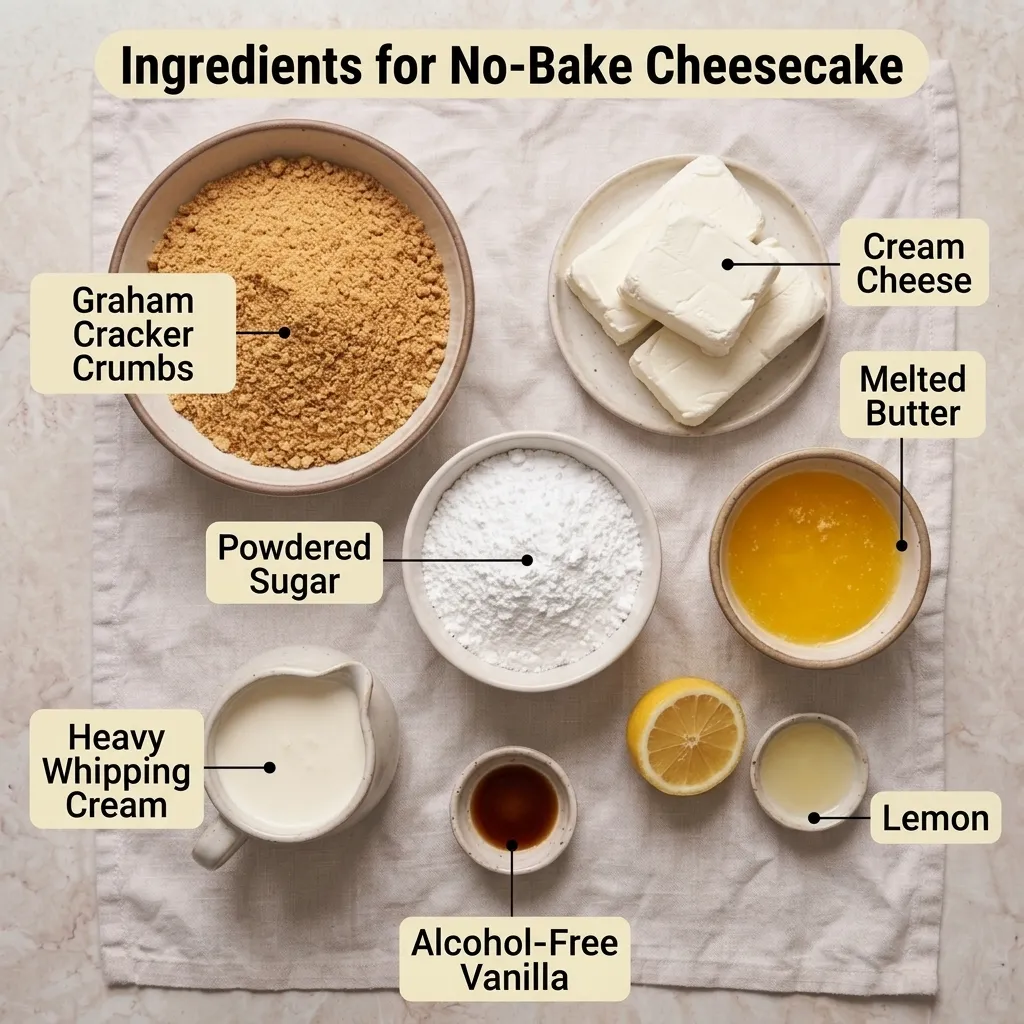
Ingredients for a Creamy Filling and Firm Crust
For the graham cracker crust:
- 1 1/2 cups (150 g) graham cracker crumbs: Fine crumbs pack evenly. Substitute equal-weight plain crisp cookies if preferred. Crush crackers finer than peas.
- 6 tablespoons (85 g) unsalted butter, melted: Cold butter binds the crumbs. Plant-based baking blocks may give a softer crust.
For the cream cheese filling:
- Three 8-ounce blocks (680 g) full-fat cream cheese, softened: Use firm blocks, such as Philadelphia Original; check the label.
- 1 cup (120 g) powdered sugar: Dissolves quickly. Granulated sugar may feel gritty.
- 1 cup (227 g) cold heavy whipping cream: Builds airy volume; light cream is unsuitable. Look for heavy whipping cream, not half-and-half, on the carton.
- 1 tablespoon (14 g) fresh lemon juice: Adds tang; omit for a milder filling. Measure it rather than squeezing freely into the bowl, since extra juice thins the mixture.
- 1 teaspoon (4 g) alcohol-free vanilla flavoring: Choose clearly labeled alcohol-free flavoring.
Firm cheese, rich cream, and fine crumbs make this chilled cake easier to slice.
Equipment Needed for Neat Slices
- 9-inch springform pan: Remove the ring without flipping the cake.
- Electric hand mixer: Smooths the cheese before whipping the cream. Wash and dry the beaters before switching bowls.
- Two mixing bowls: Whip cream separately to build volume.
- Silicone spatula: Scrape out hidden white streaks.
- Flat-bottomed measuring cup: Makes an even crust. Press near the sides first so the edge does not crumble at release.
- Offset spatula: Levels the filling gently.
Preparation Before You Start
Clear refrigerator space and check that it is 40°F or colder. Line the 9-inch springform pan base with parchment. There is no oven to preheat.
Let the cream cheese sit at room temperature for about 20 minutes within your prep period, just until a finger can leave a shallow dent. Keep the heavy cream refrigerated until you need it. A chilled bowl helps cream whip. Measure the sugar and lemon juice, crush the crackers finely, and melt the butter before you begin mixing. Set a chill timer. Keep dairy handling brief.
Step-by-Step No Bake Cheesecake Instructions
- Mix the base: Stir the 1 1/2 cups graham crumbs with 6 tablespoons melted butter for 1 minute. Chef’s Note: Squeezed crumbs should resemble damp sand.
- Shape the crust: Press the buttered crumbs firmly over the lined pan base for 2 minutes. The layer should look flat, compact, and even to the edges.
- Cool the crust: Refrigerate the base for 15 minutes while making the filling. The crumbs should feel firm.
- Beat the cheese: Mix the 24 ounces softened cream cheese with 1 cup powdered sugar for 2 minutes, scraping the bowl once. Chef’s Note: Stop when the mixture looks glossy and has no visible white lumps.
- Flavor the filling: Blend in 1 tablespoon lemon juice and 1 teaspoon alcohol-free vanilla for 20 seconds. No liquid streaks should remain.
- Whip the cream: Beat the 1 cup cold heavy whipping cream in a clean bowl for 2 to 4 minutes. Chef’s Note: When you lift the beaters, the peaks should stand up rather than bend over.
- Fold the layers: Gently fold the whipped cream into the cheese mixture in two additions for about 1 minute. The filling should look billowy, without streaks.
- Fill the pan: Spoon the mixture over the chilled base and level it with an offset spatula for 1 minute. The filling should reach the sides evenly.
- Chill and release: Cover without touching the filling and refrigerate for at least 6 hours at 40°F or colder. The center should hold a shallow fingerprint and each cold slice should keep its shape.
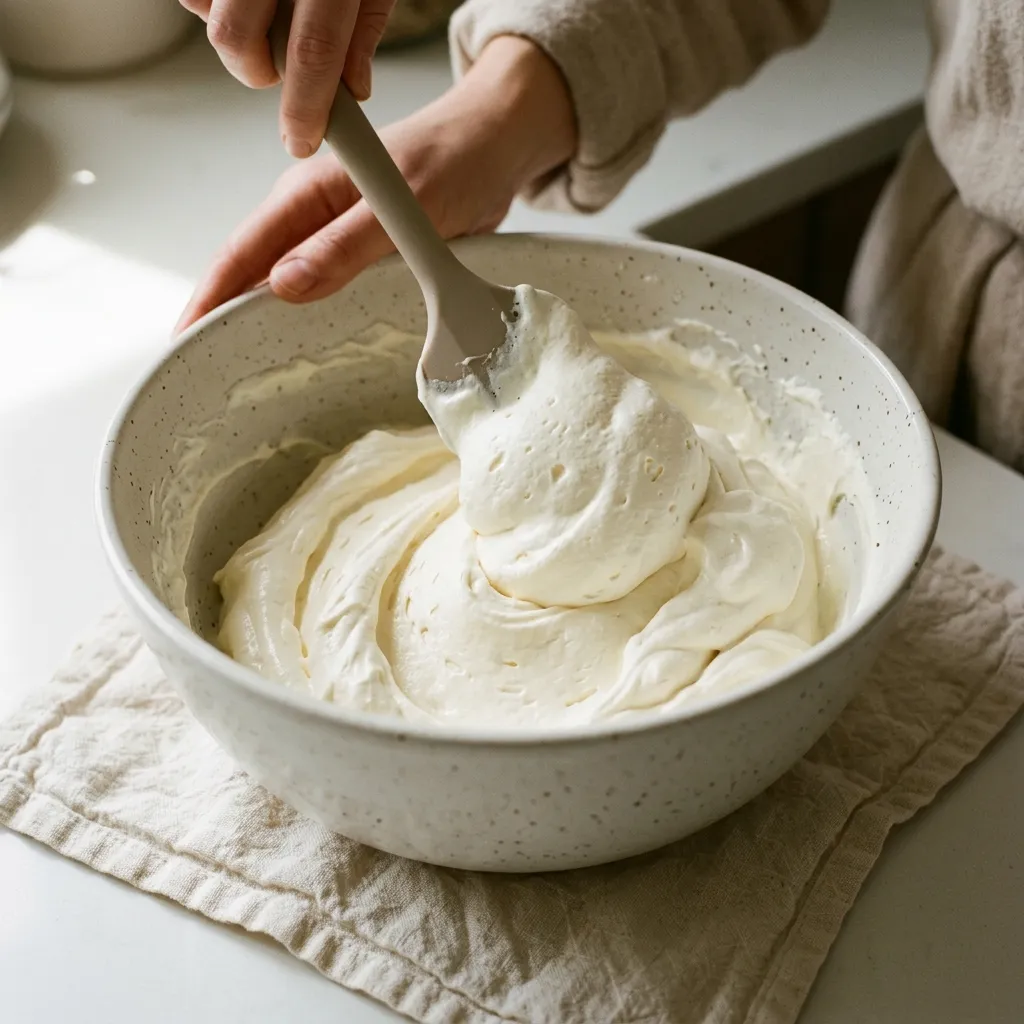
Pro Tip: Before folding, lift a spoonful of whipped cream. A firm peak stays upright for several seconds; a drooping tip means you should keep whipping briefly before combining the bowls.
Expert Tips for a Better Texture
- Do not flood the crust: Measure the melted butter. Extra butter leaves oily patches.
- Scrape between beats: Scrape the bottom to prevent cheese lumps.
- Protect the air: Fold slowly to preserve the whipped air. Rotate the bowl while bringing the spatula up through the middle.
- Keep an overnight option: Make the cake a day ahead for extra chill time.
- Slice cold: Warm and dry the knife between cuts. Wet knives can smear crumbs.
- Plan the leftovers: Cover and refrigerate within 2 hours of serving, then finish within 3 days for good quality. Use a tall container so the lid never touches the top.
Common Mistakes and How to Fix Them
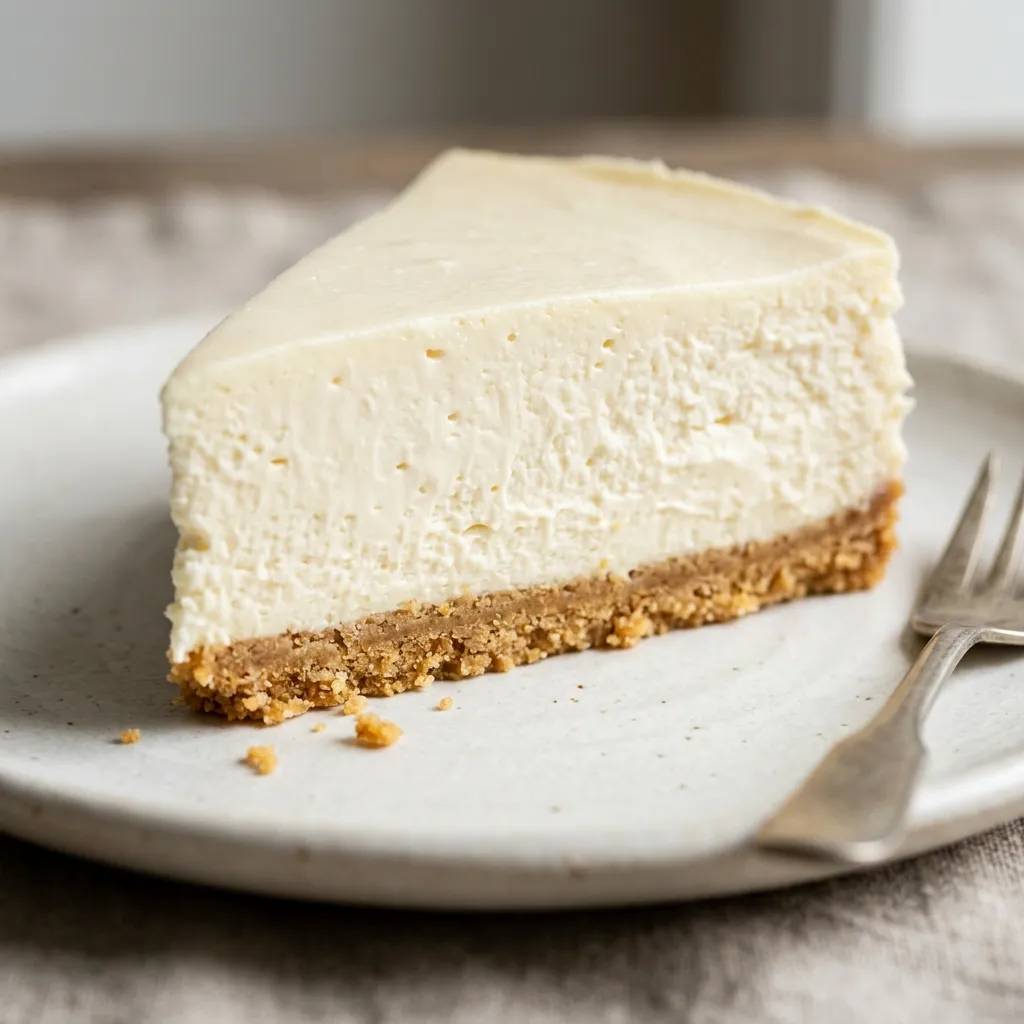
The filling stays loose: Spreadable cheese or soft whipped cream prevents setting. Next time, use blocks and firm peaks. If your no bake cheesecake remains soft after 6 hours, serve it in chilled dessert cups instead of forcing a slice.
The crust falls apart: Coarse crumbs separate. Crush and press them more firmly. For this batch, lift portions with a wide spatula and collect loose crumbs as a topping.
Little cheese lumps remain: Cold cheese leaves lumps. Soften briefly and beat before adding liquids. Small lumps already folded into the filling cannot be removed without losing some air.
The top looks grainy: Overwhipping causes graininess. Stop at firm peaks. Restart cream if it separates. If it starts looking rough, fold in a small spoonful of unwhipped cream from the measured portion, if any remains, before mixing with cheese.
Slices slump on plates: Warm filling slumps. Keep it cold and use a dry knife. If serving outdoors, bring out only the pieces people will eat right away. Return the remaining cake to the fridge between serving rounds.
How to Store No Bake Cheesecake
- Room Temperature: Not recommended for storage. Serve chilled and return to the refrigerator within 2 hours, or within 1 hour above 90°F.
- Refrigerator: Keep covered in the pan or in an airtight glass container at 40°F or colder for up to 3 days.
- Freezer: Wrap individual chilled slices tightly and place in a freezer-safe container at 0°F for up to 1 month for best texture.
- Reheating: None. Do not warm the dessert; thaw frozen slices in the refrigerator for 6 hours and serve cold.
- Make-Ahead Notes: Finish the plain cake 1 day ahead and hold toppings separately until serving.
I would store fruit separately to keep juice off the crust. Separate frozen slices with parchment.
Storage Trick: Put a small sheet of parchment against the exposed cut side before covering a partly eaten cheesecake. It helps reduce drying at the cut edge without pressing onto the decorated top.<
Variations and Substitutions to Try
Kid-Friendly Vanilla: Omit the 1 tablespoon lemon juice if your household prefers less tang. The cheesecake will taste milder.
Warm Spice: Add a small pinch of ground cinnamon to the crumb mixture for a gently spiced crust. A pinch of ginger adds more warmth.
Vegetarian Option: The base recipe uses no gelatin and is suitable for lacto-vegetarians when every packaged ingredient meets their needs. A dairy-free version requires another tested formula.
Gluten-Free Crust: Replace the graham crumbs with 1 1/2 cups (150 g) finely crushed certified gluten-free crisp cookies. Check that the pressed crumbs bind.
Fruit Finish: Add fresh strawberry slices or raspberries after chilling, not before. Keep fruit juice off the crust.
What to Serve With This Cheesecake
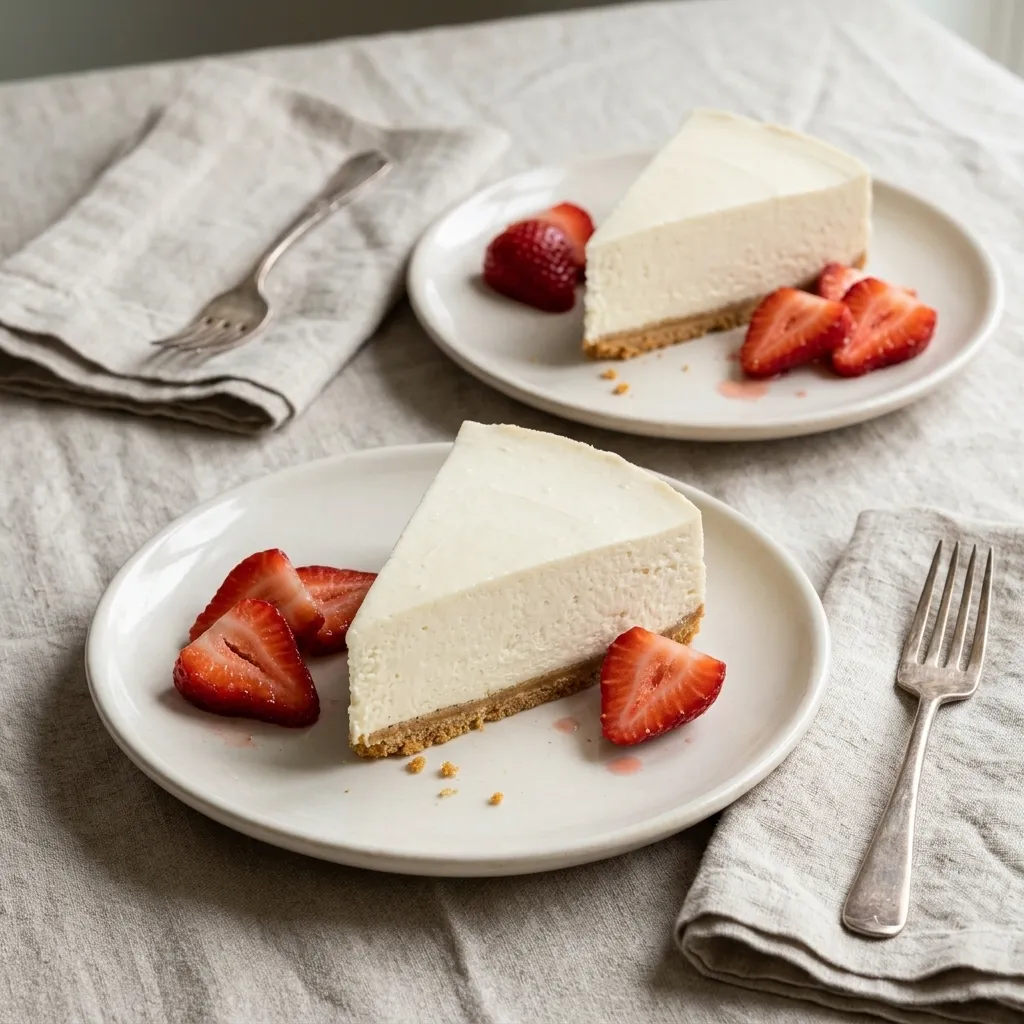
Fresh berries: Place a few sliced strawberries beside each wedge for tartness and color without a cooked sauce. Dry fruit first.
Chocolate peanut butter cookies: For a dessert spread with two textures, serve small pieces of no-bake chocolate peanut butter cookies alongside cold slices.
Chocolate cookie bites: Set out Oreo balls as a bite-size option when guests want something chocolatey after their cheesecake.
Strawberry layer cake: A slim portion of strawberry cake offers a fruit-forward choice for a mixed dessert table.
Unsweetened iced tea: Its clean finish balances the rich filling without making dessert feel sweeter. Serve it chilled.
Frequently Asked Questions About No Bake Cheesecake
Can I make no bake cheesecake the day before?
Yes. Making no bake cheesecake one day ahead gives the filling more than the minimum 6 hours to settle in the refrigerator. Leave your no bake cheesecake in the springform pan, cover the top without touching the surface, and keep it at 40°F or colder. Add fruit or sauce just before you serve it. If you are taking it to another home, pack it in a cooler with ice packs and put it back in the refrigerator as soon as you arrive.
Why my no-bake cheesecake doesn’t set?
The most common problems are soft spreadable cheese, cream that never reached firm peaks, or too little chilling time. Check whether your filling was thick enough before it went into the pan. If it is still runny after an overnight rest, freezing it briefly may make slicing possible but will not repair the original mixture. It is safer to portion a loose filling into dessert cups and test the cheese and cream choices next time.
Can I use whipped cream cheese instead of blocks?
No, not as a direct replacement in this recipe. Whipped cream cheese and many tub spreads have a softer structure than regular full-fat blocks. The finished no bake cheesecake needs the firmness of cold cream cheese as well as the air in whipped heavy cream. If you only have spreadable cheese, choose a recipe built specifically for it, preferably with a tested setting ingredient. That is more reliable than trying to correct a loose filling after mixing.
How long should a no-bake cheesecake chill before serving?
Plan on at least 6 hours in a refrigerator at 40°F or colder. The top should be cool and gently springy, and the center should hold a shallow mark when touched. An overnight chill is a useful buffer if you are serving company. A frozen outer ring with a liquid middle is not the same as a properly chilled cake. Cut a small sample wedge before removing the whole springform ring if you are unsure.
Do I need gelatin to make a no-bake cheesecake?
Not for this version. Firm full-fat cream cheese and heavy cream whipped to standing peaks can create a soft, sliceable filling after a long chill. It will not feel as dense or bouncy as a gelatin-set dessert. If you need very sharp edges for a warm outdoor event, use a tested stabilized recipe rather than adding an unmeasured setting powder. Keep this cake refrigerated until serving because its texture depends on staying cold.
A Final Note Before You Slice
Keep the cake in its pan until serving. Release the ring gently and wipe the knife between cuts. If the center is softer than expected, extra refrigeration may help, but a truly loose filling is better served in glasses. I chose a plain base for this no bake cheesecake because it leaves room for different toppings without complicating the filling.
If you loved this recipe, save it to your dessert Pinterest board so you can find it easily later!
Easy No Bake Cheesecake With a Creamy Filling and Graham Crust
Ingredients
Equipment
Method
- Stir 1 1/2 cups crumbs and 6 tablespoons melted butter for 1 minute, until the crumbs hold together like damp sand.
- Press crumbs across the lined 9-inch springform base for 2 minutes, until flat and compact.
- Refrigerate the crust for 15 minutes while preparing the filling, until firm to the touch.
- Beat 24 ounces softened cream cheese and 1 cup powdered sugar for 2 minutes, scraping once, until glossy and lump-free.
- Blend in 1 tablespoon lemon juice and 1 teaspoon alcohol-free vanilla for 20 seconds, until no liquid streaks remain.
- Whip 1 cup cold heavy cream for 2 to 4 minutes in a clean bowl, until peaks stand upright.
- Fold whipped cream into the cheese in two additions for about 1 minute, until billowy with no visible streaks.
- Fill the chilled crust and level with the offset spatula for 1 minute, until the filling meets the pan sides evenly.
- Cover without touching the filling and refrigerate at 40°F or colder for at least 6 hours, until the center holds a shallow fingerprint and slices keep their shape.
Notes
Storage: refrigerate covered for up to 3 days; freeze wrapped portions at 0°F for up to 1 month for best quality.