Red Velvet Cake With Cream Cheese Frosting and Tender Layers
A slice of red velvet cake should feel tender even after it has cooled, with a mild cocoa flavor that leaves room for tangy cream cheese frosting. The red velvet cake crumb gets attention first, but the balance of soft cake and creamy topping is what makes a second slice tempting.
This two-layer version uses both butter and a neutral oil. Butter lends flavor, while oil helps the crumb stay pleasant after chilling. Buttermilk and a small amount of vinegar give the batter its familiar tang. A measured dose of natural cocoa keeps the cake from tasting like a full chocolate layer cake.
I think the hardest part of this dessert is knowing when to stop mixing and when to start frosting. Both moments matter more than fancy decorations. The directions below focus on those decisions, plus the cooling time that a stacked cake needs. Plan the baking for a day when the layers can sit undisturbed on a rack, and save the final spreading for when they feel completely cool.
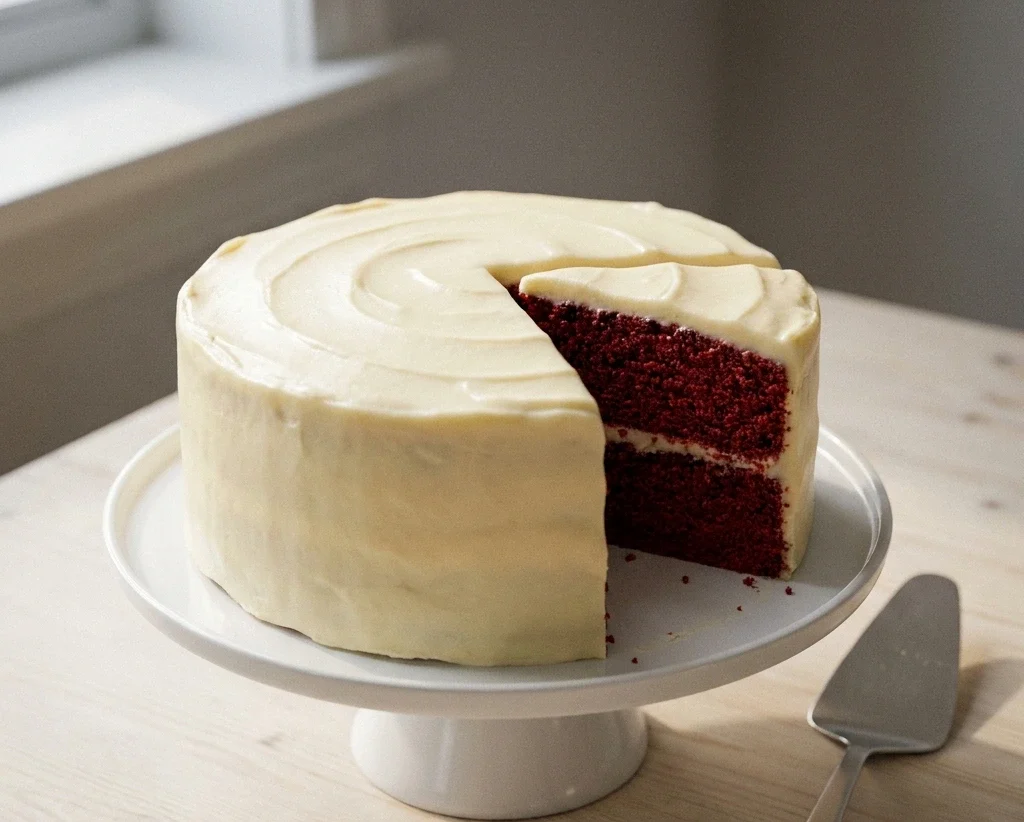
Table of Contents
Why You Will Love This Red Velvet Cake
- Red velvet cake uses pantry baking staples, with just buttermilk, cream cheese, and red coloring to check for before shopping.
- Natural cocoa gives gentle chocolate flavor without hiding the butter and vanilla notes.
- Two 9-inch red velvet cake layers are easier to fill and level than several thin layers.
- The frosting spreads without piping equipment, so decorating can stay simple.
- You can freeze the unfrosted layers ahead of a birthday or family gathering.
Recipe Snapshot for Your Baking Plan
- Prep Time: 45 minutes
- Cook Time: 30 to 35 minutes
- Cooling Time: 90 minutes
- Total Time: 2 hours 50 minutes, using the longer bake time
- Servings: 12 slices
- Difficulty: Medium
- Calories per Serving: About 718
- Key Tool: Two 9-inch round cake pans
- Best For: Birthdays and make-ahead dessert tables
Nutrition Information per Slice
- Calories per Serving: About 718
- Protein: 7 g
- Carbs: 88 g
- Fat: 39 g
- Fiber: 1 g
- Sugar: 67 g
- Sodium: 367 mg
- Serving Size: About 1/12 of the frosted cake
- Servings per Recipe: 12
The cream cheese frosting and added sugars account for much of the energy in each slice. Cutting twelve even portions makes the estimate more useful than guessing from a large wedge. Red velvet cake is meant to be enjoyed as a treat, not a high-protein snack.
Nutrition values are approximate and calculated per serving using standard ingredient amounts. Values may vary based on brands used and portion sizes.
Ingredients for Cake and Cream Cheese Frosting
For the cake layers
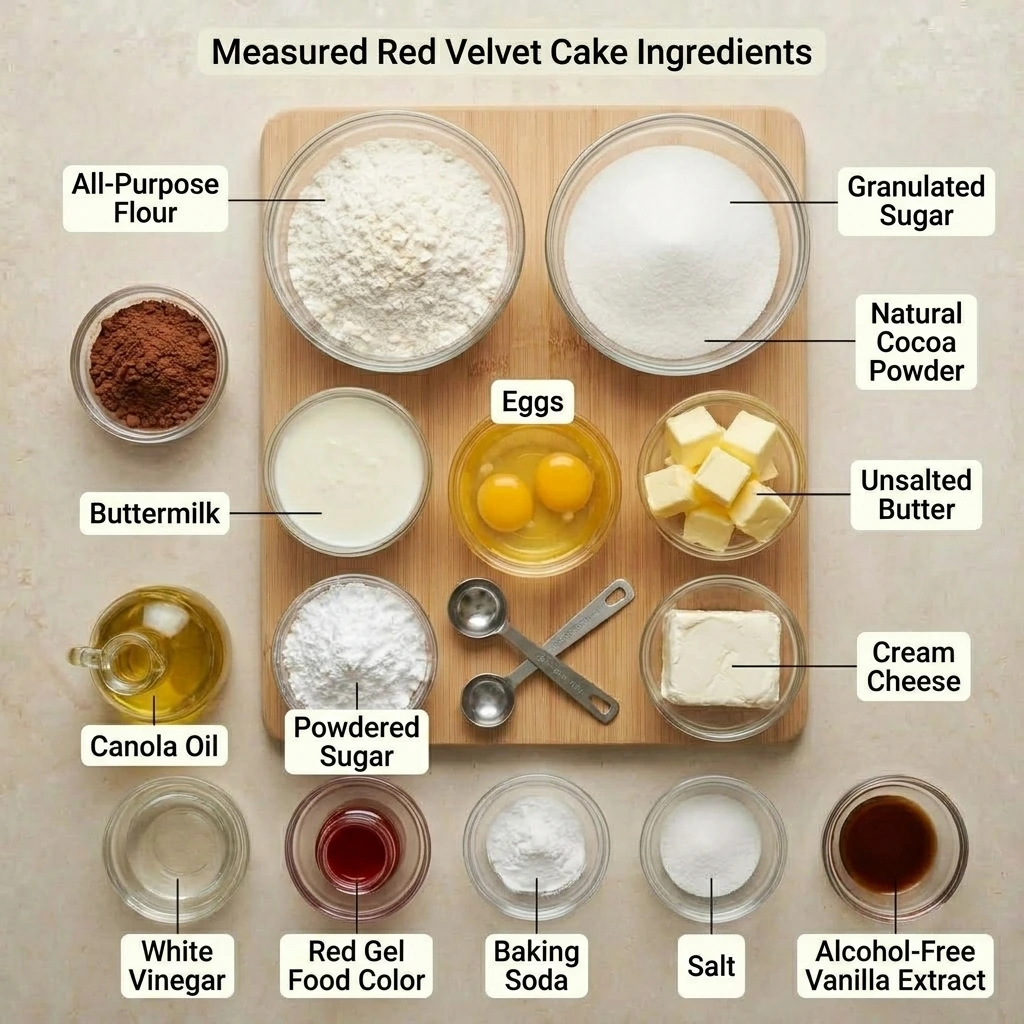
- 2 1/2 cups (300 g) all-purpose flour: Weigh if possible. King Arthur flour offers a 120 g cup reference.
- 1 1/2 cups (300 g) granulated sugar: Sweetens and tenderizes.
- 2 tablespoons (10 g) natural unsweetened cocoa powder: Avoid Dutch-process for lighter color.
- 1 teaspoon baking soda and 1/2 teaspoon table salt: Measure level.
- 1/2 cup (113 g) unsalted butter: Softened, never melted.
- 1/2 cup (110 g) canola oil: Substitute neutral vegetable oil.
- 2 large eggs: Room temperature.
- 1 cup (245 g) whole buttermilk: Supplies liquid and acidity.
- 2 teaspoons alcohol-free vanilla flavoring and 1 teaspoon white vinegar: For cake.
- 2 teaspoons suitable red gel food coloring: Check the carrier and additives.
For the frosting
- 16 ounces (454 g) full-fat block cream cheese: Use suitable cultures; keep cool.
- 1/2 cup (113 g) unsalted butter: Softened.
- 4 cups (480 g) powdered sugar: Sift lumps.
- 1 teaspoon alcohol-free vanilla flavoring: For frosting.
Buttermilk gives red velvet cake its tang and helps the soda work; plain milk is not identical. Block cream cheese holds shape better than spreadable tubs. Swapping either can change the texture.
Equipment You Will Need
- Two 9-inch round cake pans, at least 2 inches deep: Matching sizes help the layers bake evenly.
- Parchment rounds: Cut them to fit so the cake releases without tearing.
- Electric hand mixer or stand mixer: A low setting helps prevent overmixing after flour goes in.
- Wire cooling rack: Air under the layers limits trapped steam.
- Offset spatula: Its angled blade smooths frosting without dragging crumbs.
- Digital kitchen scale: Weighing flour avoids a densely packed measuring cup.
Preparation Before You Mix the Batter
Set out the butter, eggs, and buttermilk early enough to lose their refrigerator chill. Leave the cream cheese cool rather than warm or glossy. Measure the powdered sugar in its own bowl so it is ready when the layers have cooled.
Heat the oven to 350°F with a rack in the center. Grease both 9-inch pans, fit parchment rounds into the bottoms, then grease the parchment lightly. Combine the flour, natural cocoa, baking soda, and salt in one bowl. Put the sugar, butter, oil, eggs, vanilla, vinegar, coloring, and buttermilk within reach. This layout keeps the batter moving once mixing begins.
Step-by-Step Red Velvet Cake Instructions
- Cream butter and sugar. Beat 1/2 cup cake butter with granulated sugar for 2 minutes. Chef’s Note: Scrape the bowl; the mixture should look lighter and fluffy.
- Add eggs and oil. Beat in eggs individually, add oil, and mix 1 minute. No obvious egg streaks should remain.
- Mix colored liquid. Stir buttermilk, 2 teaspoons cake vanilla, vinegar, and gel for 30 seconds. Chef’s Note: Color should be uniform.
- Combine batter. Alternate dry ingredients and colored buttermilk in three additions, mixing on low for 1 minute. Stop when flour streaks disappear.
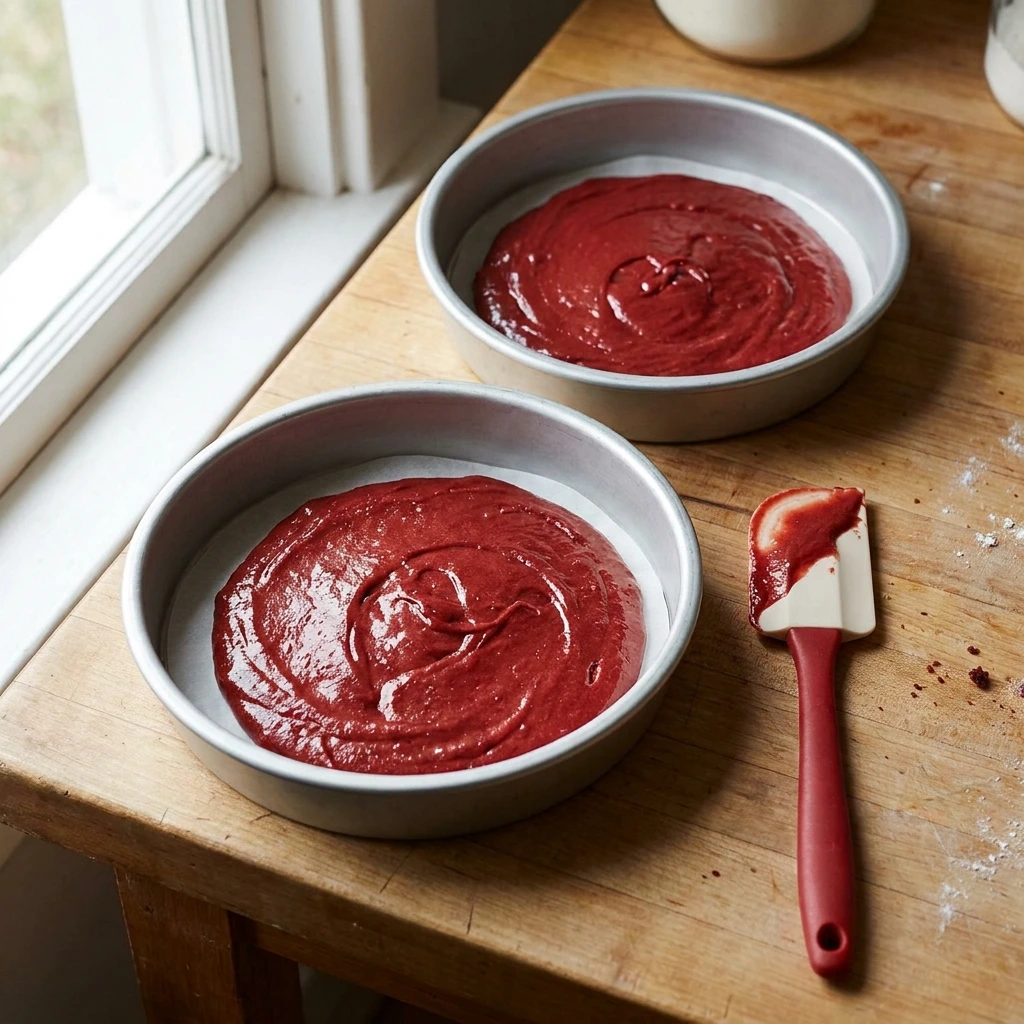
- Divide batter. Spread evenly between pans in 1 minute. Chef’s Note: Tap pans once; surfaces should be level.
- Bake. Set pans on the center rack at 350°F for 30 to 35 minutes. Tops should spring back and a center toothpick should show moist crumbs, not wet batter.
- Cool. Rest 15 minutes in pans, then 75 minutes on a rack. The undersides should feel completely cool.
- Beat frosting. Mix cream cheese and remaining 1/2 cup butter for 2 minutes; add powdered sugar and 1 teaspoon vanilla for 2 minutes. Soft spatula ridges should hold.
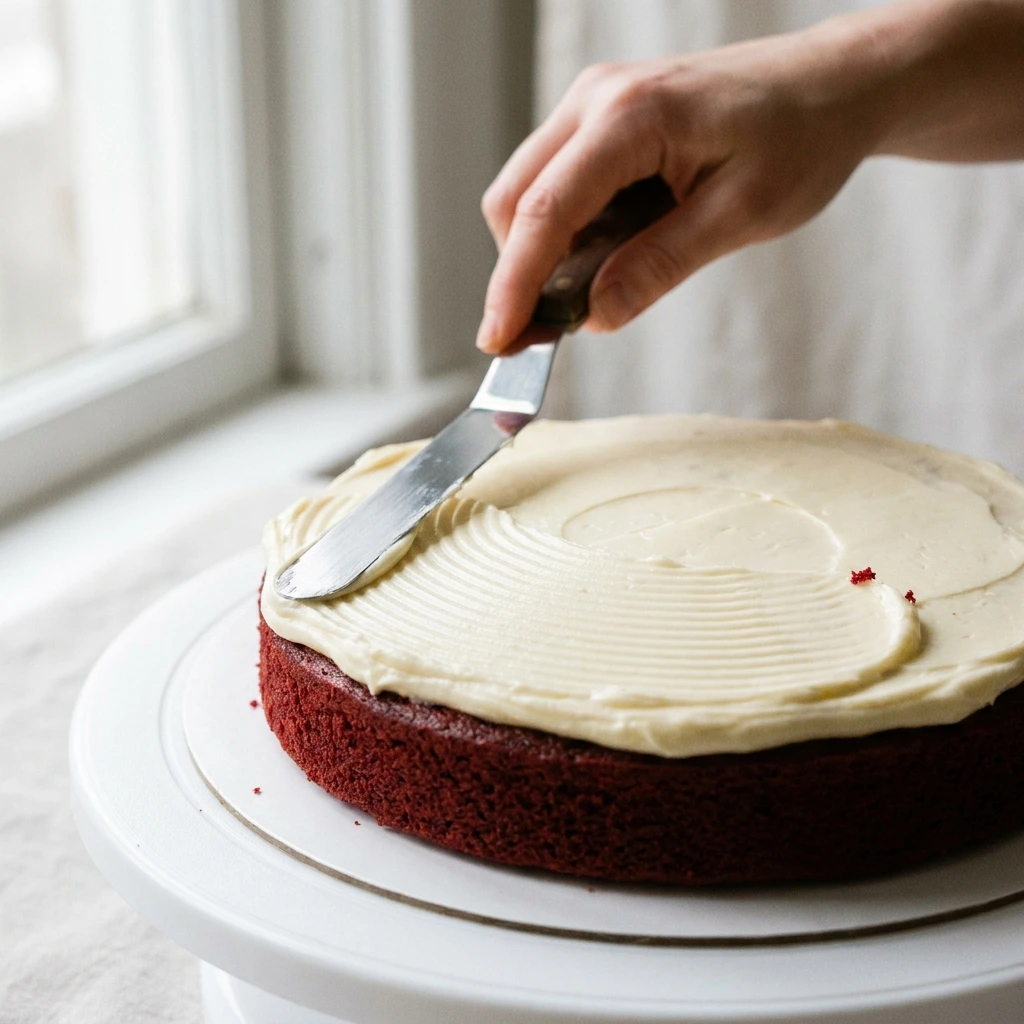
- Assemble. In 10 minutes, fill between layers and coat top and sides with frosting. The layers should stand straight without sliding.
Place the second layer with its flat underside facing up. That gives you a level surface without trimming the dome and reduces the amount of frosting needed across the top.
Expert Tips for a Tender Crumb
- Weigh the flour. A heaped cup can make the crumb dry even if the timer is accurate.
- Use the correct cocoa. Dark Dutch-process powder produces a browner batter and may alter the soda reaction.
- Keep the mixer slow near the end. Extra beating after adding flour can produce a tighter cake.
- Watch pan depth. Batter crowded into a shallow pan can rise over the rim instead of baking evenly.
- Make the layers ahead. Wrap cooled, unfrosted cakes and freeze them for up to 2 months.
- Protect leftover slices. Refrigerate in an airtight cake box within 2 hours of serving and use within 4 days.
One mistake I would actively guard against is frosting a cake that feels cool on top but warm underneath. Turn the layer over briefly and check the base. A few more minutes on the rack is easier than repairing a tilted frosted cake.
Common Mistakes and How to Fix Them
The cake looks brown instead of red
Dark cocoa or too little concentrated coloring can mute the red. Check that your cocoa is natural and use the measured gel. You cannot recolor a baked layer, but pale frosting still gives the finished slices a clear contrast.
The middle sinks after baking
An underbaked center may collapse. Test the middle, not the edge; if wet, bake 3 more minutes and retest. Level a cooled sunken cake before filling.
The crumb tastes dry or feels dense
Too much packed flour, long baking, or overmixing can cause this. Weigh ingredients and start checking at 30 minutes. For a dry finished slice, serve a smaller portion with an extra spoon of frosting rather than soaking the whole cake.
The frosting is runny
Warm or spreadable cream cheese loosens frosting. Use cool blocks and beat briefly. Chill a soft batch for 15 minutes before spreading.
The cake sticks to the pan
Without parchment, a delicate layer may stick. Line and grease the pan. If it tears, loosen the edge and hide the damaged side beneath frosting.
How to Store Red Velvet Cake Safely
- Room Temperature: Do not store frosted cake out. Serve within 2 hours, or 1 hour above 90°F.
- Refrigerator: Cover in airtight carrier at 40°F or below for 4 days.
- Freezer: Double-wrap bare layers, bag securely, and freeze for 2 months.
- Reheating: Do not heat. Let cold slices soften for 15 to 20 minutes before serving.
- Make-Ahead Notes: Freeze layers 2 months; refrigerate covered frosting separately 1 day.
I would box individual slices, then label each airtight container with the frosting date. This limits air on the cut edges.
Freeze bare layers flat instead of stacking them while soft. Once solid, they can share a freezer shelf without pressing dents into one another, making the edges easier to frost later.
Variations and Ingredient Substitutions
- Gently spiced version: Add 1/8 teaspoon cayenne to the dry ingredients for a faint warm finish. This is an optional variation, not part of the base recipe.
- Kid-friendly color: Use 1 teaspoon red gel instead of 2 for a softer shade. Flavor stays similar, but the cake will appear less bright.
- Vegetarian version: The base recipe contains no meat, so it is vegetarian when the coloring and dairy enzymes are vegetarian-suitable. Choose verified ingredients if that matters to your household.
- Gluten-free option: A cup-for-cup gluten-free baking blend may work in place of all-purpose flour. This substitution has not been tested with these exact quantities.
- Buttermilk workaround: Stir 1 1/2 teaspoons white vinegar into enough whole milk to make 1 cup; rest 5 minutes. The result may be thinner than cultured buttermilk.
What to Serve With a Slice
- Extra frosting: For a taller piped finish, prepare a separate batch of cream cheese frosting and chill it briefly before decorating.
- Small cookie plate: Set out chocolate peanut butter no-bake cookies for guests who want a bite-size dessert.
- Minty cold drink: A fresh mint and lime mocktail brings a crisp contrast to rich frosting.
- Fresh berries: Raspberries or strawberries add a tart, juicy break between bites without another heavy topping.
- Hot tea: Plain black tea keeps the dessert plate simple and cuts through the sweetness.
Frequently Asked Questions About Red Velvet Cake
Can I make red velvet cake the day before?
Yes. Bake the layers, cool them for the full 90 minutes, and wrap each one snugly before refrigerating overnight. Store the cream cheese frosting separately in a covered bowl, then assemble the next day. If the frosting feels firm, stir it gently until it spreads; avoid warming it near the stove. You can also frost the full cake one day early and keep it covered in the refrigerator until serving.
Why is my red velvet cake dry?
Dry layers often come from excess flour, overmixing, or a long bake. Weigh 300 g flour and check the center at 30 minutes. On an already baked cake, extra cream cheese frosting can soften each bite. Resist adding random liquid next time: it can upset the batter balance. Make sure the oven is fully heated before the pans go in, and keep testing the center.
What can I use instead of buttermilk in red velvet cake?
Stir 1 1/2 teaspoons white vinegar into enough whole milk to make 1 cup, then rest for 5 minutes. Use it for the 1 cup buttermilk. Acidity helps the baking soda react, but this mixture is thinner than cultured buttermilk. Because this precise substitution has not been tested here, the crumb may change slightly. Do not replace buttermilk with water: it lacks the milk solids and tang.
How do I know when red velvet cake is done?
Look for tops that spring back gently and a center toothpick with a few moist crumbs, not streaks of raw batter. Start checking at 30 minutes at 350°F; depending on the pans and oven, the layers may take up to 35 minutes. Avoid checking only the outer edge because it firms first. A wet center needs more oven time even when the outside looks evenly colored and smells baked.
Why is my red velvet cake so dark?
Natural cocoa usually gives a lighter base than Dutch-process cocoa. Very dark cocoa can make red velvet cake look brown even after gel is added. Check the package and use a baking color that stays strong under heat. A dark shade does not mean the cake tastes wrong, and it says little about doneness. Follow the center toothpick test instead of judging the top color.
A Few Final Notes Before You Slice
Give the cake its full cooling time, even when the kitchen smells wonderful and you want to start decorating. A level cake with frosting that stays put is easier to carry, cut, and share. Keep a long knife nearby and wipe it between slices for tidy layers.
If I were serving red velvet cake for a birthday, I would plan around the refrigerator space first. A covered carrier needs a clear shelf, and chilled frosting needs a short rest before the texture feels creamy again. These small details do more for the finished plate than a complicated decoration. Keep the crumb in mind, work gently, and let the cake be the focus.
If you loved this recipe, save it to your dessert Pinterest board so you can find it easily later!
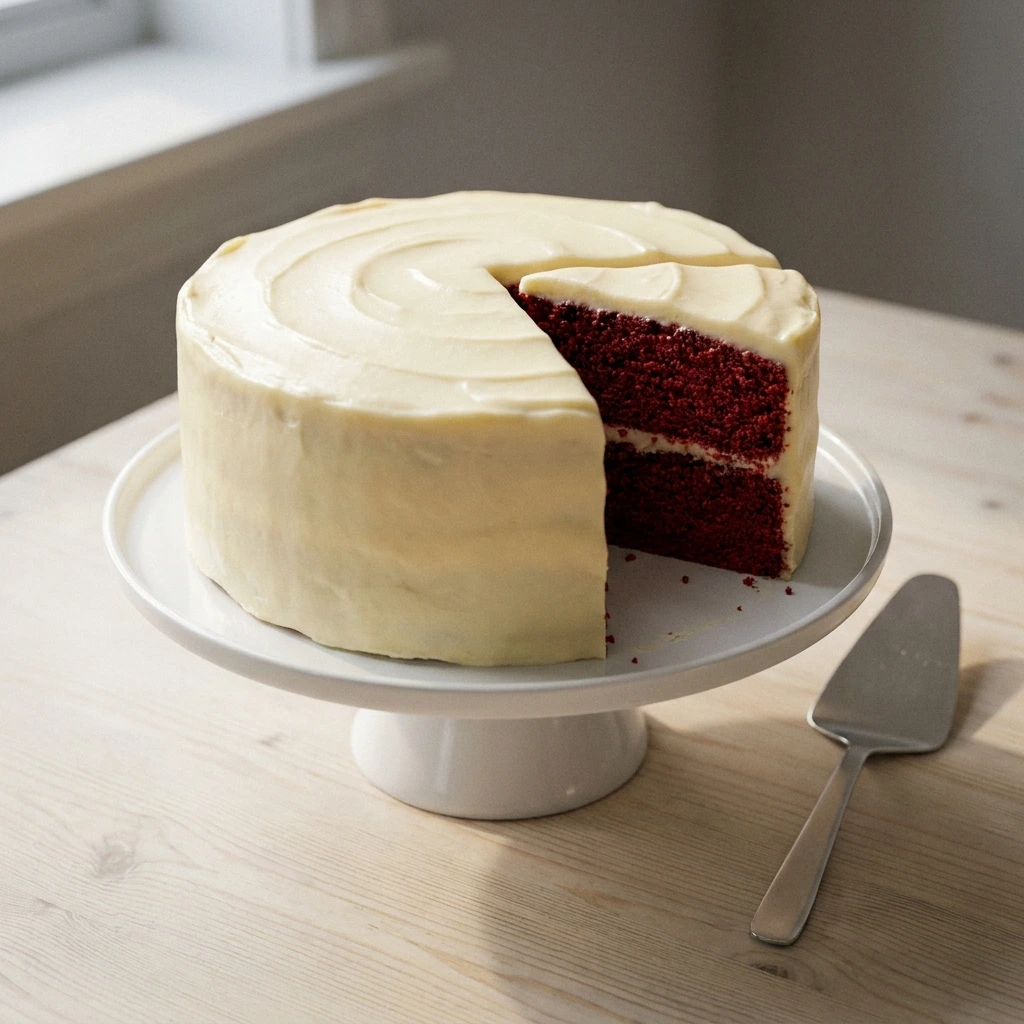
Red Velvet Cake With Cream Cheese Frosting and Tender Layers
Ingredients
Equipment
Method
- Beat the 1/2 cup cake butter with granulated sugar for 2 minutes, scraping once, until lighter and fluffy.
- Beat in eggs one at a time, then canola oil for 1 minute until no obvious egg streaks remain.
- Stir buttermilk, 2 teaspoons cake vanilla, white vinegar, and red gel for 30 seconds until evenly colored.
- Alternate dry mix and colored buttermilk in three additions on low speed for about 1 minute; stop when flour streaks disappear.
- Divide batter between prepared pans and level in about 1 minute; tap pans once.
- Bake on center rack at 350°F for 30 to 35 minutes. Tops should spring back and a center toothpick show moist crumbs, not liquid batter.
- Cool 15 minutes in pans, then 75 minutes on rack until undersides feel completely cool.
- Beat cream cheese and remaining 1/2 cup butter for 2 minutes; add powdered sugar and 1 teaspoon frosting vanilla and beat 2 more minutes until soft ridges hold.
- Stack and fill cake layers and coat top and sides in about 10 minutes; layers should remain level without sliding.