Easy Rice Krispie Treats That Stay Soft and Chewy
Rice Krispie treats go wrong in two ways. They turn out hard enough to chip a tooth, or they stay so sticky they weld themselves to the wrapper. Both problems come down to heat and pressure, and both are easy to fix.
This recipe makes 16 soft, chewy bars from six ingredients and one pot. I tested it nine times over four weeks, changing one thing per round: the butter amount, the stirring time, how hard I pressed the pan. My nephew ate three squares from round nine before his birthday candles were even lit.
Every ingredient also gets a check. Most standard marshmallows contain gelatin, so I use gelatin-free ones, which keeps the batch vegetarian. You will get exact timings, what the mixture should look like at each stage, and fixes for every problem I ran into.
Grab a big pot and a spatula. The stove part takes about 8 minutes.
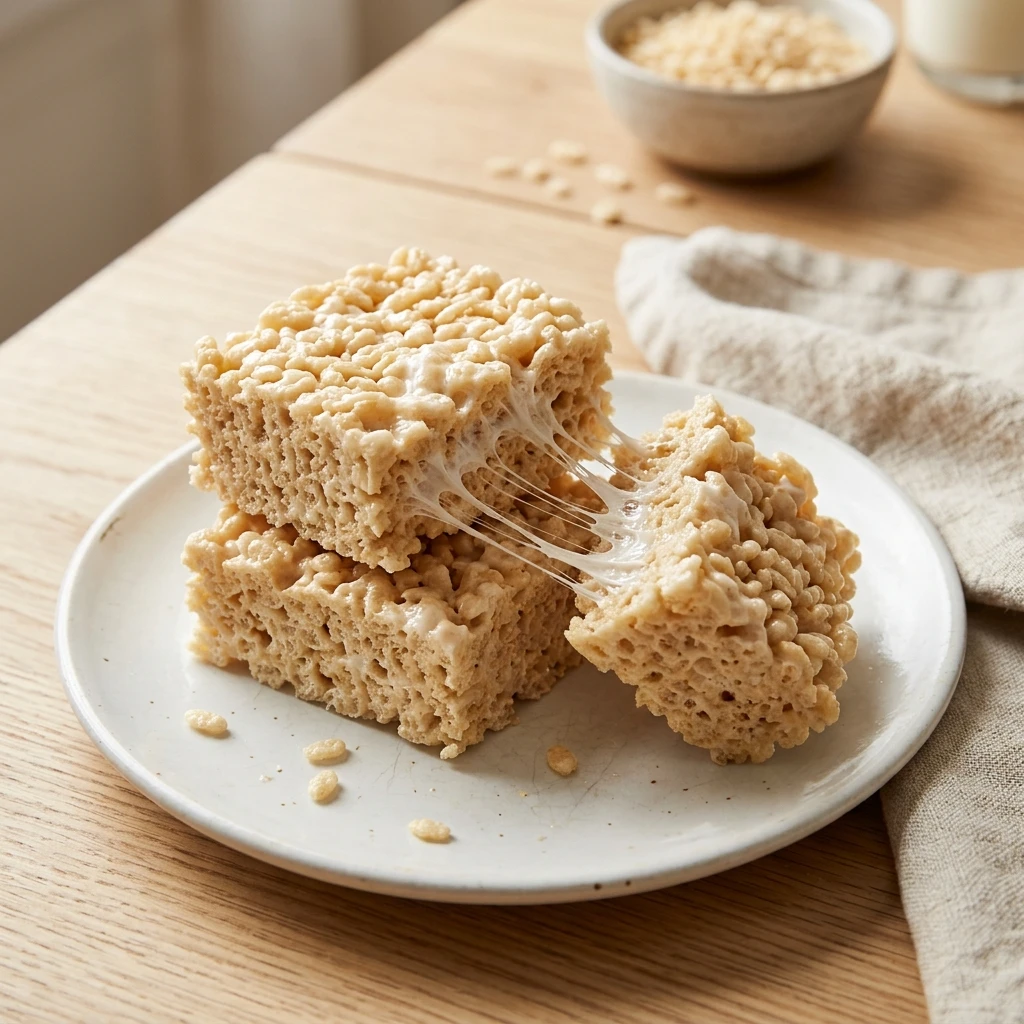
Table of Contents
Why You Will Love These Rice Krispie Treats
- Ready after 8 minutes at the stove, then 30 minutes of cooling
- Soft and chewy in the center, with a light crunch along the edges
- One pot, no oven, and almost nothing to wash afterward
- Six ingredients from the regular grocery aisle, all with the right marshmallows
- Rice Krispie treats stay soft for 2 days on the counter and freeze well for 6 weeks
- Easy enough that a 7 year old can press the pan with a greased spatula
Recipe Snapshot
- Prep Time: 10 minutes
- Cook Time: 8 minutes
- Cooling Time: 30 minutes
- Total Time: 48 minutes
- Servings: 16 bars
- Difficulty: Easy
- Calories per Serving: About 121
- Key Tool: 5 to 6 quart heavy-bottomed pot
- Best For: Lunchboxes, bake sales, and birthday parties
Nutrition Information
- Calories per Serving: About 121
- Protein: 1 g
- Carbs: 23 g
- Fat: 3 g
- Fiber: 0 g
- Sugar: 11 g
- Sodium: 108 mg
- Serving Size: About 1 bar (31 g)
- Servings per Recipe: 16
Each Rice Krispie treat is light, with only 3 grams of fat from the butter. Nearly all the calories come from the sugar in the marshmallows and cereal, so this is a treat for now and then, not a daily snack. Protein and fiber are close to zero.
Nutrition values are approximate and calculated per serving using standard ingredient amounts. Values may vary based on brands used and portion sizes.
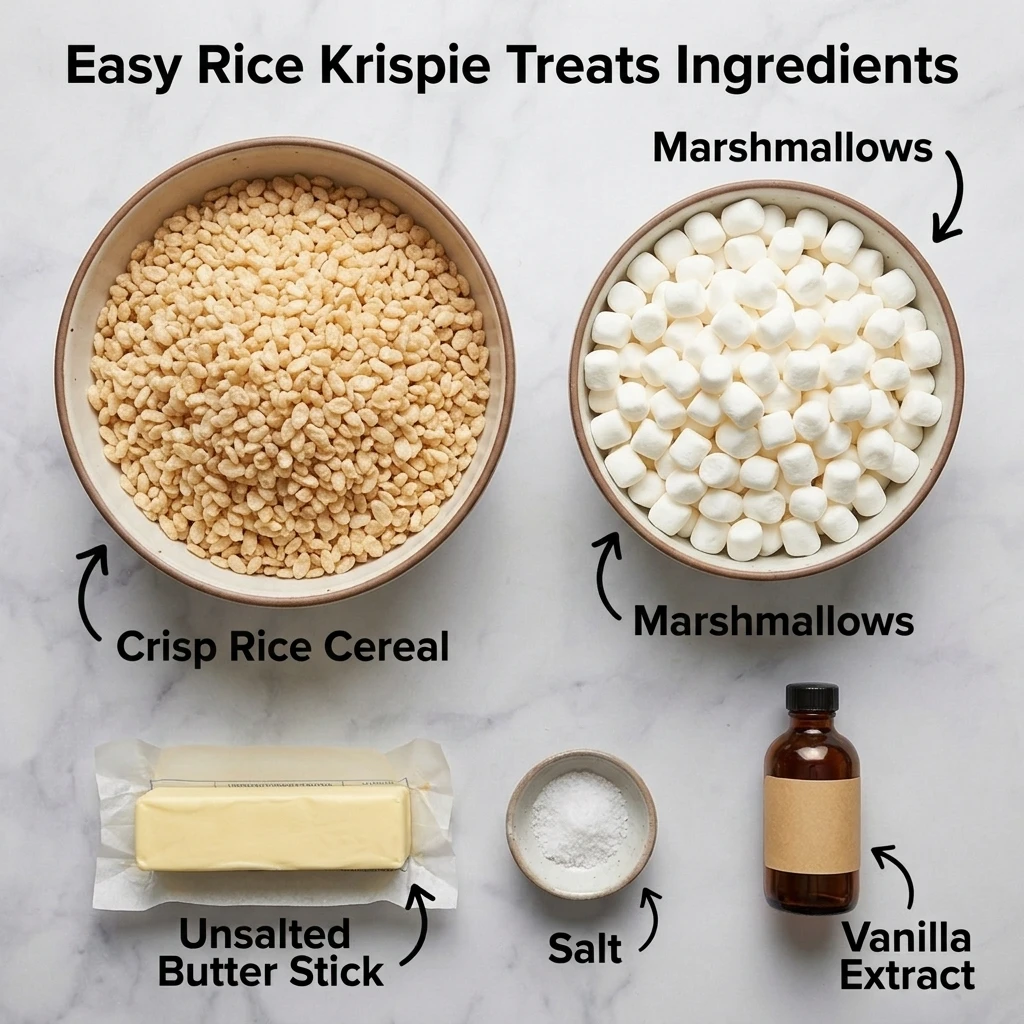
Ingredients
- 4 tablespoons unsalted butter (1/2 stick, not tub or diet margarine)
- 10 ounces gelatin-free or certified marshmallows (about 40 regular marshmallows)
- 1/2 teaspoon alcohol-free vanilla extract
- 1/4 teaspoon fine salt
- 6 cups crisp rice cereal (check the box for animal-derived additives)
- Nonstick cooking spray or extra butter, for the pan and spatula
Substitutions you can make:
- Butter: Use block margarine or vegan butter sticks in the same amount.
- Marshmallows: Swap in one 7 ounce jar of marshmallow creme after checking the label.
- Vanilla: Leave it out. The bars still taste good.
- Salt: Use 1/2 teaspoon Diamond Crystal kosher salt, because its flakes are lighter.
- Cereal: Any plain puffed rice cereal works.
Three ingredients decide how the bars turn out. Marshmallows control the chew. Fresh, soft ones melt smooth, while stiff old ones leave gritty bits. I use Dandies air-puffed vegan marshmallows because they contain no gelatin, and I skip any standard bag unless the package says certified.
Butter controls softness. I dropped to 2 tablespoons in one test, and the bars were stiff by the next morning. Weigh the marshmallows too. Cup measures for minis swing from 4 cups to 5 1/2 cups depending on the brand, so 10 ounces on a scale is the only number you can trust.
Equipment Needed
- 5 to 6 quart heavy-bottomed pot: The thick base resists scorching.
- 9×13-inch baking pan: Line it with parchment, leaving 2 inches hanging over two sides for lifting.
- Silicone spatula: Grease it first so the mixture slides off instead of clinging.
- Wax paper: A greased sheet keeps your hands clean while you press.
- Sharp chef’s knife: A long blade cuts straight through in one pull.
Preparation
- Measure 6 cups of cereal into a large bowl and park it next to the stove. It has to go in the second the marshmallows finish melting.
- Weigh out 10 ounces of marshmallows and open the bag.
- Cut the butter into 4 pieces. Put the vanilla and salt in a small dish.
- Line the 9×13-inch pan with parchment, leaving 2 inches over two sides, then coat it with cooking spray.
- Grease the spatula and one sheet of wax paper the same way.
- No oven is needed, so nothing needs preheating.
Step-by-Step Instructions
- Set the pot over medium-low heat and add the 4 tablespoons of butter. Stir slowly for 2 to 3 minutes, until the butter is fully melted and just foaming at the edges. Chef’s Note: Keep the heat low, because hot butter scorches marshmallows the moment they land.
- Pour in all 10 ounces of marshmallows and stir constantly, scraping the bottom and corners. In 4 to 5 minutes the puffs slump, then turn into a smooth, glossy cream with no white lumps left. Chef’s Note: Keep stirring even when the top looks done, because lumps hide at the bottom.
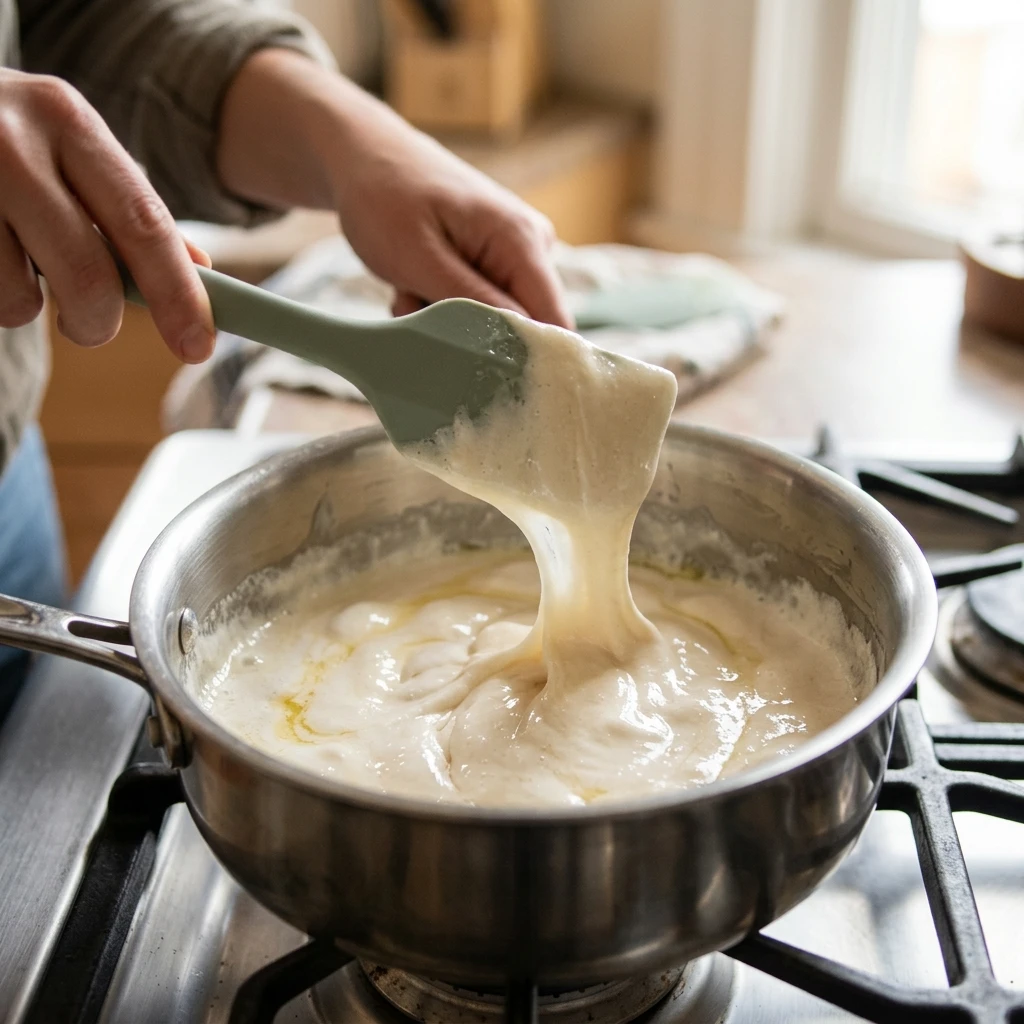
- Slide the pot off the burner and stir in the vanilla and salt. The mixture should smell sweet and creamy and fall from the spatula in a thick, slow ribbon.
- Dump in all 6 cups of cereal at once. Fold with the greased spatula for 20 to 30 seconds, until every piece looks shiny and no dry cereal is left at the bottom.
- Scrape everything into the prepared pan, then press it flat with the greased wax paper until the surface looks even and the corners are filled. Chef’s Note: Press lightly, because packing hard makes dense bars.
- Leave the pan uncovered on the counter for 30 minutes. The slab is ready when the center springs back under a fingertip and the top looks matte instead of wet.
- Lift the slab out by the parchment and cut it into 16 bars, 4 rows by 4 rows. The knife should slide through without dragging, and the sides should look clean and tight. Chef’s Note: Re-grease the blade every 2 or 3 cuts.
Pro Tip: If the mixture stiffens before you finish pressing, set the pot back over low heat for 15 seconds, stir twice, and press again.
Expert Tips and Tricks
- I once left the pot to answer the door and came back to a scorched bottom. The batch tasted like burnt toast, so I now stay put until the cereal is folded in.
- Make the slab the day before a party and cut it right before serving. The edges stay cleaner.
- Wrap cut Rice Krispie treats in wax paper and store them airtight at room temperature for up to 2 days.
- Choose soft, fresh marshmallows. A bag left open for a month melts into gritty bits.
- Level your cereal cups instead of heaping them, or the extra cereal dries the bars out.
- Measure everything before you turn on the burner, and stove time drops to 8 minutes.
Common Mistakes and Troubleshooting
Rice Krispie treats that are rock hard
Overheated marshmallow sets like candy. Keep the heat at medium-low and press lightly. To rescue a hard bar, microwave it for 5 seconds.
Burnt specks and a bitter taste
The heat was too high or the stirring stopped. Scrape the bottom as you stir. If it already scorched, pour the mixture into a clean pot and leave the burnt layer behind.
Gritty, lumpy marshmallow
Old marshmallows leave lumps. Use a fresh bag and stir until nothing white remains. Fix it by returning the pot to low heat for 1 minute and stirring hard.
Bars that crumble when cut
Too much cereal, or a mixture that cooled before pressing. Level your cups and press while the mixture is still warm. To fix crumbs, melt 1/2 cup marshmallows with 1 teaspoon butter and stir them through.
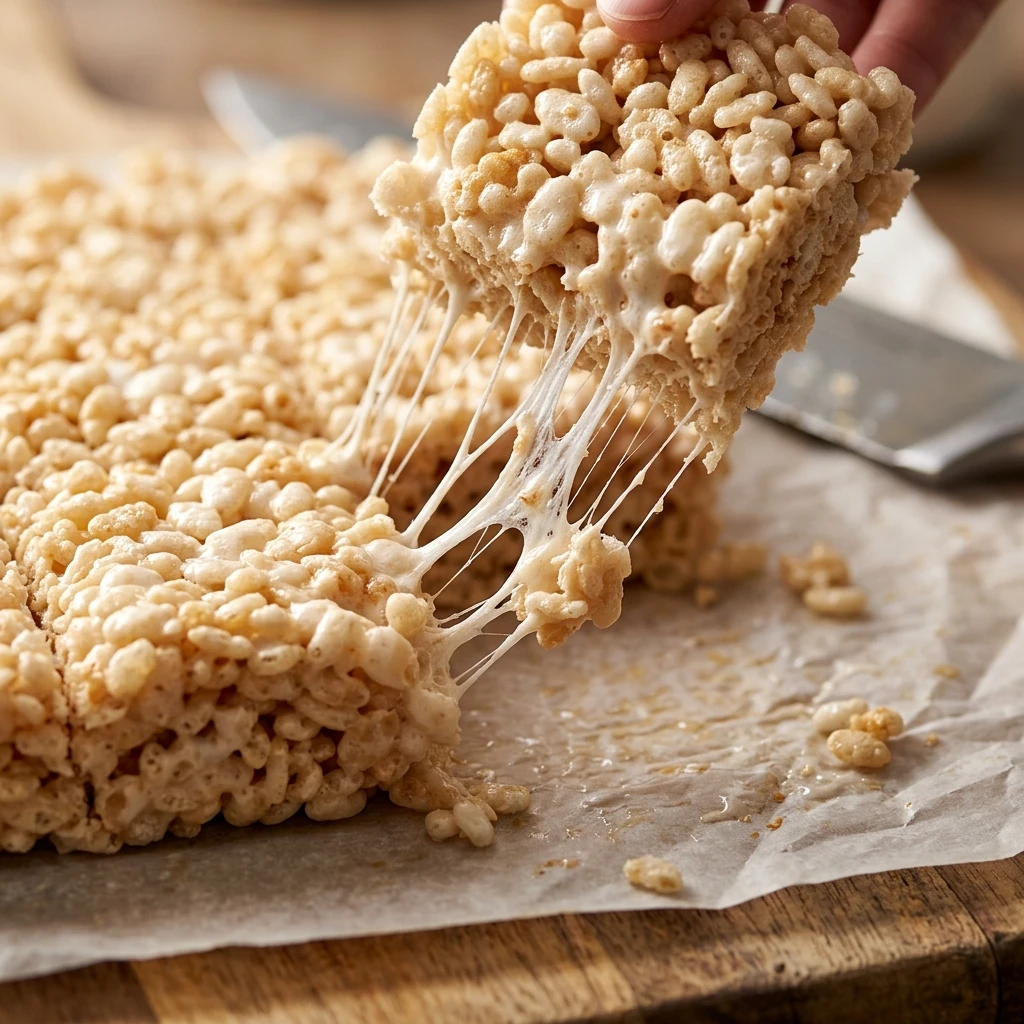
Bars that cling to the knife
The slab was still warm or the blade was dry. Wait the full 30 minutes and grease the knife. If it still drags, wipe and re-grease the blade.
Storage Instructions
- Room Temperature: Up to 2 days in an airtight container, with wax paper between layers.
- Refrigerator: Not recommended, because cold air makes the bars firm and dry. If your kitchen runs above 80°F, keep them in an airtight container for no more than 1 day.
- Freezer: Up to 6 weeks in an airtight freezer-safe container, with wax paper between layers.
- Reheating: No heat needed. Let frozen bars sit at room temperature for 15 minutes, or microwave a firm bar on a plate for 5 seconds.
- Make-Ahead Notes: Make the whole slab up to 1 day ahead, covered but uncut. Cut it just before serving.
Cold Rice Krispie treats bite back, so I never serve one straight from the freezer. I pull out what I need 15 minutes before the kids get home from school, and the chew comes right back.
Storage Trick: Cut the bars before freezing and wrap each one in its own square of wax paper. You can take out a single bar without thawing the whole batch.
Variations and Substitutions
- Spicy: Stir 1/4 teaspoon cinnamon and a pinch of cayenne into the melted marshmallow before the cereal. It tastes like Mexican hot chocolate.
- Kid-Friendly: Let the mixture cool for 3 minutes, then fold in 1/3 cup mini chocolate chips so they stay whole. Press certified sprinkles on top for parties.
- Vegetarian and Vegan: The base recipe is already vegetarian with gelatin-free marshmallows. For vegan bars, use vegan butter sticks.
- Gluten-Free: Standard crisp rice cereal contains barley malt. Use a box labeled gluten-free in the same amount.
- Peanut Butter: Stir 1/4 cup peanut butter into the melted marshmallows. If you want that flavor without cereal, try my chocolate peanut butter no-bake cookies.
What to Serve With This
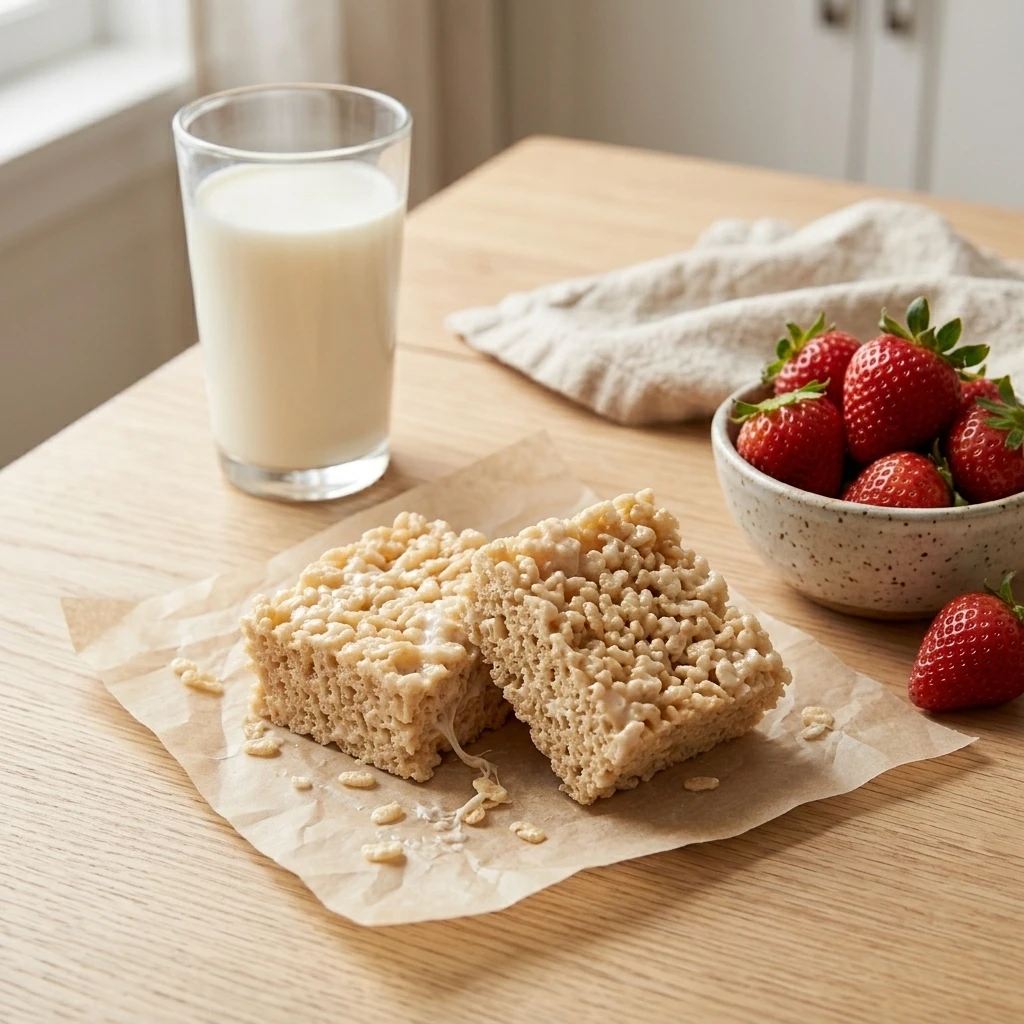
- Cold milk: A glass of milk balances the sweetness of Rice Krispie treats.
- Fresh strawberries: Their tartness cuts the sweetness.
- Mocktail: A fresh mojito mocktail with mint and lime makes a bright, alcohol-free drink for a party table.
- Yogurt snack: Crumble one bar over plain yogurt and add a spoonful of homemade granola for an after-school plate.
- Lunchbox combo: Pair a bar with apple slices and cheese cubes for a balanced box.
Frequently Asked Questions
How long do Rice Krispie treats last?
Rice Krispie treats stay soft for up to 2 days at room temperature in an airtight container. After that, the sugar in the marshmallow firms up and the bars turn hard. For longer storage, freeze them for up to 6 weeks in layers separated by wax paper. Pack them in a single layer if you can, so the bars do not press flat. I never refrigerate them, because cold air makes them stiffer.
Why are my Rice Krispie treats hard?
Hard Rice Krispie treats usually mean the marshmallow got too hot or the mixture was packed too tightly. Chasing a faster melt with high heat is the usual cause. Keep the burner on medium-low, stir constantly, and press with light pressure. Check your cereal measure too, because extra cereal soaks up the melted marshmallow. If a batch is already hard, microwave a single bar for 5 seconds to soften it.
Can I use marshmallow fluff instead of marshmallows for Rice Krispie treats?
Yes, one 7 ounce jar of marshmallow creme can replace the marshmallows, according to Kellogg’s own recipe notes. Expect a softer, stickier mixture, so grease your spatula well and fold the cereal in right away, while the creme is still loose. The rest of the recipe stays the same. Read the label before buying, since not every brand is certified. I prefer gelatin-free marshmallows for the chew, but creme saves time on busy nights.
How long do Rice Krispie treats take to set?
They need about 30 minutes at room temperature to set fully. They are ready when the center springs back under a fingertip and the top looks matte instead of glossy. If your kitchen is hot, add 10 minutes. Setting the pan on a wire rack helps, since air can reach the bottom. Even when you are rushing, wait the full time, because cutting warm bars squashes them and leaves ragged, sticky edges.
Can you make Rice Krispie treats in the microwave without them getting hard?
Yes, the microwave works for the melting stage. Heat the butter and marshmallows in a large microwave-safe bowl on high for up to 3 minutes, stirring after every minute, until smooth. Then stir in the cereal and press it into the pan. Use a bowl twice the size of the mixture, since marshmallows puff up as they heat. Microwave times vary, so stop when no lumps remain. I still prefer the stove because I can watch the mixture change.
Final Thoughts on Rice Krispie Treats
Rice Krispie treats look simple, which is why small details matter so much. Low heat and a light hand do more for the texture than any extra ingredient. Once you have the rhythm, you can change the flavor without touching the method.
My favorite batch is the plain one, still slightly warm, eaten standing at the counter while the rest sets. My sister now asks me to bring a full pan whenever she hosts game night.
Try the cinnamon and cayenne version for adults, or press sprinkles on top for a school party. Either way, give the bars their full 30 minutes before you cut.
If you loved this recipe, save it to your dessert Pinterest board so you can find it easily later!
Easy Rice Krispie Treats That Stay Soft and Chewy
Ingredients
Equipment
Method
- Line the 9×13-inch pan with parchment, leaving 2 inches over two sides, and coat with spray. Grease the spatula and a sheet of wax paper. Measure the cereal into a large bowl beside the stove.
- Set the pot over medium-low heat and melt the butter, stirring slowly for 2 to 3 minutes, until fully melted and just foaming at the edges.
- Add all 10 ounces of marshmallows and stir constantly, scraping the bottom and corners, for 4 to 5 minutes, until smooth and glossy with no white lumps.
- Remove the pot from the heat and stir in the vanilla and salt until the mixture falls from the spatula in a thick, slow ribbon.
- Add all 6 cups of cereal at once and fold with the greased spatula for 20 to 30 seconds, until every piece is shiny and no dry cereal remains.
- Scrape the mixture into the pan and press it flat with the greased wax paper, using light pressure, until the surface is even and the corners are filled.
- Cool uncovered at room temperature for 30 minutes, until the center springs back under a fingertip and the top looks matte.
- Lift the slab out by the parchment and cut into 16 bars, 4 rows by 4 rows, re-greasing the knife every 2 or 3 cuts.
Notes
Use gelatin-free or certified marshmallows. Check the cereal label for animal-derived additives.
Storage: Airtight at room temperature up to 2 days, freezer up to 6 weeks, refrigerator not recommended.