Teriyaki Chicken with Alcohol-Free Apple-Ginger Glaze
Glossy sauce should coat the chicken in a thin, even layer, not burn onto the skillet or flood the rice. This teriyaki chicken controls those two extremes by cooking the meat before the sweet sauce enters the pan. The browned pieces come out first, excess rendered fat is removed, and the glaze thickens in a clean skillet before everything is reunited.
Unsweetened apple juice and fresh lemon supply fruitiness and acidity without any restricted cooking ingredient. Certified alcohol-free low-sodium soy sauce provides the savory base, while ginger, garlic, brown sugar, honey, and sesame oil fill out the flavor. A small cornstarch slurry creates a dependable coating without a long reduction that would concentrate the salt.
Boneless chicken thighs stay tender during searing and glazing, and the 45-minute method fits naturally among easy dinners. The recipe also gives separate timing for chicken breast, plus a gluten-free adaptation using certified tamari.
I developed this sauce because I wanted the familiar sweet-savory glaze without any of the cooking wine that most teriyaki recipes call for.
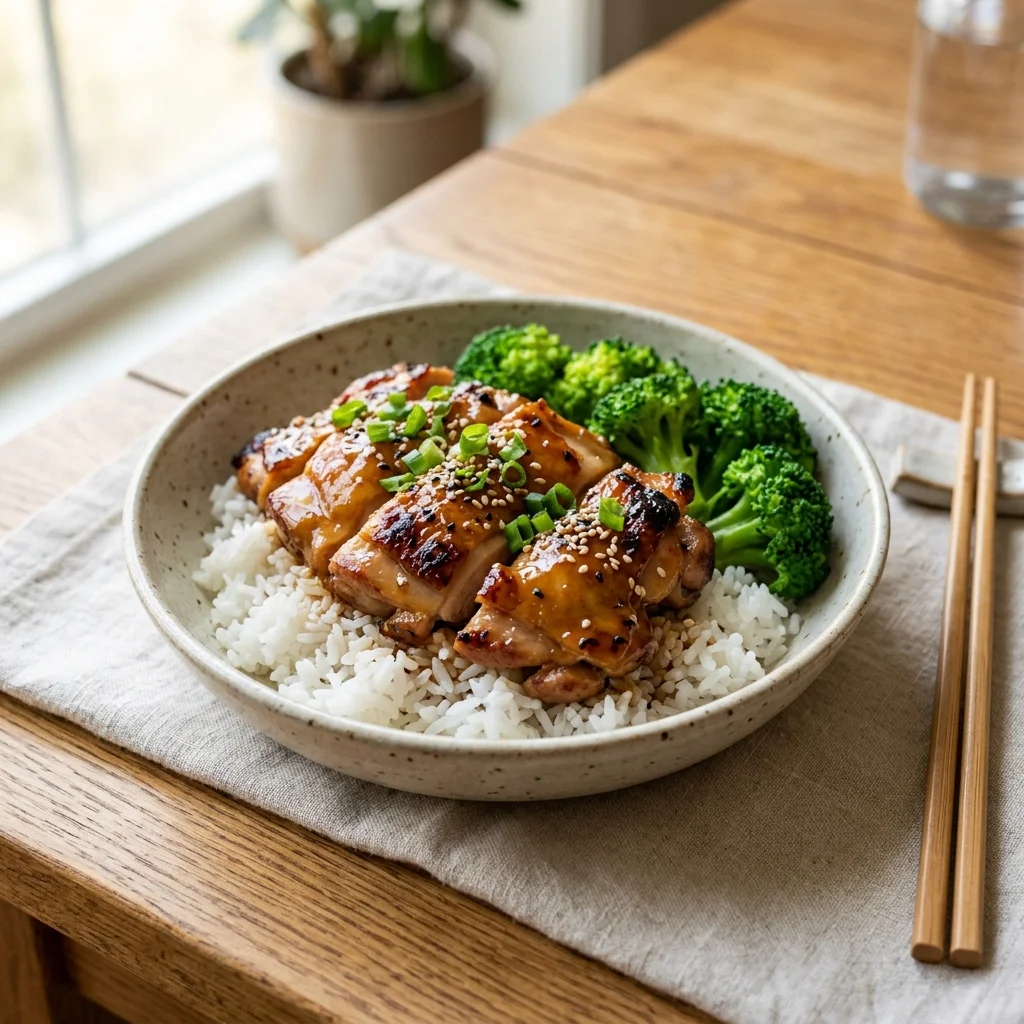
Table of Contents
Why This Teriyaki Chicken Glazes Evenly
- Chicken browns before sugar enters the skillet, reducing the risk of a scorched glaze.
- Low-sodium sauce, water, and apple juice keep salinity balanced during simmering.
- A cold cornstarch slurry thickens quickly without prolonged reduction.
- Excess chicken fat is removed so the glaze stays cohesive instead of oily.
- One-inch pieces cook at a similar rate and collect sauce along every edge.
Teriyaki Chicken Snapshot
- Prep time: 20 minutes
- Cook time: 25 minutes
- Total time: 45 minutes
- Servings: 6
- Difficulty: Easy
- Calories: Approximately 325 per serving
- Key ingredient: Certified alcohol-free low-sodium soy sauce
- Best for: Weeknight dinner, rice bowls, and meal preparation
Teriyaki Chicken Nutrition
- Calories per serving: Approximately 325
- Protein: 29 grams
- Carbohydrates: 15 grams
- Fat: 17 grams
- Fiber: Less than 1 gram
- Sugar: 11 grams
- Sodium: Approximately 820 milligrams
- Serving size: One-sixth of the chicken and glaze
- Servings per recipe: 6
Chicken provides most of the protein, while the sauce supplies most of the carbohydrate and sodium. Rice, noodles, vegetables, and extra sauce are not included in these estimates.
Nutrition information is estimated per serving using standard ingredient amounts. Actual values can differ depending on the brands used and portion sizes.
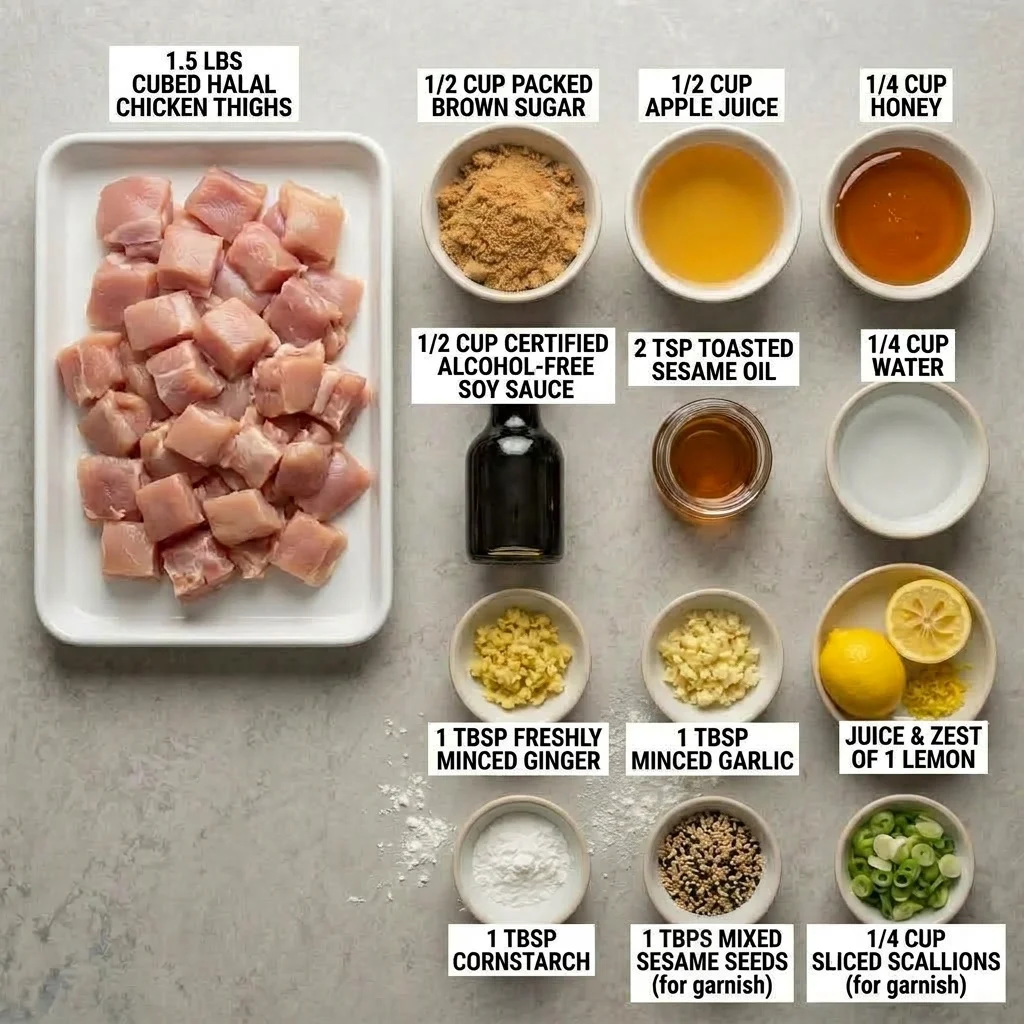
Ingredients for Alcohol-Free Teriyaki Chicken
Chicken
- Certified boneless skinless chicken thighs, 900 grams or 2 pounds: Cut into 1-inch pieces.
- Neutral high-heat oil, 1 tablespoon: Avocado, sunflower, or canola oil works.
- Ground black pepper, one-quarter teaspoon: White pepper is an equal substitute.
Apple-ginger glaze
- Certified alcohol-free low-sodium soy sauce, 80 milliliters or one-third cup: Certified gluten-free tamari can replace it.
- Water, 80 milliliters or one-third cup: This limits salt concentration.
- Unsweetened apple juice, 60 milliliters or one-quarter cup: Unsweetened white grape juice also works.
- Light brown sugar, 38 grams or 3 tablespoons packed: Granulated sugar is an equal substitute.
- Honey, 21 grams or 1 tablespoon: Date syrup can replace it.
- Fresh ginger, 2 teaspoons finely grated: One-half teaspoon ground ginger also works.
- Garlic, 2 large cloves finely grated: Three-quarter teaspoon garlic powder can replace it.
- Fresh lemon juice, 1 tablespoon: This balances sweetness and salinity.
- Toasted sesame oil, 1 teaspoon: Omit for a sesame allergy.
- Cornstarch, 1 tablespoon: Arrowroot makes a softer reheated sauce.
- Cold water, 1 tablespoon: This disperses the starch.
To finish
- Toasted sesame seeds, 2 teaspoons: Optional for a sesame allergy.
- Scallions, 2, thinly sliced: Chives provide a milder substitute.
Check the soy sauce label carefully. Use a certified alcohol-free product, preferably low sodium. Similar-looking sauces can differ greatly in salt and added ingredients, which changes both suitability and glaze balance.
Equipment Needed
- Twelve-inch heavy skillet: Its broad surface limits steaming.
- Instant-read thermometer: Confirm a 165°F center.
- Medium measuring jug: A pouring lip controls the sauce.
- Small bowl and whisk: Use these for the fresh slurry.
- Tongs or a thin spatula: Turn pieces without tearing the surface.
- Clean plate: Hold the seared chicken while the glaze thickens.
Preparation Before Cooking
- Cut chicken into 1-inch pieces and pat dry.
- Whisk all glaze ingredients except cornstarch and cold water.
- Prepare garnishes away from the raw chicken area.
- Mix the slurry only when the sauce simmers.
- Set out a clean plate and thermometer before heating the skillet.
Keep the sauce jug, garnishes, and cooked-chicken plate outside the raw-chicken workspace. If the cutting board or knife touches the uncooked meat, wash it before preparing anything served without further cooking. Read the soy sauce label before measuring because certification, sodium, and added ingredients vary between products.
How to Make Teriyaki Chicken
- Season the chicken.Pat away collected moisture and add black pepper. Skip salt because the glaze seasons the teriyaki chicken.
- Heat the skillet.Heat the skillet over medium-high for 2 minutes, then add oil. It should shimmer without smoking.
- Sear in two batches.Cook half the chicken undisturbed for 3 minutes. Turn, cook 2 to 3 minutes, transfer to the plate, and repeat.
Chef’s Note: Pieces finish cooking in the glaze, so they need not reach 165°F while searing.
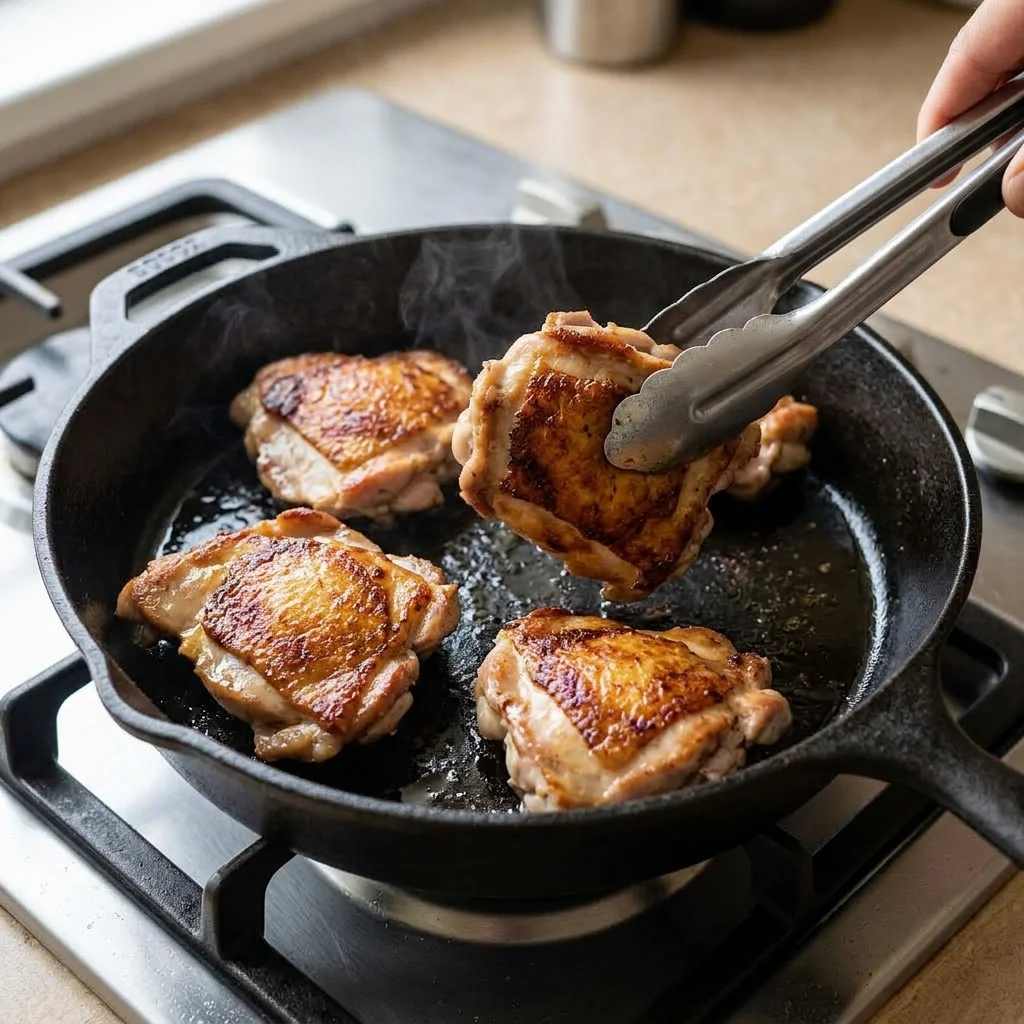
Look for a brown crust on the underside rather than trying to color every face. Those browned areas give the finished glaze roasted depth, and the bits left in the skillet dissolve when the sauce enters. Moving the pieces too early tears that surface and slows browning.
- Remove extra fat.Lower heat to medium, leave 1 teaspoon fat, and spoon out the rest.
- Simmer the sauce.Add the re-whisked sauce, scrape up browned bits, and simmer gently for 3 minutes.
Chef’s Note: A violent boil reduces too quickly and concentrates salt.
- Add the slurry.Whisk cornstarch with cold water. Stir it into simmering sauce for 30 to 60 seconds, until a spoon leaves a brief path.
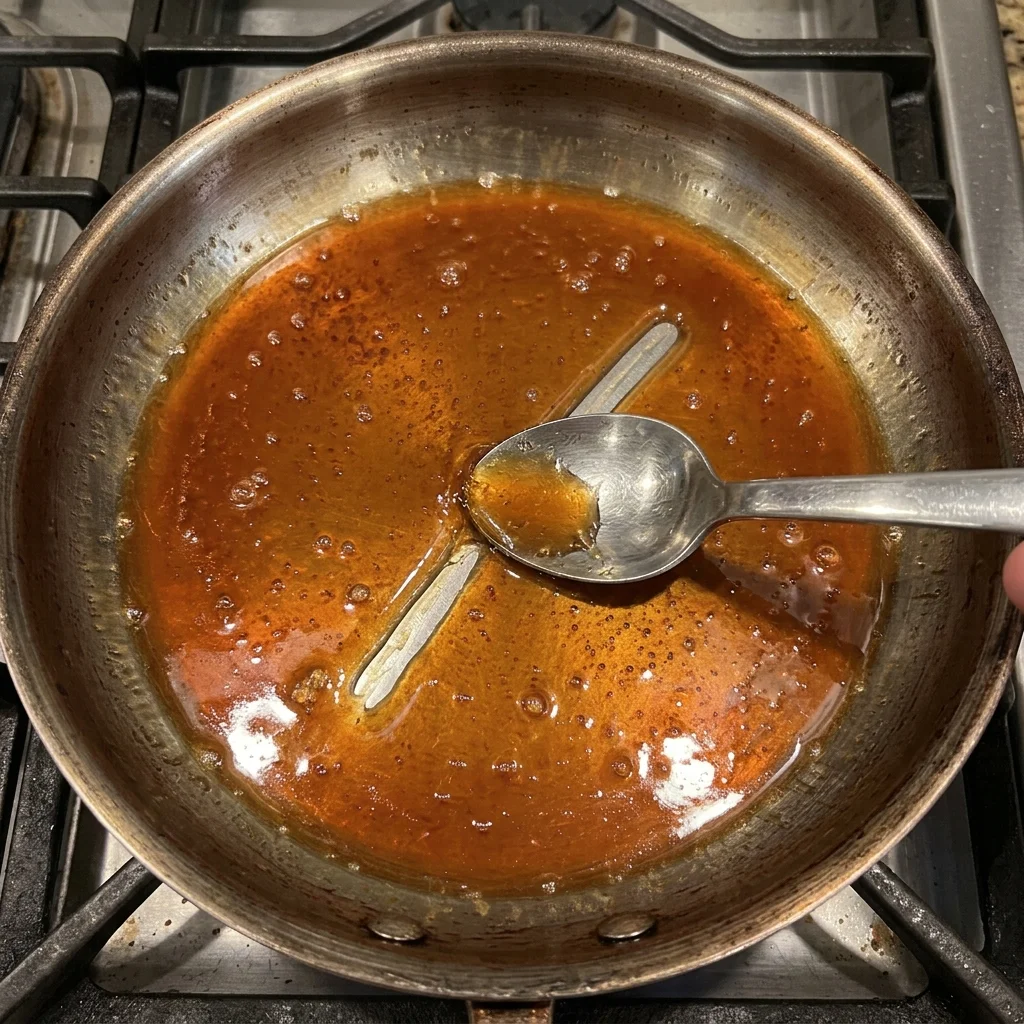
Stop while the glaze still flows. Cornstarch keeps setting as it cools, so a paste-like pan produces a heavy coating.
The spoon-path cue should last about one second before sauce flows back over the skillet. If the path stays open, remove the pan from the heat and add 1 tablespoon water before returning the chicken. This adjustment is easier before the meat begins absorbing the glaze.
- Glaze and finish the chicken.Return chicken and juices. Toss 2 to 3 minutes, until coated and 165°F in the thickest pieces.
Chef’s Note: Insert the thermometer sideways so its sensor reaches the center.
- Rest and garnish.Rest the skillet off heat for 3 minutes. Add sesame and scallions, then serve the teriyaki chicken.
Expert Tips for Juicy Chicken and Glossy Sauce
- Dry chicken browns faster because surface water creates steam.
- Work in two batches so the skillet stays hot.
- Verify low-sodium, alcohol-free sauce to prevent harsh reduction.
- Separate raw-chicken tools from cooked food and garnish.
- Make sauce 2 days ahead, keeping the slurry separate.
- Refrigerate within 2 hours and use within 3 to 4 days.
- Reheat with 1 tablespoon water per serving to loosen the glaze.
I added both batches of chicken to the skillet at once in an early test and the pieces steamed rather than browned, so splitting them into two batches with a clean hot pan between each made the difference.
Teriyaki Chicken Problems and Practical Fixes
The glaze is too thin
Cause: The sauce stayed cool, starch settled, or chicken released water.
Prevention: Re-whisk the slurry and maintain a gentle simmer.
Fix: Add half of a fresh 1-teaspoon starch slurry, simmer 30 seconds, and reassess.
The glaze is too thick
Cause: Excess starch or simmering removed too much water.
Prevention: Stop at a brief spoon path, before paste forms.
Fix: Add water 1 tablespoon at a time over low heat.
The dish tastes too salty
Cause: Full-sodium sauce, long reduction, or added salt concentrated salinity.
Prevention: Use low-sodium sauce, skip salt, and avoid over-reducing.
Fix: Add unsalted chicken or vegetables and water. Sugar cannot remove sodium.
The chicken looks pale
Cause: Wet pieces or crowding created steam.
Prevention: Dry the chicken and sear in two batches.
Fix: Remove chicken, reduce pan liquid, and briefly sear before glazing.
The sauce tastes burnt
Cause: Sugar met excessive heat or the glaze cooked too long.
Prevention: Lower heat before sauce and stir after adding slurry.
Fix: Discard black or acrid sauce; it cannot be repaired reliably.
I found the sauce pooled at the bottom of the skillet rather than clinging to the chicken because I had not removed enough rendered fat, and spooning out all but about a teaspoon before adding the sauce kept the glaze cohesive.
Storing and Reheating Teriyaki Chicken
Room temperature: Refrigerate within 2 hours, or within 1 hour when the surrounding temperature exceeds 90°F or 32°C.
Refrigerator: Store chicken and glaze in a shallow airtight container for 3 to 4 days.
Freezer: Freeze cooled portions for up to 2 months. Leave a little space in the container and thaw overnight in the refrigerator.
Reheating: Add 1 tablespoon water per serving, cover, and warm gently in a skillet or microwave until the center reaches 165°F. Stir halfway through.
Make-ahead notes: Refrigerate sauce up to 2 days and cut chicken separately up to 1 day ahead.
Cold glaze firms naturally. Water and gentle heat restore flow without raising sodium.
For meal-prep portions, cool rice and chicken in separate shallow containers before sealing them. Keeping crisp vegetables and scallions separate prevents condensation from softening them. Label frozen portions with the date, and reheat only the amount you plan to serve.
After two days in the refrigerator the glaze firmed into a solid coating, but a tablespoon of water and a covered skillet on low heat brought it back to a texture close to freshly made.
Teriyaki Chicken Variations
Chicken Breast: Cut 900 grams certified breast into 1-inch pieces. Sear 2 minutes per side, then glaze to 165°F.
Gluten-Free: Use certified alcohol-free gluten-free tamari and certified cornstarch.
Mild Ginger: Reduce ginger to 1 teaspoon and omit scallions.
Spicy Glaze: Add one-quarter teaspoon crushed red pepper, then adjust after reduction.
Tofu Version: Sear 700 grams pressed extra-firm tofu until crisp before glazing. See crispy baked tofu.
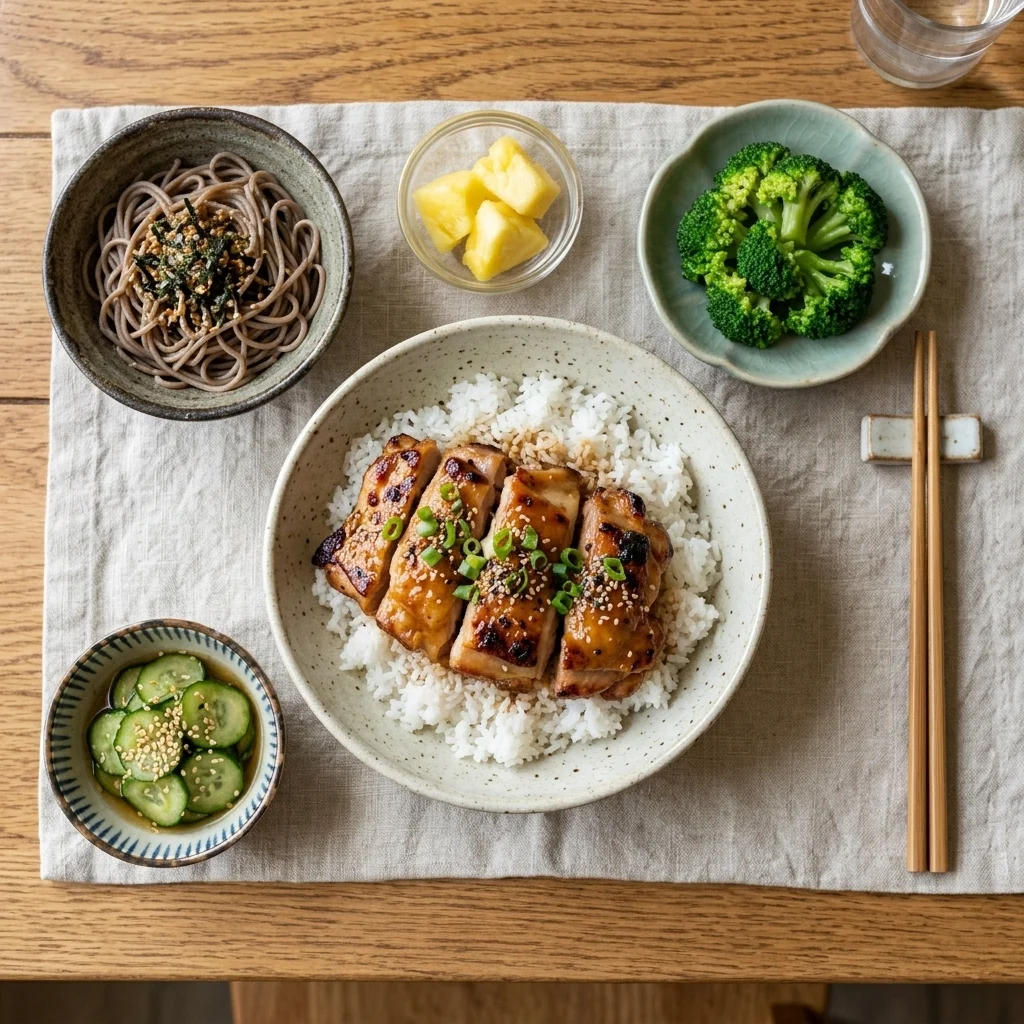
What to Serve with Teriyaki Chicken
Steamed rice: Plain rice absorbs glaze without making the meal saltier.
Sesame cucumber salad: Cold cucumber and light acidity contrast with warm teriyaki chicken.
Steamed broccoli: Florets catch glaze and add a firm vegetable.
Soba-style noodles: Verify gluten needs, then toss lightly with glaze.
Fresh pineapple: Serve pieces on the side for cool sweetness.
For a complete bowl, begin with a modest rice portion, add broccoli or cucumber, then place the glazed chicken on top. Add extra sauce only after tasting so the final bowl stays balanced rather than becoming increasingly salty near the bottom.
Teriyaki Chicken FAQs
Why is my teriyaki sauce not thickening?
Teriyaki sauce stays thin when the cornstarch settles, the sauce is below a simmer, or watery chicken dilutes it. Whisk the slurry immediately before pouring it into gently bubbling sauce, then stir for 30 to 60 seconds. If it remains loose, combine 1 teaspoon cornstarch with 1 teaspoon cold water, add half, and reassess after simmering. The glaze also thickens slightly as it cools.
Can I use chicken breast instead of thighs?
Yes, use 900 grams certified boneless breast cut into even 1-inch pieces. Sear it in two batches for about 2 minutes per side, then return it to the thickened glaze only until the center reaches 165°F. Breast contains less fat than thigh and dries sooner, so avoid a long final simmer. The sauce quantities stay the same, and the finished dish may release slightly less rendered fat.
Can I make teriyaki chicken ahead for meal prep?
Yes, cook and cool it promptly, then divide it among shallow airtight containers for up to 3 to 4 days in the refrigerator. Keep rice and crisp vegetables separate when possible. For reheating, add 1 tablespoon water per chicken serving, cover, and warm to 165°F. You can also make the sauce two days ahead, but mix the cornstarch slurry only when the sauce is simmering.
How do I know when the chicken is safely cooked?
The thickest chicken pieces must reach 165°F in the center. Insert an instant-read thermometer from the side so its sensing area sits fully inside the meat rather than touching the skillet. Color alone is unreliable, especially after the dark glaze coats the surface. Check several large pieces after 2 minutes in the sauce, then continue cooking in 30-second intervals if any piece remains below temperature.
Why does homemade teriyaki chicken taste too salty?
Excess salt usually comes from full-sodium soy sauce, a long reduction, added salt on the chicken, or too much glaze per serving. Use certified alcohol-free low-sodium soy sauce, include the measured water and apple juice, and stop reducing once the slurry thickens. If the dish is already salty, add unsalted cooked chicken, tofu, rice, or vegetables plus a little water. Adding sugar changes perception but does not reduce sodium.
Thicken the Glaze After the Chicken Browns
The order of cooking protects both texture and flavor in this teriyaki chicken. Give the meat room to brown, remove excess fat, and lower the heat before the sweet sauce reaches the skillet. Add a freshly whisked slurry only after the sauce simmers, then stop while the glaze still moves easily around a spoon.
Use the thermometer for the chicken and the spoon-path cue for the sauce. Together, those checks are more reliable than judging either one by color. A short rest finishes the coating without another minute of concentrated heat.
What I noticed most on the plate was how the glaze stayed with the chicken rather than running into the rice, which came down entirely to removing the excess fat before the sauce went in.
If you loved this recipe, save it to your chicken dinners Pinterest board so you can find it easily later!
Teriyaki Chicken with Alcohol-Free Apple-Ginger Glaze
Ingredients
Equipment
Method
- Pat the chicken pieces completely dry and season with black pepper. Whisk all glaze ingredients except the cornstarch and cold water in a measuring jug and set aside. In a small bowl, mix the cornstarch and cold water into a slurry but do not add it yet.
- Heat a 12-inch heavy skillet over medium-high for 2 minutes, then add the oil until it shimmers. Sear the chicken in two batches, undisturbed for 3 minutes, then turn and cook 2 to 3 minutes more. Transfer to a clean plate and repeat with the second batch.
- Reduce heat to medium. Spoon out excess fat, leaving about 1 teaspoon in the skillet. Pour in the re-whisked glaze and scrape up the browned bits. Simmer gently for 3 minutes — do not let it boil hard.
- Re-whisk the cornstarch slurry and stir it into the simmering sauce for 30 to 60 seconds, until a spoon leaves a brief path that closes after about one second. Remove from heat immediately if it thickens to a paste.
- Return the chicken and any collected juices to the skillet. Toss for 2 to 3 minutes over medium heat until every piece is coated and the thickest pieces reach 165°F (74°C) at the center.
- Rest the skillet off heat for 3 minutes. Scatter sesame seeds and scallions over the top and serve.
Notes
- Store in a shallow airtight container in the refrigerator for 3 to 4 days. To reheat, add 1 tablespoon water per serving, cover, and warm gently to 165°F (74°C).
- Make ahead: Prepare the sauce up to 2 days ahead and refrigerate. Mix the cornstarch slurry fresh only when the sauce is simmering. Cut chicken up to 1 day ahead and store separately.
- For chicken breast: cut 900 g into 1-inch pieces and sear for about 2 minutes per side. Return to the glaze only until the center reaches 165°F — do not over-simmer or it will dry out.