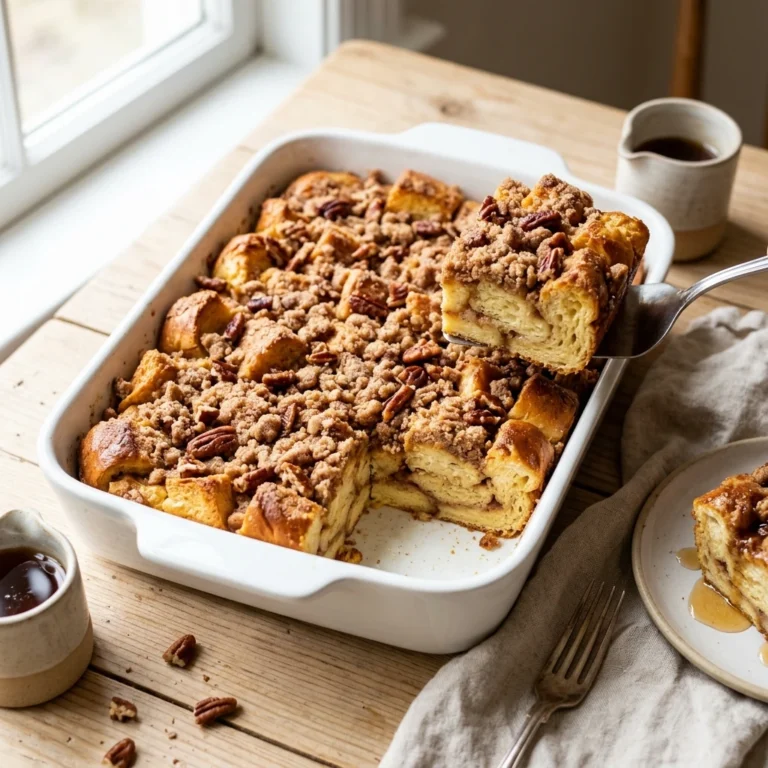
Easy Scones with Tall, Flaky Layers in 55 Minutes
A good scone splits open with a gentle push and shows layers of butter inside. I have bought my share of bakery versions that taste more like sweet rocks. These scones go the other way: tall, flaky, and tender, with a golden top that crackles a little when you bite in.
Three things make the difference: very cold butter, heavy cream, and a short chill before baking. I tested this recipe nine times over five weeks, because my first three batches spread into flat, greasy discs. Batch four fixed the problem, and the other five were about tuning the cream amount and oven temperature until every wedge rose to the same height.
You do not need a rolling pin or a biscuit cutter. You pat the dough into a round, cut eight wedges, and bake. Below you will find exact measurements, the doneness cues I trust, and fixes for every problem I ran into along the way.

Table of Contents
Why You Will Love These Scones
- Ready in 55 minutes, with only 20 minutes of hands-on work.
- These scones have a buttery, tender crumb, because heavy cream carries most of the moisture.
- Shaping takes two minutes, with no re-rolled scraps to turn the last few tough.
- Each one has just 9 grams of sugar, so jam and whipped cream do not tip them into dessert.
- The shaped dough waits in the fridge overnight, so you bake while the coffee brews.
- My daughter asked for these three mornings in a row.
Recipe Snapshot
- Prep Time: 20 minutes, plus 15 minutes of chilling
- Cook Time: 20 minutes
- Total Time: 55 minutes
- Servings: 8 scones
- Difficulty: Easy
- Calories per Serving: About 350
- Key Ingredient or Tool: Very cold butter
- Best For: Weekend breakfast, brunch, and afternoon tea
Nutrition Information
- Calories per Serving: About 350
- Protein: 5 g
- Carbs: 38 g
- Fat: 20 g
- Fiber: 1 g
- Sugar: 9 g
- Sodium: 345 mg
- Serving Size: About 1 scone
- Servings per Recipe: 8
Most of the 20 grams of fat comes from butter and cream, which keeps the crumb tender. Serve one with scrambled eggs or Greek yogurt for a more filling breakfast.
Nutrition values are approximate and calculated per serving using standard ingredient amounts. Values may vary based on brands used and portion sizes.
Ingredients and Why They Matter
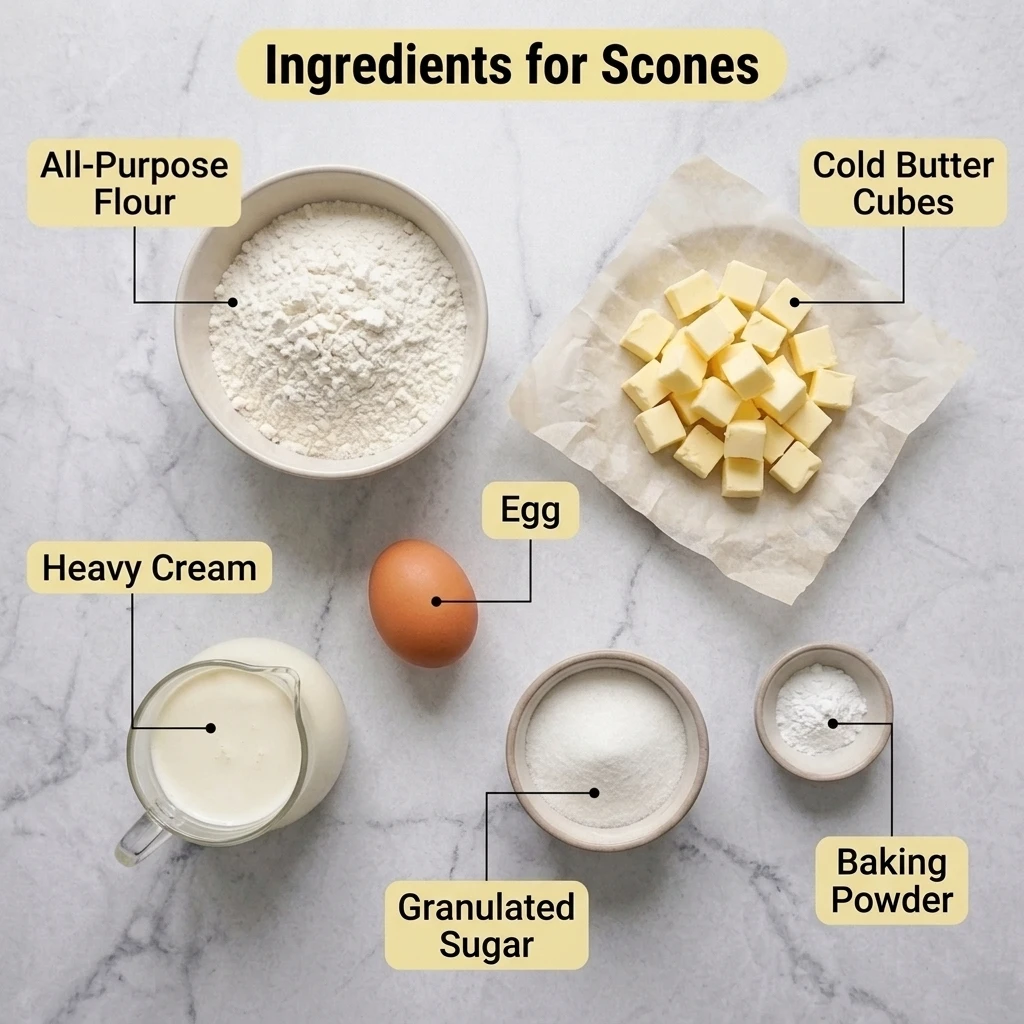
- 2 1/2 cups all-purpose flour (about 10 1/2 ounces, spooned and leveled)
- 1/4 cup granulated sugar
- 1 tablespoon baking powder
- 1/2 teaspoon fine sea salt
- 1/2 cup (1 stick) cold unsalted butter, cut into 1/2 inch cubes
- 1/2 cup plus 2 tablespoons cold heavy cream
- 1 large egg, cold
- 2 teaspoons alcohol-free vanilla extract
- 1 tablespoon heavy cream, for brushing the tops
- 1 tablespoon coarse sugar, such as turbinado, for sprinkling
Pro Tip: Spoon flour into the measuring cup and level it with a knife. A cup scooped from the bag can weigh about an ounce more, and that extra flour makes a batch bake up dry.
Butter does the heavy lifting. Cold cubes melt in the hot oven and release steam, which lifts the dough into flaky layers. Soft butter blends into the flour and bakes up flat and greasy.
Heavy cream brings fat and liquid in one ingredient. King Arthur all-purpose flour gave me the same dough texture in every test.
Easy Substitutions
- Butter: Salted works if you cut the sea salt to 1/4 teaspoon.
- Cream: Cold buttermilk gives a tangier, denser crumb.
- Egg: Skip it and add 3 tablespoons more cold cream.
- Sugar: Light brown sugar swaps in one to one.
Equipment Needed
- Large mixing bowl: Choose a wide one so you can fold without squashing the butter.
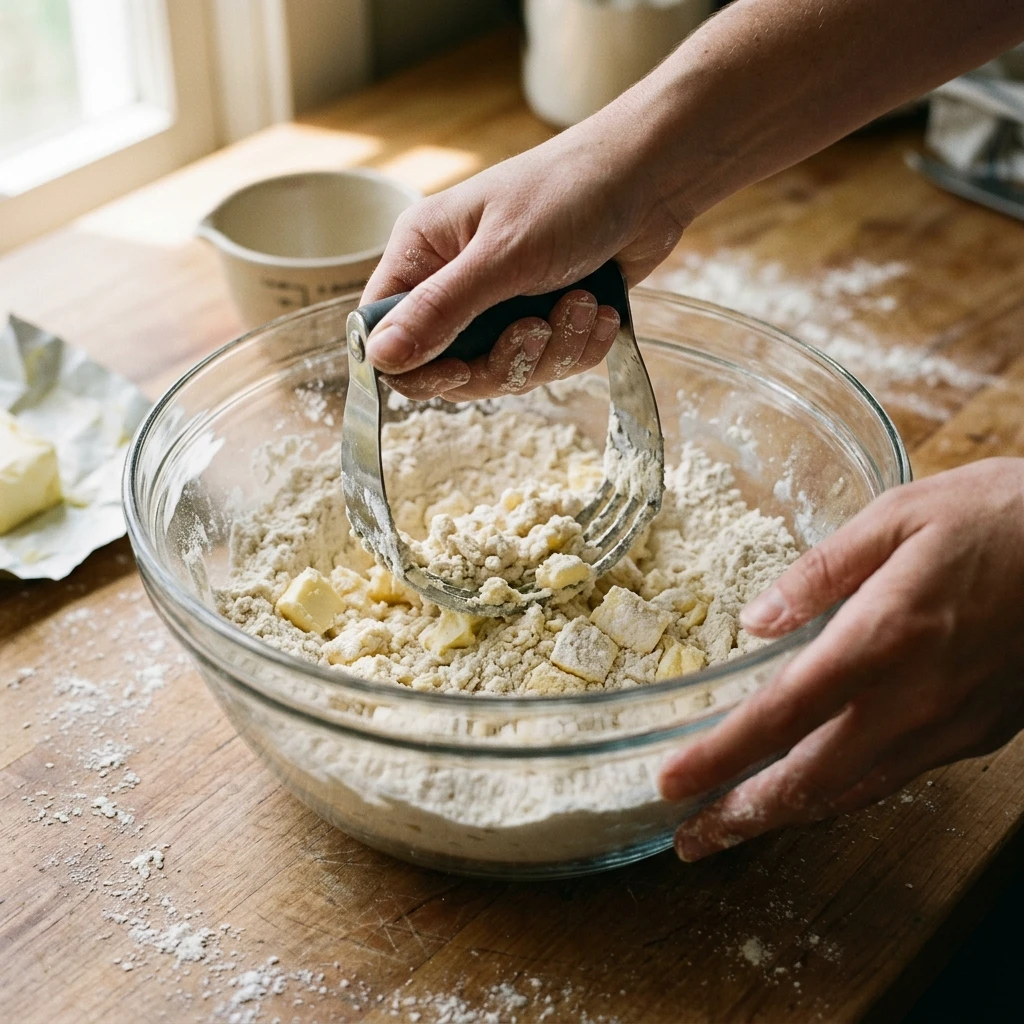
- Pastry cutter: Two forks work too, but a cutter keeps warm hands off the butter.
- Bench scraper: It lifts sticky dough and cuts clean wedges.
- 13×18-inch rimmed baking sheet: Check a dark pan at 16 minutes, since it can scorch the bottoms.
- Parchment paper: It stops sticking and speeds cleanup.
- Pastry brush: Brush only the tops, because cream on the cut sides glues the layers shut.
Preparation Before You Start
- Cube and chill: Freeze the cubed butter for 15 minutes while you measure everything else.
- Keep it cold: Leave the cream and egg in the fridge until you need them.
- Heat the oven: Place the rack in the center and heat the oven to 400°F when you start mixing.
- Line the pan: Cover the baking sheet with parchment paper.
- Set up your station: Measure everything and lightly flour a clean counter.
Step-by-Step Instructions
- Whisk the flour, sugar, baking powder, and salt in a large bowl for 30 seconds, until the mixture looks evenly pale with no white streaks.
- Add the frozen butter and cut it in with a pastry cutter for 2 to 3 minutes, until the biggest pieces look like peas. Chef’s Note: Visible butter chunks make the flaky layers, so never cut it down to sand.
- Whisk the egg, 1/2 cup plus 2 tablespoons cream, and vanilla for 15 seconds, until smooth with no streaks of egg white. Pour it over the flour mixture, where it should pool pale yellow.
- Fold with a spatula for 10 to 15 strokes, until no dry flour sits at the bottom of the bowl. Chef’s Note: The dough should look lumpy and a little sticky, not smooth.
- Tip the dough onto a lightly floured counter and fold it over itself 3 or 4 times, just until it holds together. Pat it into an 8 inch round about 1 inch thick, with flecks of butter showing.
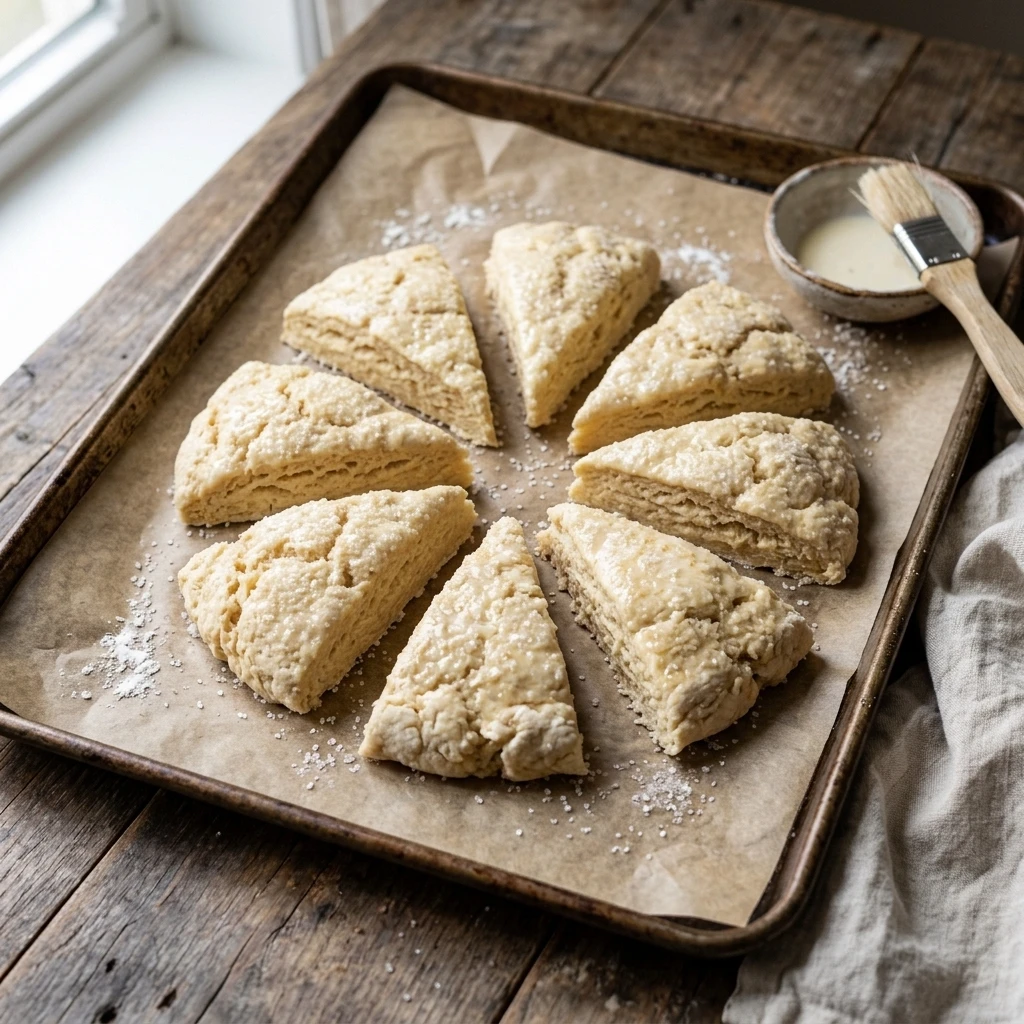
- Press a floured bench scraper straight down to cut 8 wedges, then set them 2 inches apart on the pan. Chef’s Note: Never saw or twist the blade, because sealed edges rise less. Each cut side should show ragged layers.
- Freeze the pan for 15 minutes, or refrigerate it for 30 minutes, until the wedges feel firm and cold. Brush the tops with the 1 tablespoon cream and sprinkle on the coarse sugar, which should sparkle on a damp-looking surface.
- Bake in the center of the oven at 400°F for 18 to 22 minutes, turning the pan front to back after 10 minutes. Chef’s Note: Lift one with a spatula to check the bottom, and look into the center crack for a dry, matte surface. The tops should be deep golden.
- Cool the scones on the pan for 5 minutes, then on a wire rack for 10 minutes more, until the sides feel firm and the layers pull apart in flaky sheets.
Expert Tips and Tricks
- Test your baking powder first: stir 1/2 teaspoon into 1/4 cup hot water, and a strong fizz means it works. Replace an opened can every 6 months.
- Run your hands under cold water and dry them before shaping. Warm palms soften butter, and soft butter means flatter scones.
- Here is my mistake: batch one used butter left on the counter for an hour, and the wedges melted into one pan-wide pancake.
- Whisk the dry ingredients the night before and leave the bowl covered. Morning work shrinks to about 10 minutes.
- Cube two sticks of butter at once and freeze the extra for the next batch.
- Rub 1 tablespoon of orange or lemon zest into the sugar with your fingertips before mixing, so the oils spread without adding liquid.
Common Mistakes and Troubleshooting
Flat, spread-out discs. Warm butter melts before the dough sets. Chill the wedges the full 15 minutes. If they spread anyway, press the edges back in with a spatula 8 minutes into baking.
Dry, crumbly texture. Too much flour or too much oven time drives out moisture. Pull the pan at the first deep golden color. Already dry? Split them and spread on jam and whipped cream.
Tough, dense centers. Overmixing builds gluten. It is the same stir-only-until-combined rule that keeps soft banana muffins with tall bakery style domes tender. Stop folding when no dry flour shows, and toast tough ones with butter.
Pale tops and doughy middles. The oven was not fully hot, or the baking powder was old. Check the temperature with an oven thermometer and test the powder. Return underbaked wedges to the oven for 3 to 4 minutes.
A short, lopsided rise. Twisting or sawing the blade seals the cut edges. Press straight down and lift. If one leans, pat it back into shape before it goes in the oven.
Storage Instructions
- Room Temperature: Up to 2 days in an airtight container, once the scones are completely cool.
- Refrigerator: Up to 3 days in an airtight glass container. Cold air dries them, so warm them before serving.
- Freezer: Up to 2 months. Wrap each cooled scone in plastic wrap, then stack them in a freezer-safe zip bag.
- Reheating: Thaw for 1 hour on the counter, then warm at 350°F for 6 to 8 minutes. Brush with 1 teaspoon cream first if they feel dry.
- Make-Ahead Notes: Cut the wedges, cover the pan tightly, and refrigerate for up to 12 hours. Bake them the next morning.
I freeze baked scones on a tray for an hour before bagging them, so they never fuse together. On busy school mornings I pull out two and have warm ones in about 10 minutes.
Storage Trick: Freeze the cut, unbaked wedges on the pan until solid, about 1 hour, then bag them for up to 1 month. Bake from frozen at 400°F, adding 4 to 6 minutes.
Variations to Try
- Spicy Jalapeño Chive: Cut the sugar to 2 tablespoons, then fold in 2 seeded, minced jalapeños and 1/4 cup chopped chives. Skip the coarse sugar.
- Mild and Kid-Friendly Chocolate Chip: Fold in 1/2 cup mini chocolate chips, cut 12 smaller wedges, and bake for 14 to 16 minutes.
- Vegetarian and Dairy-Free: The base recipe is already vegetarian. For dairy-free, use cold vegan butter sticks and chilled coconut cream.
- Gluten-Free: Use a 1 to 1 gluten-free baking flour with xanthan gum, and rest the dough for 10 minutes before shaping so the flour absorbs the liquid.
- Lemon Blueberry: Add 1 tablespoon lemon zest and 3/4 cup blueberries tossed in 1 tablespoon flour, folded in during the last 3 strokes.
What to Serve With Scones
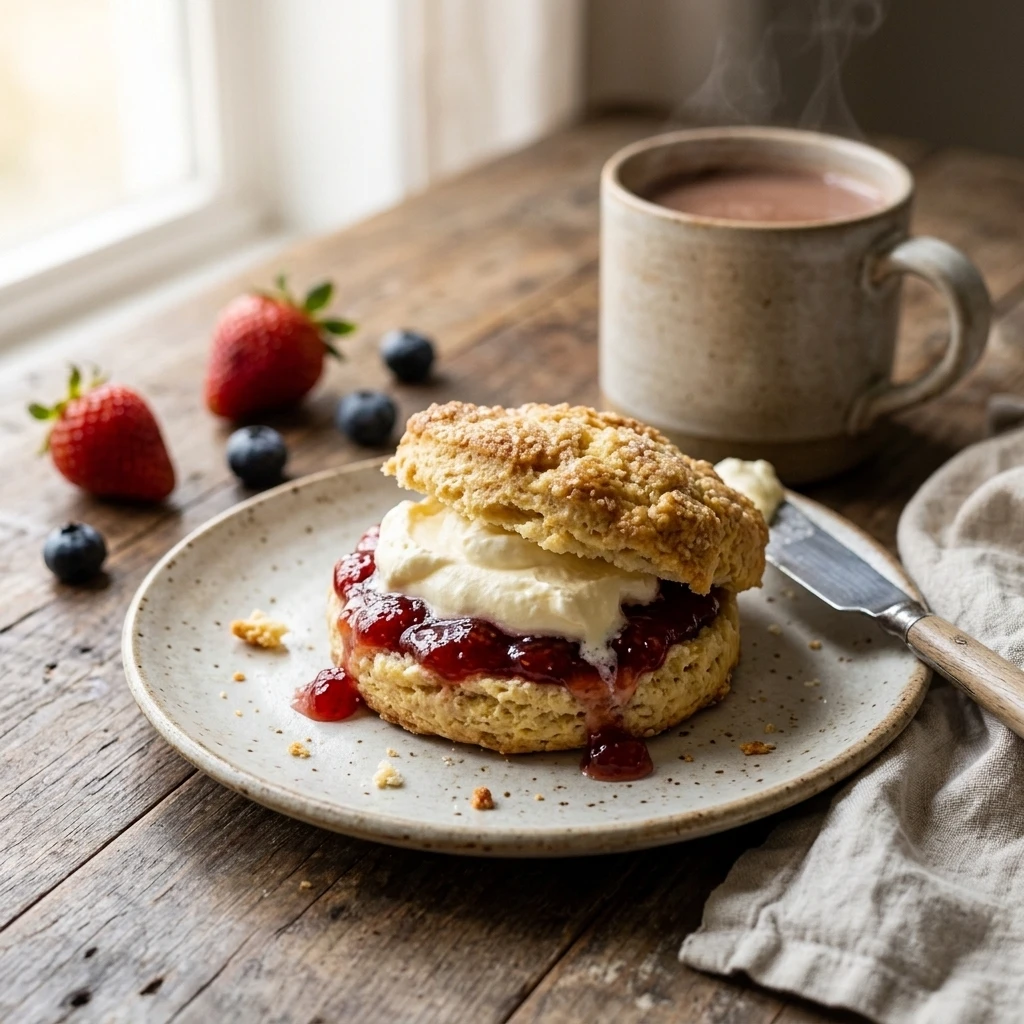
- Jam and whipped cream: Strawberry jam adds tartness, and softly whipped cream gives a cool contrast to the buttery crumb.
- Creamy chicken salad: Split a cooled scone and fill it with creamy chicken salad with grapes and pecans for a sweet and savory lunch.
- Fresh berries and orange slices: Their juice cuts through the butter.
- Hot chocolate: A mug of easy hot chocolate with real chocolate and cocoa turns a plain morning into a treat.
- Scrambled eggs and melon: Soft eggs and cold fruit turn scones into a full brunch plate.
Frequently Asked Questions
Why are my scones flat and hard?
Warm butter and overmixing cause most flat, hard scones. Butter that melts before the oven sets the dough spreads it out instead of up, and extra stirring builds gluten that toughens the crumb. Keep the butter frozen until you add it, fold only until no dry flour shows, and chill the wedges for 15 minutes. Old baking powder limits the rise too, so test yours in hot water first.
Can you leave scone dough in the fridge overnight?
Yes, for up to 12 hours. Cut the wedges, set them on the lined pan, and cover it tightly with plastic wrap. Skip the cream and sugar until morning so the tops stay dry. Brush, sprinkle, and bake straight from the fridge at 400°F, adding about 2 minutes. I do this on school mornings, and nobody can tell the difference from same-day scones.
Can I use milk instead of heavy cream for scones?
Yes, but expect a plainer, drier crumb. Heavy cream supplies fat and liquid together, so milk removes much of the richness. Use cold whole milk, never skim, and start with 1/2 cup, adding 1 tablespoon at a time until the dough just holds together. Half and half lands in the middle for a tender result. Brush the tops with the same liquid you used inside.
How do you know when scones are done baking?
Look for deep golden tops and browned bottoms, usually after 18 to 22 minutes at 400°F. Lift one with a spatula to check the underside, and peek into the center crack, which should look dry and matte instead of shiny. The sides should feel firm when pressed gently, and the bottoms should lift easily from the parchment. Pale tops with a damp center need 3 to 4 more minutes.
Should scone dough be wet or dry?
Slightly sticky and shaggy, never smooth. Dry dough that holds together without any stickiness bakes into dense, crumbly scones, while batter-like dough spreads. The right dough sticks a little to your fingers and still pats into a round. If dry flour remains in the bowl, press it in by hand instead of adding liquid. Stickiness is normal, so use a floured bench scraper instead of extra flour.
Final Thoughts on Making Scones at Home
The best scone I ever made came from the batch I was most tempted to rush. I skipped nothing that time: frozen butter, a rough dough, a full 15 minute chill. It split with a soft crack and showed layers I had only seen in bakery windows.
Keep a bag of frozen, unbaked wedges and you are about 30 minutes from fresh ones on any morning. My neighbor now texts me when she runs low, which I take as the highest review there is.
If you loved this recipe, save it to your brunch baking Pinterest board so you can find it easily later!
Easy Scones with Tall, Flaky Layers in 55 Minutes
Ingredients
Equipment
Method
- Freeze the cubed butter for 15 minutes. Place the oven rack in the center, heat the oven to 400°F, and line a 13×18-inch baking sheet with parchment paper.
- Whisk the flour, sugar, baking powder, and salt in a large bowl for 30 seconds, until the mixture looks evenly pale with no white streaks.
- Add the frozen butter and cut it in with a pastry cutter for 2 to 3 minutes, until the biggest pieces look like peas.
- Whisk the egg, 1/2 cup plus 2 tablespoons cream, and vanilla for 15 seconds, until smooth with no streaks of egg white. Pour it over the flour mixture.
- Fold with a spatula for 10 to 15 strokes, until no dry flour sits at the bottom of the bowl. The dough should look lumpy and a little sticky, not smooth.
- Tip the dough onto a lightly floured counter and fold it over itself 3 or 4 times, just until it holds together. Pat it into an 8 inch round about 1 inch thick, with flecks of butter showing.
- Press a floured bench scraper straight down to cut 8 wedges, then set them 2 inches apart on the pan. Do not saw or twist the blade. Each cut side should show ragged layers.
- Freeze the pan for 15 minutes, or refrigerate it for 30 minutes, until the wedges feel firm. Brush the tops with the 1 tablespoon cream and sprinkle on the coarse sugar, which should sparkle on a damp-looking surface.
- Bake in the center of the oven at 400°F for 18 to 22 minutes, turning the pan front to back after 10 minutes, until the tops are deep golden and the center crack looks dry and matte.
- Cool on the pan for 5 minutes, then on a wire rack for 10 minutes more, until the sides feel firm and the layers pull apart in flaky sheets.
Notes
To bake from frozen, freeze the cut wedges until solid, then bake at 400°F for 4 to 6 minutes longer.
Storage: Keep cooled scones airtight at room temperature up to 2 days or in the refrigerator up to 3 days, and freeze baked scones up to 2 months or unbaked wedges up to 1 month.