Easy Fluffy Pancakes Ready in 30 Minutes
Most flat pancakes are ruined before the batter ever touches the pan. The batter gets stirred until it is smooth, the skillet is not quite hot enough, and the stack that comes off the heat is pale, rubbery, and thin. These pancakes go the other direction: golden outside, soft and airy inside, and about 1/2 inch tall.
I tested this pancakes recipe nine times over two weeks, changing one thing per round: the amount of baking powder, the flour brand, the rest time, and the pan temperature. The final version uses pantry staples, takes 30 minutes from first whisk to last pancake, and makes about 10 four-inch rounds. That is enough for five people at 2 per person.
My younger brother ate four on the first Saturday I served the final batch and asked what I had changed. The answer was less stirring, a 5 minute rest, and a pan set to medium. Here is how to repeat it, with fixes for every problem I ran into along the way.
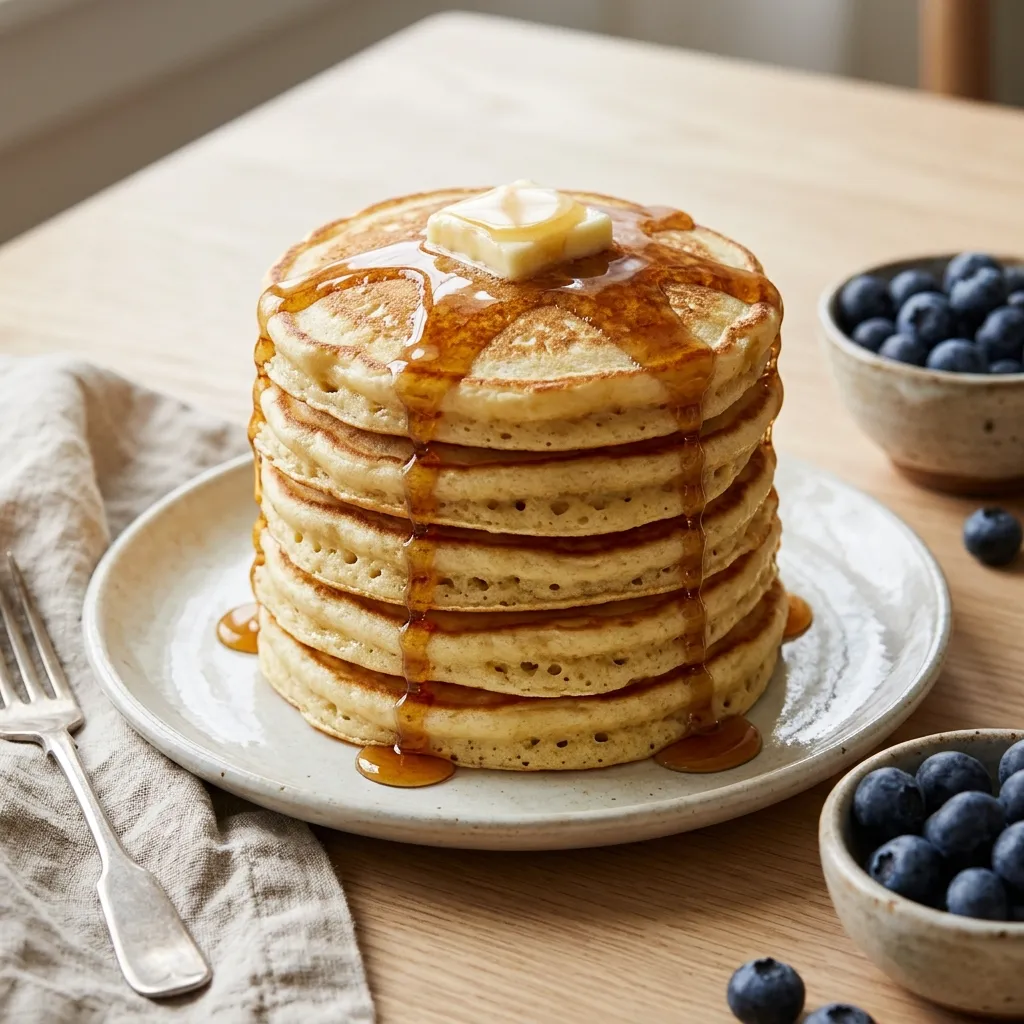
Table of Contents
Why You Will Love These Pancakes
- Ready in 30 minutes on a school morning, with only 8 minutes of hands-on prep.
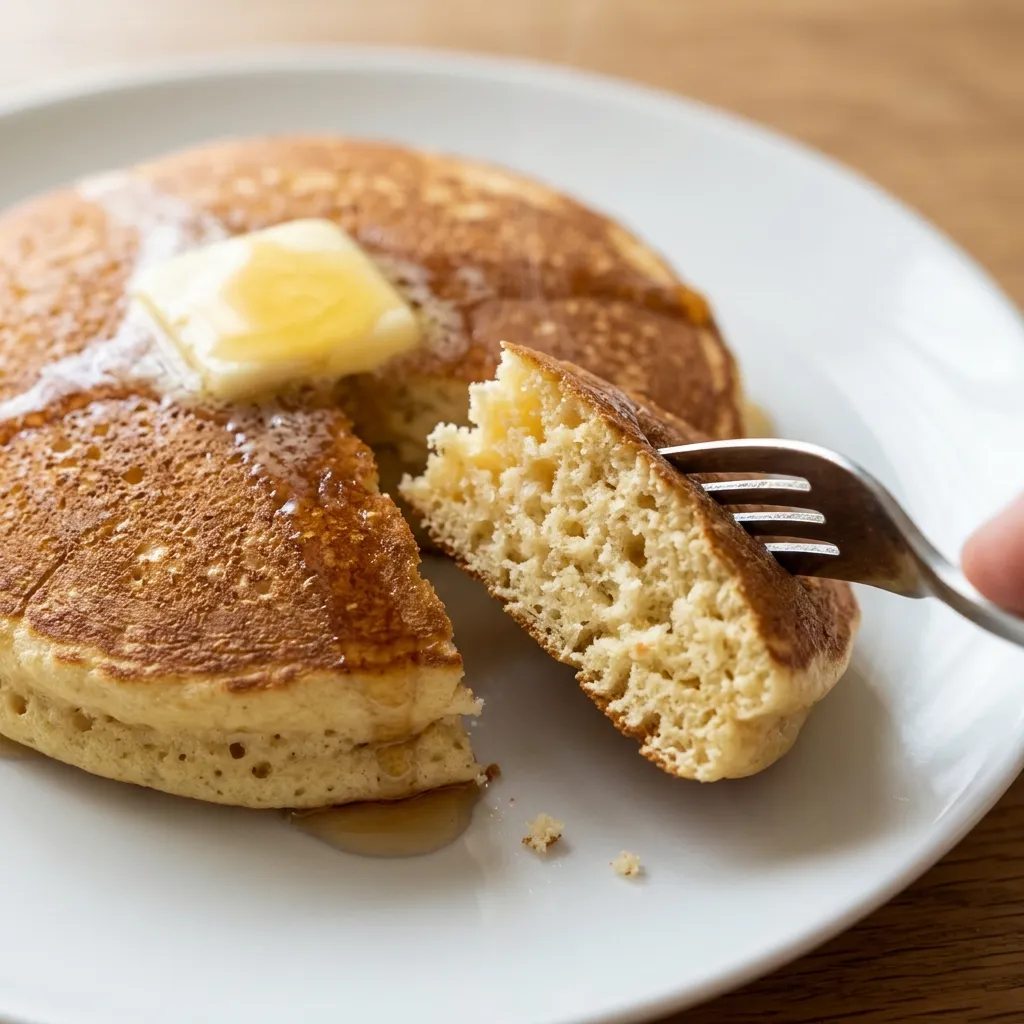
- Tall, soft centers with thin golden edges and no gummy middle.
- Made from flour, milk, an egg, and butter that most kitchens already have.
- Leftovers reheat in a toaster in about 3 minutes, so weekday breakfasts take care of themselves.
- Plain and gently sweet, so kids eat them with or without toppings.
Pancakes Recipe Snapshot
- Prep Time: 8 minutes
- Cook Time: 17 minutes
- Total Time: 30 minutes (includes a 5 minute rest)
- Servings: 5 (about 10 four-inch rounds)
- Difficulty: Easy
- Calories per Serving: About 290
- Key Ingredient or Tool: Fresh baking powder and a nonstick skillet
- Best For: Weekend breakfast, school mornings, and brunch
Nutrition Information
- Calories per Serving: About 290
- Protein: 7 g
- Carbs: 36 g
- Fat: 13 g
- Fiber: 1 g
- Sugar: 8 g
- Sodium: 519 mg
- Serving Size: About 2 pancakes
- Servings per Recipe: 5
Each serving gives you 7 grams of protein, mostly from the egg, milk, and flour. Fiber is low at 1 gram, so a handful of berries on top fills that gap. Most of the 519 milligrams of sodium comes from the baking powder and salt.
Nutrition values are approximate and calculated per serving using standard ingredient amounts. Values may vary based on brands used and portion sizes.
Ingredients
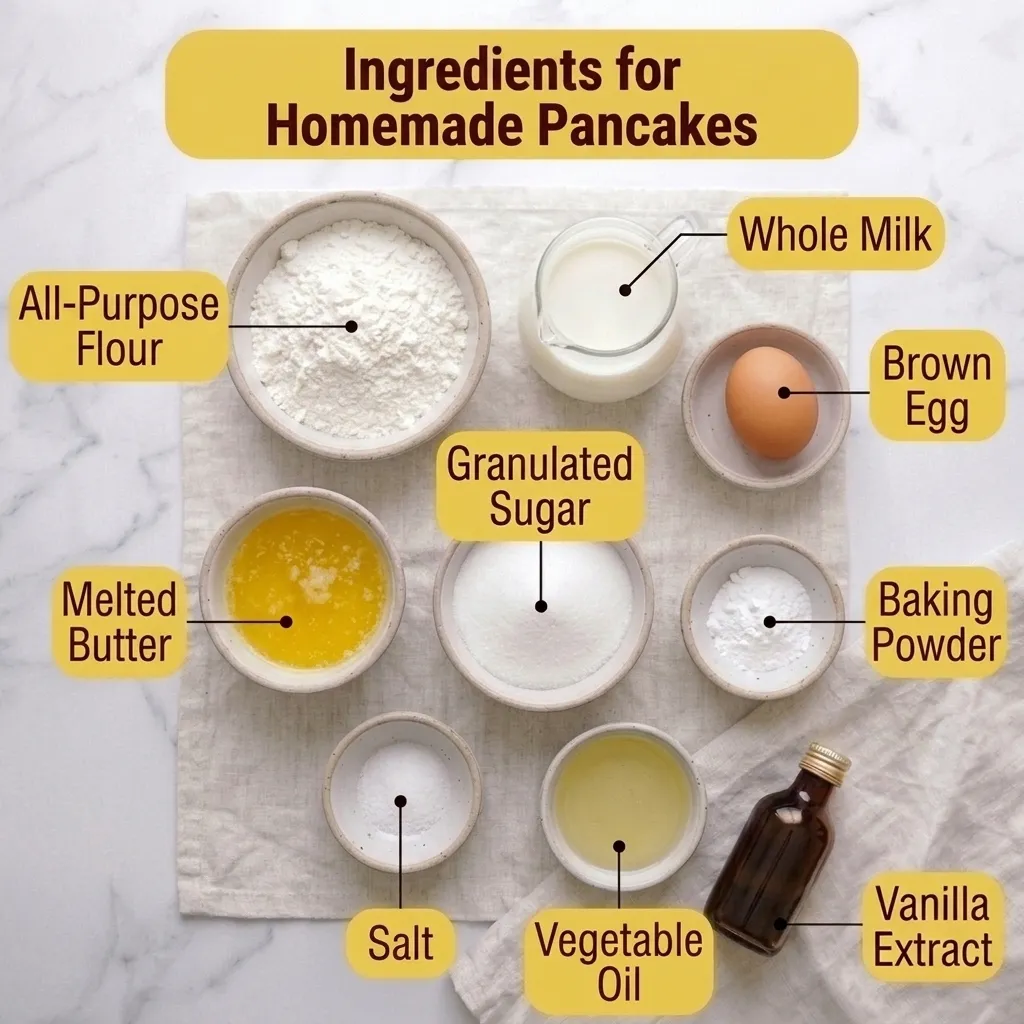
- 1 1/2 cups (180 g) King Arthur all-purpose flour, spooned into the cup and leveled
- 2 tablespoons granulated sugar
- 2 1/2 teaspoons baking powder
- 1/2 teaspoon fine salt
- 1 1/4 cups whole milk, at room temperature
- 1 large egg, at room temperature
- 3 tablespoons unsalted butter, melted and cooled for 2 minutes
- 1 teaspoon alcohol-free vanilla extract
- 1 tablespoon neutral oil, such as canola or avocado oil, for the pan
Swaps that work: oat milk or soy milk cup for cup, 3 tablespoons neutral oil for the butter, 1/4 cup unsweetened applesauce for the egg, light brown sugar for white sugar, and a 1 to 1 gluten-free baking flour for the all-purpose flour.
Three ingredients control the texture. All-purpose flour gives structure without chew, so do not swap in bread flour. Baking powder does all the lifting here because the milk has no acid, so replace the tin every 6 months. Room temperature milk keeps the melted butter smooth instead of seizing into specks.
Equipment Needed
- 12-inch nonstick skillet or electric griddle: Nonstick lets you cook with a thin film of oil, which gives even color.
- Two medium mixing bowls: One holds the dry mix and one holds the wet, so the baking powder never clumps.
- 1/4 cup measuring cup: Equal scoops cook in equal time.
- Thin, wide spatula: It slides under the edge without squashing the rise.
- Wire rack set on a baking sheet: It holds finished rounds in a 200°F oven without steaming the bottoms.
Preparation
- Set the milk and egg on the counter 20 minutes before you start.
- Heat the oven to 200°F and place a wire rack on a baking sheet inside.
- Melt the butter in the microwave in 20 second bursts, then let it cool for 2 minutes.
- Spoon the flour into the measuring cup and level it with a knife, or weigh out 180 g.
- Measure everything before you turn on the stove, because the batter starts working the moment it is wet.
Make-Ahead Shortcut: Whisk the flour, sugar, baking powder, and salt together in a lidded jar the night before. In the morning, you only need the wet ingredients and a hot skillet.
Step-by-Step Instructions
- Whisk the flour, sugar, baking powder, and salt in a large bowl for 20 seconds. The mixture should look like one even, pale powder.
- Whisk the egg, milk, and vanilla in a second bowl for 30 seconds, then stream in the melted butter. Chef’s Note: Cold milk turns melted butter into specks that never disappear. The liquid should look smooth and slightly frothy.
- Pour the wet mixture into the dry ingredients and fold with a spatula for 10 to 12 strokes. Chef’s Note: Lumps are fine, because smoothing them out toughens the batter. It should look thick and bumpy.
- Let the batter rest for 5 minutes while the skillet heats. Small bubbles will pop on the surface.
- Heat the 12-inch skillet over medium for 3 minutes, to about 350°F. Wipe it with a paper towel dipped in the oil. The oil should shimmer without smoking.
- Scoop 1/4 cup of batter per round, three at a time, leaving 2 inches between them. Chef’s Note: Never press or spread the batter, because that pushes out the air. Cook for 2 to 3 minutes, until bubbles stay open on top and the edges look dry.
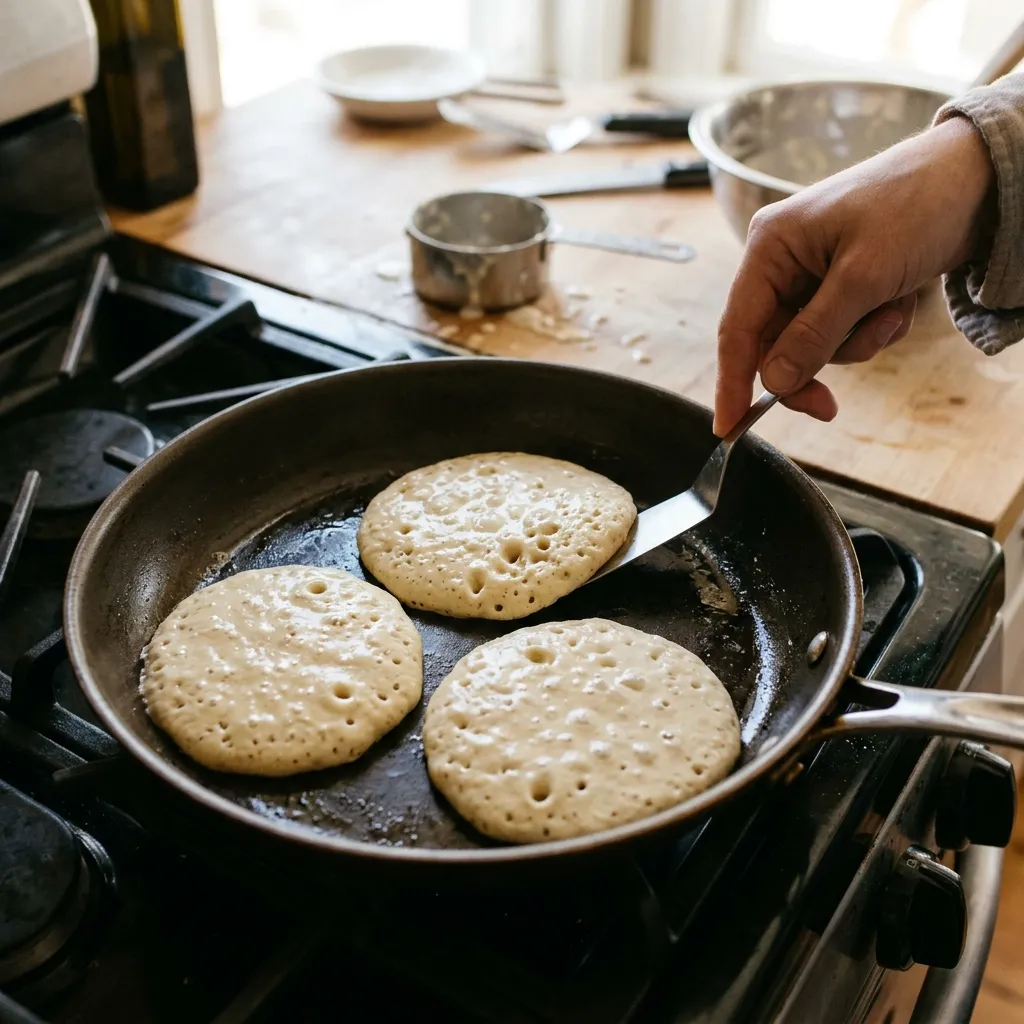
- Slide the spatula fully under each one and flip once. Chef’s Note: A second flip deflates the rise. Cook 1 to 2 minutes more, until the second side is golden brown and the center springs back when pressed.
- Move the finished rounds to the wire rack in the 200°F oven, where they stay warm for up to 20 minutes with dry tops.
- Repeat with the remaining batter, wiping the pan with a little oil between batches. You should end with about 10 rounds, each 4 inches wide, 1/2 inch tall, and evenly golden.
Pro Tip: Treat the first round as a test. If it browns in under 2 minutes, lower the heat a notch before the next batch. If it takes more than 3 minutes to form bubbles, raise it a notch.
Expert Tips and Tricks
- I once poured batter into a skillet that had only heated for a minute. The first three came out pale and spread thin, and only the fourth, after the pan caught up, was worth eating.
- Spoon the flour into the cup instead of scooping with it. Scooping packs in extra flour and gives dry, dense pancakes.
- Grease the pan with oil, not butter. Butter solids burn before the batter finishes cooking and leave dark specks.
- An electric griddle set to 350°F cooks four or five at once, so you finish in fewer rounds of flipping.
- Cook the whole batch on Sunday and cool it on a wire rack for 10 minutes before stacking, then reheat on school mornings.
- Write the freeze date on the bag with a marker. Frozen rounds taste best within 2 months.
Common Mistakes and Troubleshooting
Flat, dense pancakes. Overmixing builds gluten, and old baking powder barely lifts. Stop stirring when the flour disappears. To rescue a flat batter, fold in 1/2 teaspoon fresh baking powder stirred into 2 tablespoons milk.
Dark outside, raw inside. The pan is too hot, so the surface browns before the center sets. Keep the heat at medium. If it already happened, bake the thick ones on a baking sheet at 350°F for 4 to 5 minutes.
Pale and rubbery. The pan was too cold, so the batter steamed instead of browning. Give the skillet its full 3 minute preheat. Raise the heat one notch and wipe the pan again.
Sticking or tearing. The pan is dry, or you flipped before the bubbles stayed open. Wipe a thin film of oil between batches and wait for dry edges.
Thin, spreading batter. Too much milk or too little flour is the cause. Fix it by folding in 1 tablespoon of flour at a time until the batter drops from a spoon in a thick ribbon.
Storage Instructions
Room Temperature: Up to 2 hours, or 1 hour if your kitchen is above 90°F.
Refrigerator: Up to 4 days. Cool them for 10 minutes, then stack them with squares of parchment between layers in an airtight glass container.
Freezer: Up to 2 months for the best texture. Freeze in a single layer on a parchment-lined baking sheet for 1 hour, then move to a freezer-safe zip bag and press out the air.
Reheating: Toast for 2 to 3 minutes, or 3 to 4 minutes from frozen. Or warm them on a baking sheet at 350°F for 8 to 10 minutes. In the microwave, cover 2 with a damp paper towel for 20 to 30 seconds. Leftovers should reach 165°F.
Make-Ahead Notes: Cook the full batch up to 4 days ahead and keep syrup and fruit in separate containers.
I freeze mine in bags of four, enough for one school morning. Each bag gets a date in marker, because an unlabeled bag turns into a mystery by week three.
Variations and Substitutions
- Spicy Cinnamon: Whisk 1/2 teaspoon cinnamon and 1/8 teaspoon cayenne into the dry ingredients. Drizzle with honey to soften the heat.
- Kid-Friendly Chocolate Chip: Fold 1/3 cup mini chocolate chips into the batter. Keep the pan at medium so the chocolate does not scorch.
- Vegetarian and Vegan: The base recipe is vegetarian as written. For a vegan version, use oat milk, 3 tablespoons neutral oil, and 1/4 cup applesauce in place of the milk, butter, and egg.
- Gluten-Free: Use a 1 to 1 gluten-free baking flour and rest the batter for 10 minutes, since those flours absorb liquid more slowly.
- Crisp Edge Switch: For crisp edges instead of soft stacks, try these crispy homemade waffles. The batter is richer and built for a hot iron.
What to Serve With These Pancakes
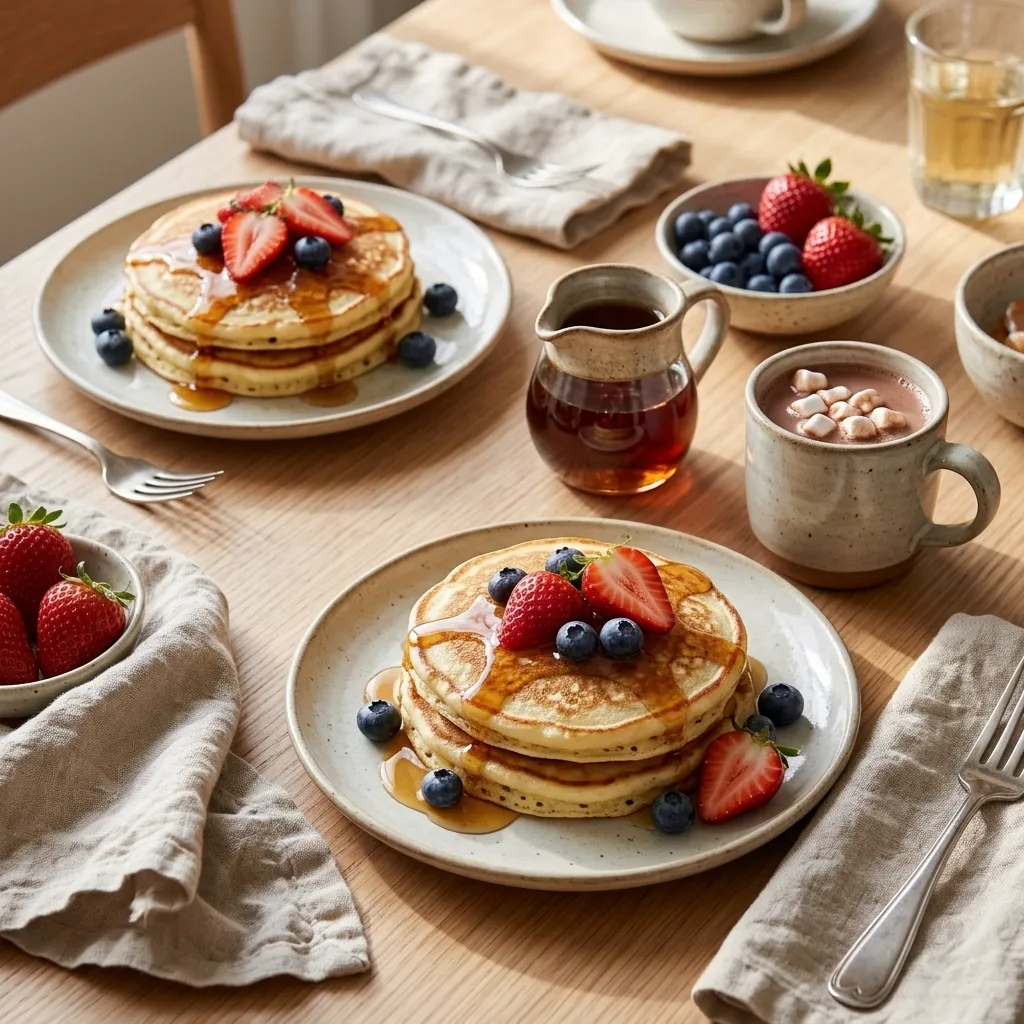
- Warm maple syrup and whipped butter: Heat the syrup for 20 seconds in the microwave so it does not cool the stack.
- Fresh berries: Sliced strawberries or blueberries add tartness that balances the syrup.
- Breakfast casserole: When you feed a crowd, bake a breakfast casserole so there is a savory option while you finish flipping.
- Hot chocolate: A mug of hot chocolate made with real chocolate turns a plain Saturday into brunch.
- Scrambled eggs: Soft eggs add protein, which keeps everyone full until lunch.
Frequently Asked Questions
Why are my pancakes always flat?
Flat pancakes usually come from old baking powder, too much mixing, or batter that is too thin. Test the baking powder by stirring 1/2 teaspoon into hot water. It should fizz hard. Then stir the batter only 10 to 12 strokes and leave the lumps. If the batter pours like heavy cream, whisk in 1 tablespoon of flour at a time until it thickens.
Can you make pancake batter the night before?
Not with this recipe. Baking powder starts making bubbles the moment it meets milk, and by morning most of that lift is gone, so the batter bakes up flat and dense. Cook the pancakes ahead instead and refrigerate them for up to 4 days. A toaster brings them back in about 3 minutes, and they taste close to freshly made.
Can I use buttermilk instead of milk in pancakes?
Yes, swap it cup for cup, then change the leavening. Use 1 1/2 teaspoons baking powder plus 1/2 teaspoon baking soda in place of the 2 1/2 teaspoons baking powder. The acid in buttermilk reacts with the baking soda for extra lift and a mild tang. The batter will be thicker, so give it the full 5 minute rest and thin it with a splash of milk if it will not spread.
How do you know when pancakes are ready to flip?
Watch the surface, not the clock. Bubbles should break across the top and stay open, and the edges should look dry and matte instead of shiny. That takes 2 to 3 minutes at medium heat. Lift one edge to check, because the underside should be golden brown. If the bubbles close right back up, the batter is still raw and needs another 30 seconds.
Why are my pancakes gummy in the middle?
Gummy centers mean the middle never cooked, usually because the pan was too hot and the outside set first. Drop the heat to medium and give the first side 2 to 3 minutes. After flipping, press the center. It should spring back. Too much egg or too much stirring also makes a dense, custard-like middle, so measure carefully and stop mixing early.
Final Thoughts on Pancakes
The gap between decent pancakes and the ones people ask for again is mostly patience: a short rest, a pan that has really heated, and a light hand on the whisk. Keep one tin of baking powder for baking only and write the date on the lid.
I made a stack on a Wednesday night just because breakfast for dinner sounded right, and the plate was empty in ten minutes. That is the best review a recipe gets.
If you loved this recipe, save it to your breakfast Pinterest board so you can find it easily later!
Easy Fluffy Pancakes Ready in 30 Minutes
Ingredients
Equipment
Method
- Set the milk and egg out 20 minutes ahead. Heat the oven to 200°F with a wire rack on a baking sheet inside. Melt the butter and cool it for 2 minutes.
- Whisk the flour, sugar, baking powder, and salt in a large bowl for 20 seconds, until it looks like one even, pale powder.
- Whisk the egg, milk, and vanilla in a second bowl for 30 seconds, then stream in the melted butter, until the liquid is smooth and slightly frothy.
- Pour the wet mixture into the dry and fold with a spatula for 10 to 12 strokes, until the batter is thick and bumpy. Leave the lumps.
- Rest the batter for 5 minutes, until small bubbles pop on the surface.
- Heat the 12-inch skillet over medium (about 350°F) for 3 minutes. Wipe it with a paper towel dipped in oil, until the oil shimmers without smoking.
- Scoop 1/4 cup batter per pancake, three at a time, with 2 inches between them. Do not press the batter. Cook 2 to 3 minutes, until bubbles stay open on top and the edges look dry.
- Flip once and cook 1 to 2 minutes more, until the second side is golden brown and the center springs back when pressed.
- Hold the finished pancakes on the wire rack in the 200°F oven for up to 20 minutes, until all the batter is cooked.
- Repeat with the remaining batter, wiping the pan with oil between batches, until you have about 10 pancakes that are 4 inches wide and evenly golden.
Notes
Do not mix the wet batter ahead. Baking powder starts working as soon as it meets the milk.
Storage: refrigerate up to 4 days in an airtight container, or freeze up to 2 months, with parchment between layers.